background image

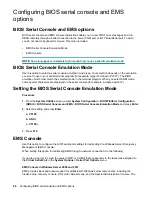
Saving or erasing user default options

Use 

User Default Options

 to save or erase a configuration as the custom default configuration.

Configure the system as necessary and then enable this option to save the configuration as the default
configuration. When the system loads the default settings, the custom default settings are used instead of
the manufacturing defaults.

Procedure

1.

From the 

System Utilities

 screen, select 

System Configuration

 > 

BIOS/Platform Configuration

(RBSU)

 > 

System Default Options

 > 

User Default Options

.

2.

Select an option.

Save User Defaults

Yes, Save

—Saves the current settings as the system default settings.

No, Cancel

—Does not save the current settings as the system default settings.

Erase User Defaults

Yes, erase the current settings

—Erases (deletes) the current user-defined default settings.

Once deleted, you can only restore these settings manually.

No, Cancel

—Does not erase the current user-defined default settings

3.

Save your setting.

110

Configuring the date and time and system defaults

Содержание ProLiant m510

Страница 1: ...s and use the Unified Extensible Firmware Interface UEFI that is embedded in the system ROM of all UEFI based ProLiant m510 m710x and m710x L server blades It details how to access and use options provided in BIOS Platform Configuration menus that were formerly known as the ROM Based Setup Utility RBSU This document is for the person who installs administers and troubleshoots servers and storage s...

Страница 2: ...ommercial Computer Software Computer Software Documentation and Technical Data for Commercial Items are licensed to the U S Government under vendor s standard commercial license Links to third party websites take you outside the Hewlett Packard Enterprise website Hewlett Packard Enterprise has no control over and is not responsible for information outside the Hewlett Packard Enterprise website Ack...

Страница 3: ...5 Configuration Utility options 18 Network Options 18 Configuring Network Options 19 Advanced Network Options 19 Configuring Advanced Network Options 20 User Management 20 Add User 20 Adding new user accounts 21 Edit Remove User 21 Editing or removing user accounts 22 Setting Options 22 Configuring access settings 23 Set to factory defaults 23 Resetting iLO to the factory default settings 23 Reset...

Страница 4: ...de 33 Rebooting the system 33 Exit and resume system boot 33 Exiting and resuming system boot 33 Reboot the System 33 Rebooting the system 33 Selecting a language and browser mode 33 Select Language 33 Selecting a system language 34 BIOS Platform Configuration options 35 Configuring System Options 36 System Options 36 Serial Port Options 36 Virtual Serial Port 36 Assigning a Virtual Serial Port 36...

Страница 5: ...ns 46 Advanced Memory Protection 47 Configuring Advanced Memory Protection 47 Configuring Boot Options 48 Boot Options 48 Boot Mode 48 Selecting the boot mode 48 UEFI Optimized Boot 49 Enabling or disabling UEFI Optimized Boot 49 Boot Order Policy 49 Setting the boot order policy 49 UEFI Boot Order 50 Changing the UEFI boot order 50 Advanced UEFI Boot Maintenance 50 Add Boot Option 50 Adding a boo...

Страница 6: ...dd Embedded UEFI Shell to Boot Order 61 Adding the Embedded UEFI Shell to the UEFI Boot Order list 62 UEFI Shell Script Auto Start 62 Enabling or disabling automatic execution of the Embedded UEFI Shell startup script 62 Shell Auto Start Script Location 63 Setting the Embedded UEFI Shell startup script location 63 Network Location for Shell Auto Start Script 64 Setting the network location for the...

Страница 7: ...mory Proximity Reporting for I O 77 Enabling or disabling Memory Proximity Reporting for I O 77 I O Non posted Prefetching 77 Enabling or disabling I O Non posted Prefetching 77 NUMA Group Size Optimization 77 Setting NUMA Group Size Optimization 78 Enabling maximum internal graphics frequency 78 Configuring Server Security 79 Server Security options 79 Set Power On Password 79 Setting the power o...

Страница 8: ...bling the Trusted Platform Module 88 Configuring PCIe devices 90 PCI Device Enable Disable 90 Configuring specific PCIe devices 90 Configuring Server Availability 91 Server Availability options 91 ASR Status 91 Enabling or disabling ASR 91 ASR Timeout 91 Setting the ASR timeout 91 Wake On LAN 92 Enabling or disabling Wake On LAN 92 POST F1 Prompt 92 Setting the POST F1 prompt delay 93 Power Button...

Страница 9: ... PCI Bus Padding Options 104 Enabling or disabling PCI Bus padding 105 Consistent Device Naming 105 Enabling or disabling Consistent Device Naming 105 Serial Number 105 Re entering a serial number 106 Product ID 106 Re entering a product ID 106 Configuring the date and time and system defaults 107 Setting the Date and Time 107 Resetting system defaults 107 System Default Options 107 Restore Defaul...

Страница 10: ... one or more devices 117 Cannot find a new network or storage device in the Boot Order list 118 Invalid Server Serial Number and Product ID 118 Invalid time or date 118 Support 120 Websites 121 Additional UEFI related websites 121 Related information 121 Support and other resources 123 Accessing Hewlett Packard Enterprise Support 123 Accessing updates 123 Customer self repair 124 Remote support 12...

Страница 11: ...Getting started This part introduces the UEFI System Utilities menu driven interface and its configuration options Getting started 11 ...

Страница 12: ...EFI Graphical User Interface GUI An Embedded UEFI Shell that provides a preboot environment for running scripts and tools Boot support for option cards that only support a UEFI option ROM What is UEFI Unified Extensible Firmware Interface UEFI defines the interface between the operating system and platform firmware during the boot or start up process Compared to BIOS UEFI supports advanced pre boo...

Страница 13: ... and then choosing the application type to launch 2 Restart or power on the server The server restarts and the POST screen appears 3 Press F9 The System Utilities screen appears Navigating the System Utilities Procedure 1 Launch the System Utilities and do one of the following To navigate through the screens and modify settings use your pointing device or press any of the navigational keys Key fun...

Страница 14: ... such as option cards or iLO F10 Prompts you to save changed settings F12 Prompts you to save changed settings and then exits the System Utilities Reboot Required radio button Is selected and turns red when changes require that you reboot the server Changes Pending radio button Is selected and turns red when changes are pending that must be saved to take effect When a reboot is required For certai...

Страница 15: ...the current health status of all devices in the system Exit and resume system boot Exits the system and continues the normal boot process Reboot the System Exits the system and reboots it by going through the UEFI Boot Order list and launching the first bootable option in the system For example you can launch the UEFI Shell if enabled and listed as the first bootable option in the list Select Lang...

Страница 16: ...are done making changes if you do not see the prompt Changes are pending Do you want to save changes and exit press F10 to display it b Press Y to save your changes A Change saved confirmation prompt appears c Select a reboot option and press Enter Exit and resume system boot Exits the system and continues the normal boot process The system continues through the boot order list and launches the fi...

Страница 17: ... main menu is your starting point for System Configuration One Time Boot Menu Embedded Applications System Information System Health Exit and resume system boot Reboot the System Select Language Setup Browser Selection System Utilities main menu options 17 ...

Страница 18: ...Advanced Network Options User Management Setting Options Set to factory defaults Reset iLO About Network Options MAC Address read only Specifies the MAC address of the selected iLO network interface Network Interface Adapter Specifies the iLO network interface adapter to use ON Uses the iLO Dedicated Network Port Shared Network Port Uses the Shared Network Port This option is only available on sup...

Страница 19: ...ort DHCP Enable Configures iLO to obtain its IP address and many other settings from a DHCP server DNS Name Sets the DNS name of the iLO subsystem This name can only be used if DHCP and DNS are configured to connect to the iLO subsystem name instead of the IP address IP Address Specifies the iLO IP address If DHCP is used the iLO IP address is supplied automatically If DHCP is not used enter a sta...

Страница 20: ... 2 Select any of the Advanced Network Options and then select a setting or enter a value for that option 3 Save your settings User Management Add User Edit Remove User Add User Use this option to add new local iLO user accounts with the following privileges and information iLO 5 user privileges Administer User Accounts Enables a user to add edit and delete local iLO user accounts A user with this ...

Страница 21: ...not have to be the same as the Login Name The maximum length for a user name is 39 characters The user name must use printable characters Assigning descriptive user names can help you to easily identify the owner of each login name Login Name Specifies the name that must be used when logging in to iLO It appears in the user list on the User Administration page on the iLO Overview page and in iLO l...

Страница 22: ... the iLO 5 Configuration Utility If this option is set to Disabled the iLO 5 Configuration Utility menu item is not available when you access the UEFI System Utilities Require Login for iLO 5 Configuration Determines whether a user credential prompt is displayed when a user accesses the iLO 5 functionality If this setting is Enabled provide user credentials for functions including updating with SU...

Страница 23: ...et iLO to the factory default settings When you do so you cannot access the iLO 5 Configuration Utility until after the next system reboot If you are managing iLO remotely the remote console session is automatically ended If the server has a factory installed license key the license key is retained Resetting iLO to the factory default settings Procedure 1 From the System Utilities screen select Sy...

Страница 24: ...guration Utility Reset iLO The iLO 5 Configuration Utility prompts you to select YES or NO 2 Select YES 3 When prompted to confirm the reset press Enter Active iLO connections are reset If you are managing iLO remotely the remote console session is automatically ended 4 Resume the boot process a Optional If you are managing iLO remotely wait for the iLO reset to finish and then start the iLO remot...

Страница 25: ...eens to view information about and configure installed system devices such as embedded NICs and FCoEs Devices listed and configuration options available vary by system Procedure 1 From the System Utilities screen select System Configuration 2 Select a device A System Configuration screen displays information about the embedded device 3 View select or enter settings 4 Save your settings NPAR config...

Страница 26: ...ration options related to the embedded device appear 2 Select Multi Function Mode and press Enter 3 Select NPAR1 5 and press Enter 4 Press F10 Up to eight virtual NICs for this device are now available 26 System Configuration ...

Страница 27: ...rity of this option and retain this priority for use with USB devices you might install in the future Setting this priority does not affect priorities set for individual USB devices in the UEFI Boot Order list Embedded Flexible LOMs Embedded UEFI Shell Embedded SATA Port Run a UEFI Application from a file system Enables you to select a UEFI application to run from a file system You can browse all ...

Страница 28: ...ain system information and to configure and update the system BIOS Prerequisites Embedded UEFI Shell is set to enabled Procedure 1 From the System Utilities screen select Embedded Applications Embedded UEFI Shell The Embedded UEFI Shell screen appears 2 Press any key to acknowledge that you are physically present This step ensures that certain features such as disabling Secure Boot or managing the...

Страница 29: ...ded Applications Active Health System Log and press Enter 2 Select Download Active Health System Log and press Enter 3 Complete the following and press Enter after each selection or data entry a Download Entire Log Unless you are advised by support personnel to download AHS records for the life of the server leave this disabled not selected The default setting is disabled b Range Start Date Enter ...

Страница 30: ...ation status current reading and cautions Power Supplies power supply summary and smart storage battery Processors Memory NIC Information Storage and Firmware Information System Tests Lists information and gives you options for checking hardware subsystems to ensure that they are working properly The Quick Test option performs a 10 minute check of the hardware The Extensive Test option performs a ...

Страница 31: ...at the CPU supports The Core Count the number of enabled cores and Thread Count number of logical cores in the CPU package The Rated Speed and External Clock Speed of the CPU The Voltage of the CPU package A list of Microcode Patches installed by the BIOS L1 L2 and L2 cache size and speed Memory Information Shows detailed memory information including Total System Memory Total Memory Slots Operatin...

Страница 32: ...e com info restfulinterface docs System Health Use this screen to check the health status of all devices in the system This screen shows for example the presence of any unsupported devices found during the boot process Viewing System Information Procedure 1 From the System Utilities screen select System Health and press Enter 2 Select View System Health and press Enter 3 Optional To download an AH...

Страница 33: ... For example you can launch the UEFI Embedded Shell if it is enabled and selected as first bootable option in the UEFI Boot Order list Procedure 1 From the System Utilities screen select Exit and resume system boot A confirmation message appears 2 Click OK or press Enter Reboot the System Use this option to exit the system and reboot the system without continuing with the normal boot process Reboo...

Страница 34: ...ecting a system language Procedure 1 From the System Utilities screen select Select Language 2 Select a language English Japanese Simplified Chinese 3 Save your setting 34 Rebooting the system selecting a language and setting the browser mode ...

Страница 35: ...r System Options Boot Options Network Options Storage Options Embedded UEFI Shell Power Management Performance Options Server Security PCI Device Enable Disable Server Availability BIOS Serial Console and EMS Server Asset Information Advanced Options Date and Time System Default Options BIOS Platform Configuration options 35 ...

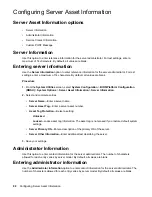
Страница 36: ... physical serial port to support the BIOS Serial Console and the operating system serial console Assigning a Virtual Serial Port Prerequisites For proper screen resolution set the console resolution in the terminal software to 100x31 Procedure 1 From the System Utilities screen select System Configuration BIOS Platform Configuration RBSU System Options Serial Port Options Virtual Serial Port and p...

Страница 37: ...on BIOS Platform Configuration RBSU System Options USB Options USB Control 2 Select a setting All USB Ports Enabled Enables all USB ports and embedded devices All USB Ports Disabled Disables all USB ports and embedded devices External USB Ports Disabled Disables external USB ports Internal USB Ports Disabled Disables internal USB ports 3 Save your setting USB Boot Support Set this option to disabl...

Страница 38: ...ll performance for applications that benefit from a higher processor core count NOTE Hyperthreading is not supported on all processors For more information see the documentation for your processor model Enabling or disabling Intel Hyperthreading Use the Intel R Hyperthreading Options option to disable or enable the logical processor cores on processors supporting Intel Hyperthreading technology In...

Страница 39: ...ocessor all cores are enabled 3 Save your setting Processor x2APIC Support Use this option to enable or disable x2APIC support When enabled processor x2APIC support helps operating systems run more efficiently on high core count configurations and optimizes interrupt distribution in virtualized environments Enabled mode does not enable x2APIC hardware but provides the support necessary to the oper...

Страница 40: ... only if you have the appropriate Intel driver on your OS This feature is disabled by default The first time you use this feature set SGX to Enabled Even if you plan to use Software Controlled set SGX to Enabled until you complete the necessary steps in the OS for the Intel drivers Set SGX to Software Controlled after you have configured your Intel drivers in the OS Procedure 1 From the System Uti...

Страница 41: ...nual User Defined Owner EPOCHs Change the EPOCH seed to a hexadecimal value that you enter 3 Press Enter The system advises you to write down the EPOCH values that the system will generate or that you will enter 4 Optional To not change the current EPOCH value select No Change in Owner EPOCHs and press Enter Continue with Step 7 5 Optional To have the system generate a random EPOCH value a Select ...

Страница 42: ...rolled is enabled you can change the region size here or with the driver software Prerequisites Intel Software Guard Extensions SGX is enabled Procedure 1 From the System Utilities screen select System Configuration BIOS Platform Configuration RBSU System Options Processor Options PRMRR Size and press Enter 2 Select a setting and press Enter a 32 MB b 64 MB c 128 MB d Software Controlled The size ...

Страница 43: ...ray RAID 4 Select Enable SATA AHCI Support and press Enter 5 Press F10 SATA Secure Erase Use this option to control whether SATA Secure Erase functionality is supported This function prevents the Secure Freeze Lock command from being sent to SATA hard drives Enabling SATA Secure Erase To enable SATA Secure Erase Prerequisites The SATA controller on the hard drive is in AHCI mode The hard drive sup...

Страница 44: ...rocessors NOTE You do not need to disable Virtualization Technology if you are using a VMM or an operating system that does not support AMD V virtualization Procedure 1 From the System Utilities screen select System Configuration BIOS Platform Configuration RBSU Virtualization Options Intel R Virtualization Technology Intel VT 2 Select a setting Enabled Disabled 3 Save your setting Intel R VT d Us...

Страница 45: ... m710x and m710x L server blades Use this option to prevent the OS from enabling Extended xAPIC x2APIC mode if your OS does not work with x2APIC This option is disabled by default Procedure 1 From the System Utilities screen select System Configuration BIOS Platform Configuration RBSU System Options Virtualization Options X2APIC Opt Out and press Enter 2 Select a setting and press Enter a Enabled ...

Страница 46: ...Fast Training option to configure memory training on server reboots When enabled the platform uses the previously saved memory training parameters determined from the last cold boot of the server which improves server boot time When installed on your server and this setting is enabled NVDIMM N Memory contents are left undisturbed during warm resets If Memory Fast Training is disabled each warm res...

Страница 47: ...essages that are displayed in the IML and the NVDIMMs are disabled until the configuration is set to Advanced ECC Support When Advanced Memory Protection is set to Advanced ECC Support the Advanced Memory Protection option is hidden greyed out in the menu Procedure 1 From the System Utilities screen select System Configuration BIOS Platform Configuration RBSU Memory Options Advanced Memory Protect...

Страница 48: ...st boot in UEFI Mode to use the following options Secure Boot UEFI Optimized Boot Generic USB Boot IPv6 PXE Boot iSCSI Boot Boot from URL NOTE The boot mode you use must match the operating system installation If not changing the boot mode can impact the ability of the server to boot to the installed operating system Selecting the boot mode Prerequisites When booting to UEFI Mode leave UEFI Optimi...

Страница 49: ...needed for video operations in Windows Boot Mode must be set to UEFI Mode when this option is enabled This option must be enabled to Enable and use Secure Boot Operate VMware ESXi Enabling or disabling UEFI Optimized Boot Procedure 1 From the System Utilities screen select System Configuration BIOS Platform Configuration RBSU Boot Options UEFI Optimized Boot and press Enter 2 Select an option and ...

Страница 50: ...tion at http www hpe com info restfulinterface docs Changing the UEFI boot order Procedure 1 From the System Utilities screen select System Configuration BIOS Platform Configuration RBSU Boot Options UEFI Boot Order and press Enter 2 Use the arrow keys to navigate within the boot order list 3 Press the key to move an entry higher in the boot list 4 Press the key to move an entry lower in the list ...

Страница 51: ...r The new boot option appears in the UEFI Boot Order list 6 Select Commit changes and exit to save your selection Delete Boot Option Use this option to delete one or more applications from the UEFI Boot Order list Deleting boot options from the UEFI Boot Order list NOTE If a deleted option points to a standard boot location such as a network PXE boot or a removable media device the system BIOS add...

Страница 52: ...IPv4 and the other for IPv6 Setting the UEFI PXE Boot Policy Procedure 1 From the System Utilities screen select System Configuration BIOS Platform Configuration RBSU Network Options Network Boot Options UEFI PXE Boot Policy and press Enter 2 Select a setting and press Enter a Auto Modifies the order of the existing network boot targets in the UEFI Boot Order list New network boot targets are adde...

Страница 53: ...dentifier 2 Select a setting Auto Sets the DUID using the Universal Unique Identifier UUID of the server or if the server is not available the Link Layer Address Plus Time DUID LLT method DUID LLT Sets the DUID using the Link Layer Address Plus Time DUID LLT method 3 Save your changes Network Boot Retry Support Use this option to enable or disable the network boot retry function By default the sys...

Страница 54: ... system and can include for example Embedded LOM 1 Port 1 Embedded FlexibleLOM 1 Port 1 NOTE You might need to configure the NIC firmware to activate the boot option Procedure 1 From the System Utilities screen select System Configuration BIOS Platform Configuration RBSU Network Options Network Boot Options 2 Select a NIC 3 Select a setting Network Boot Enables network boot Disabled Disables netwo...

Страница 55: ...ttings configured in the System Utilities automatically selects these interface If the interface used by ftp and webclient are configured by ifconfig that setting is erased Instead the System Utilities Pre Boot Network Settings menu is applied on the interface when the commands are run Pre Boot Network Interface Specifies the network interface used for preboot network connections Auto default The ...

Страница 56: ...a name for the iSCSI initiator using iSCSI Qualified Name IQN format EUI format is not supported This option replaces the default name set for the initiator Procedure 1 From the System Utilities screen select System Configuration BIOS Platform Configuration RBSU Network Options iSCSI Boot Configuration iSCSI Initiator Name 2 Enter a unique name for the iSCSI initiator using iSCSI Qualified Name IQ...

Страница 57: ...entries 5 Select Save Changes Delete iSCSI Boot Attempts Use this option to delete one or more iSCSI boot targets Deleting iSCSI boot attempts Procedure 1 From the System Utilities screen select System Configuration BIOS Platform Configuration RBSU Network Options iSCSI Boot Configuration Delete iSCSI Boot Attempts 2 Select one or more iSCSI boot attempt entries 3 Select Commit Changes and Exit iS...

Страница 58: ...om the System Utilities screen select System Configuration BIOS Platform Configuration RBSU Network Options VLAN Configuration 2 Complete the following a VLAN Control Select Enabled to enable VLAN tagging on all enabled network interfaces This setting is disabled by default b VLAN ID When VLAN Control is enabled enter a VLAN ID between 1 and 4094 c VLAN Priority When VLAN Control is enabled enter ...

Страница 59: ...ties screen select System Configuration BIOS Platform Configuration RBSU Storage Options Fibre Channel FCoE Scan Policy and press Enter 2 Select a setting and press Enter a Scan All Targets Each installed FC FCoE adapter scans all available targets b Scan Configured Targets Only Each installed FC FCoE adapter only scans targets that are preconfigured in the device settings This setting overrides a...

Страница 60: ...ss F10 PCIe Storage Boot Policy Use this option to select the UEFI BIOS boot targets for storage controllers in PCIe slots NOTE This setting overrides the Fibre Channel FCoE Scan Policy setting for Fibre Channel controllers in PCIe slots Setting the PCIe storage boot policy Use the PCIe Storage Boot Policy option to select the UEFI BIOS boot targets for storage controllers in PCIe slots NOTE This ...

Страница 61: ...bedded UEFI Shell option to enable or disable the pre boot command line environment for scripting and running UEFI applications including UEFI boot loaders The Embedded UEFI Shell also provides CLI based commands you can use to obtain system information and to configure and update the system BIOS When enabled and Add Embedded UEFI Shell to Boot Order is enabled the Embedded UEFI Shell is added to ...

Страница 62: ...o start is enabled and the Shell Auto Start Script Location option is set to Auto the Shell looks for the script file in any of the FAT16 or FAT32 file systems available It is recommended that you have only one startup nsh file on one file system Enabling or disabling automatic execution of the Embedded UEFI Shell startup script Use the UEFI Shell Script Auto Start option to enable or disable auto...

Страница 63: ... Shell startup script location Use the Shell Auto Start Script Location option to select the location of the Embedded UEFI Shell startup script When UEFI Shell Script Auto Start is enabled this setting specifies where the Shell looks for the startup nsh file Prerequisites Embedded UEFI Shell is enabled UEFI Shell Script Auto Start is enabled Procedure 1 From the System Utilities screen select Syst...

Страница 64: ...Embedded UEFI Shell is enabled Shell Auto Start Script Location is set to Network Location or Auto Discover Shell Auto Start Script using DHCP is disabled When specifying and HTTPS URL the TLS certificate of the HTTPS server is configured using Server Security TLS HTTPS Options Procedure 1 From the System Utilities screen select System Configuration BIOS Platform Configuration RBSU Embedded UEFI S...

Страница 65: ...ns in this table are adjustable on all servers However even if you do not have the option of adjusting some of these settings they default to the values shown here When you select Custom as your Power Profile setting all available settings for the Power Management options are available to customize your configuration Power Management option Power Profile settings Balanced Power and Performance Min...

Страница 66: ...d Performance Provides optimum settings to maximize power savings with minimal impact to performance for most operating systems and applications b Minimum Power Usage Enables power reduction mechanisms that can negatively affect performance This mode guarantees a lower maximum power usage by the system c Maximum Performance Disables all power management options that can negatively affect performan...

Страница 67: ...tem c Static High Performance Mode Processors run in the maximum power and performance state regardless of the OS power management policy This mode is useful in environments where performance is critical and power consumption is less important d OS Control Mode Processors run in their maximum power and performance state at all times unless the OS enables a power management policy 3 Press F10 Minim...

Страница 68: ... with Intel processors Setting the Minimum Processor Idle Power Package C State Prerequisites Power Profile is set to Custom Procedure 1 From the System Utilities screen select System Configuration BIOS Platform Configuration RBSU Power and Performance Options Minimum Processor Idle Power Package C State 2 Select a setting Package C6 retention State Package C6 non retention State No Package State ...

Страница 69: ...mption b Balanced Performance Provides optimum power efficiency and is recommended for most environments c Balanced Power Provides optimum power efficiency based on server utilization d Power Savings Mode Provides power savings for environments that are power sensitive and can accept reduced performance 3 Press F10 Maximum Memory Bus Frequency When Power Profile is set to Custom use this option to...

Страница 70: ...is set to Custom Procedure 1 From the System Utilities screen select System Configuration BIOS Platform Configuration RBSU Power Management Advanced Power Options Maximum PCI Express Speed and press Enter 2 Select a setting and press Enter a Maximum Supported Configures the platform to run at the maximum speed supported by the platform or the PCIe device whichever is lower b PCIe Generation 1 0 Co...

Страница 71: ... collaborative power control configures the operating system to request processor frequency changes even when the Power Regulator option is set to Dynamic Power Savings Mode on the server For operating systems that do not support the PCC Interface or when the Power Regulator mode is not configured for Dynamic Power Savings Mode this option has no impact on system operation Enabling or disabling co...

Страница 72: ...dd Supply Standby The system places the odd power supply in standby d High Efficiency Mode Even Supply Standby The system places the even power supply in standby 3 Press F10 Intel DMI Link Frequency Use this option to force the link speed between the processor and south bridge to run at slower speeds Doing so can reduce power consumption but can also impact system performance NOTE You can configur...

Страница 73: ... Gen 1 Speed Gen 2 Speed 3 Save your setting Configuring Power Management 73 ...

Страница 74: ...n the processor s rated speed if the processor has available power and is within temperature specifications Procedure 1 From the System Utilities screen select System Configuration BIOS Platform Configuration RBSU Power and Performance Options Intel R Turbo Boost Technology 2 Select a setting Enabled Enables the logical processor cores on processors supporting Hyperthreading technology Disabled Re...

Страница 75: ...ns Advanced Performance Tuning Options HW Prefetcher and press Enter 2 Select a setting and press Enter a Enabled b Disabled 3 Press F10 Adjacent Sector Prefetcher Use this option to disable or enable the adjacent sector prefetch function In most environments leave the option enabled for optimal performance With certain workloads disabling it might provide a performance benefit Do so only after pe...

Страница 76: ...tream Prefetcher and press Enter 2 Select a setting and press Enter a Enabled b Disabled 3 Press F10 DCU IP Prefetcher Use this option to enable or disable the DCU IP stream prefetch function In most environments leave the option enabled for optimal performance With certain workloads disabling it might provide a performance benefit Do so only after performing application benchmarking to verify imp...

Страница 77: ... 2 Select a setting and press Enter a Enabled b Disabled 3 Press F10 I O Non posted Prefetching Use this option to enable or disable the I O non posted prefetch function In most environments leave the option enabled for optimal performance With certain workloads disabling it might provide a performance benefit Do so only after performing application benchmarking to verify improved performance in a...

Страница 78: ...ect a setting Clustered Optimizes groups along NUMA boundaries providing better performance Flat Enables applications that are not optimized to take advantage of processors spanning multiple groups to utilize more logical processors 3 Save your setting Enabling maximum internal graphics frequency Configures the maximum allowed frequency of the internal graphics device Procedure 1 From the System U...

Страница 79: ...ssword option to set a password for accessing the server during the boot process When you are powering on the server a prompt appears where you enter the password to continue To disable or clear the password enter the password followed by a slash when prompted to enter the password NOTE In the event of an Automatic Server Recovery ASR reboot the power on password is bypassed and the server boots n...

Страница 80: ... the One Time Boot Menu during the current boot This option does not modify the normal boot order settings When this option is enabled you can boot directly into the One Time Boot Menu in the System Utilities by pressing F11 in the POST screen after a server reboot See One Time Boot Menu options Enabling or disabling the One Time Boot Menu F11 prompt Use this option to control whether you can pres...

Страница 81: ...ions Server Security No Execute Protection and press Enter 2 Select a setting and press Enter a Enabled b Disabled 3 Press F10 Processor AES NI Support Use this option to enable or disable the Advanced Encryption Standard Instruction Set in the processor Enabling or disabling processor AES NI support Use the Processor AES NI option to enable or disable the Advanced Encryption Standard Instruction ...

Страница 82: ...e website http www hpe com info ProLiantUEFI docs You can customize the certificates embedded in the UEFI BIOS by adding or removing your own certificates either from a management console directly attached to the server or by remotely connecting to the server using the iLO Remote Console You can configure Secure Boot using The System Utilities options described in the following sections The RESTfu...

Страница 83: ...boot blacklist signature database of signatures that are not authorized to run on the platform DBT Timestamp Signatures Database Maintains signatures of codes in the timestamp signatures database Delete all keys Export all keys Reset all keys to platform defaults NOTE Changing the default security certificates can cause the system to fail booting from some devices It can also cause the system to f...

Страница 84: ...n to delete a PK certificate NOTE Deleting the Platform Key forces Secure Boot to be disabled until you enroll a new PK Deleting a PK certificate Procedure 1 From the System Utilities screen select System Configuration BIOS Platform Configuration RBSU Server Security Secure Boot Settings Advanced Secure Boot Options Platform Key PK Options Delete Platform Key PK and press Enter 2 Select a key from...

Страница 85: ... F5A96B31 DBA0 4faa A42A 7A0C9832768E For Microsoft certificates enter 77fa9abd 0359 4d32 bd60 28f4e78f784b For SUSE certificates enter 2879c886 57ee 45cc b126 f92f24f906b9 5 Select Commit changes and exit Delete KEK Entry Use this option to delete a Key Exchange Key Deleting a KEK entry Procedure 1 From the System Utilities screen select System Configuration BIOS Platform Configuration RBSU Serve...

Страница 86: ...Enter Use the following GUID format 36 characters 11111111 2222 3333 4444 1234567890ab For Hewlett Packard Enterprise certificates enter F5A96B31 DBA0 4faa A42A 7A0C9832768E For Microsoft certificates enter 77fa9abd 0359 4d32 bd60 28f4e78f784b For SUSE certificates enter 2879c886 57ee 45cc b126 f92f24f906b9 5 Select Commit changes and exit Delete Signature Allowed DB Use this option to delete a si...

Страница 87: ...222 3333 4444 1234567890ab For Hewlett Packard Enterprise certificates enter F5A96B31 DBA0 4faa A42A 7A0C9832768E For Microsoft certificates enter 77fa9abd 0359 4d32 bd60 28f4e78f784b For SUSE certificates enter 2879c886 57ee 45cc b126 f92f24f906b9 5 Select Commit changes and exit Delete Signature Forbidden DB Use this option to delete a signature from the Forbidden Signatures Database Deleting a ...

Страница 88: ...rm Module options Use this menu to access Trusted Platform Module TPM options for servers configured with a TPM TPM enables the firmware and operating system to take measurements of all phases of the boot process For information on installing and enabling the TPM module option see the user documentation for your server model CAUTION A TPM locks all data access if you do not follow proper procedure...

Страница 89: ...asuring UEFI PCI operation ROMs Default is Enabled 3 Verify that your new Current TPM Type and Current TPM State settings appear at the top of the screen 4 Press F10 5 Save your changes and reboot the server blade TPM is enabled and you can now enable TPM functionality in the OS such as Microsoft Windows BitLocker or measured boot Configuring Server Security 89 ...

Страница 90: ...ration 2 Select a device from the list 3 Select settings Depending on the device options include Device Disable Auto The device is automatically enabled at server boot Disabled The device is not automatically enabled PCIe Link Speed Auto Sets the link speed to the maximum supported speed of the PCIe link PCIe Generation 1 0 Sets the link speed to a maximum speed of PCIe Generation 1 0 PCIe Generat...

Страница 91: ... loaded Procedure 1 From the System Utilities screen select System Configuration BIOS Platform Configuration RBSU Server Availability ASR Status and press Enter 2 Select a setting and press Enter a Enabled b Disabled 3 Press F10 ASR Timeout When ASR Status is enabled use this option to set the time to wait before rebooting the server if an operating system crash or server lockup occurs When the se...

Страница 92: ...able this option remove all power cords before adding or removing any adapters Some adapters can cause the system to power on when added or removed Enabling or disabling Wake On LAN Prerequisites A WOL capable NIC NIC driver and operating system Procedure 1 From the System Utilities screen select System Configuration BIOS Platform Configuration RBSU Server Availability Wake On LAN and press Enter ...

Страница 93: ...m cannot run with the missing or failed components it halts until those components are replaced Procedure 1 From the System Utilities screen select System Configuration BIOS Platform Configuration RBSU System Options Server Availability POST F1 Prompt 2 Select a setting Delayed 20 seconds If an error occurs the system pauses for 20 seconds at the F1 prompt and then continues to boot the OS Delayed...

Страница 94: ...omatically powers on when AC power is applied By default the system returns to its previous power state when AC power is restored after an AC power loss Procedure 1 From the System Utilities screen select System Configuration BIOS Platform Configuration RBSU System Options Server Availability Automatic Power On 2 Select a setting Always Power On The system automatically returns to a power on state...

Страница 95: ...wers up after a power loss which can prevent power usage spikes NOTE These events override the Power On Delay setting and immediately power on the server Pressing the power button using the iLO Virtual Power Button Wake ON LAN events RTC Real Time Clock wake up events Procedure 1 From the System Utilities screen select System Configuration BIOS Platform Configuration RBSU System Options Server Ava...

Страница 96: ... the serial console for example a degree symbol Setting the BIOS Serial Console Emulation Mode Procedure 1 From the System Utilities screen select System Configuration BIOS Platform Configuration RBSU BIOS Serial Console and EMS BIOS Serial Console Emulation Mode and press Enter 2 Select a setting and press Enter a VT100 b ANSI c VT100 3 Press F10 EMS Console Use this option to configure the ACPI ...

Страница 97: ...ystem ROM by default on ProLiant ML and DL servers If EMS is disabled in Windows Server 2008 or 2012 configure the EMS console on a COM port and reboot the server to update the boot ini file Configuring the EMS console Procedure 1 From the System Utilities screen select System Configuration BIOS Platform Configuration RBSU BIOS Serial Console and EMS EMS Console and press Enter 2 Select a setting ...

Страница 98: ...ormation 2 Select and complete entries Server Name Enter a server name Server Asset Tag Enter a server asset number Asset Tag Protection Select a setting Unlocked Locked Locks asset tag information The asset tag is not erased if you restore default system settings Server Primary OS Enter a description of the primary OS of the server Server Other Information Enter additional text describing the ser...

Страница 99: ...Service Contact Information option to enter service contact information for the server administrator The number of characters allowed for each entry varies by server model By default all values are blank Procedure 1 From the System Utilities screen select System Configuration BIOS Platform Configuration RBSU System Options Server Asset Information Service Contact Information 2 Select and complete ...

Страница 100: ...ties screen select System Configuration BIOS Platform Configuration RBSU System Options Server Asset Information Custom POST Message 2 Enter a message of up to 62 characters 3 Save your setting 100 Configuring Server Asset Information ...

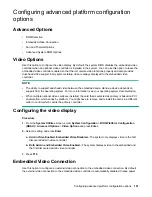
Страница 101: ...video cards are installed the card that is selected as primary is based on PCI enumeration which varies by platform You might have to remove and reinstall the cards in a different order to control which card is the primary controller Configuring the video display Procedure 1 From the System Utilities screen select System Configuration BIOS Platform Configuration RBSU Advanced Options Video Options...

Страница 102: ...f a monitor is attached with a monitor detection that does not function causing Auto mode to not work properly 3 Save your setting GPU Aperture size Use this option to configure the Intel GPU Graphics Processing Unit aperture size Configuring the GPU aperture size Procedure 1 From the System Utilities screen select System Configuration BIOS Platform Configuration RBSU Advanced Options GPU Aperture...

Страница 103: ...ws 7 Microsoft Windows 2012 R2 and older operating systems This fixes an issue where the keyboard and mouse do not work in the iLO Integrated Remote Console on these operating systems under EL1000 Instrumentation and EL4000 Instrumentation chassis This issue does not happen with Microsoft Windows 10 or Microsoft Windows 2016 Procedure 1 From the System Utilities screen select System Configuration ...

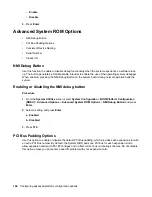
Страница 104: ...ton Procedure 1 From the System Utilities screen select System Configuration BIOS Platform Configuration RBSU Advanced Options Advanced System ROM Options NMI Debug Button and press Enter 2 Select a setting and press Enter a Enabled b Disabled 3 Press F10 PCI Bus Padding Options Use this option to enable or disable the default PCI Bus padding which provides each expansion slot with an extra PCI Bu...

Страница 105: ...orted operating systems use the Consistent Device Naming option to control how NIC ports are named based on their locations in the system NOTE Existing NIC connections retain their names until reinstalled under the OS environment Procedure 1 From the System Utilities screen select System Configuration BIOS Platform Configuration RBSU Advanced Options Consistent Device Naming 2 Select a setting CDN...

Страница 106: ...r and then press Enter 3 Save the setting Product ID Use this option to re enter the product ID after replacing the system board Re entering a product ID Use the Product ID option to re enter the product ID after replacing the system board This value must match the product ID sticker located on the back of the chassis Procedure 1 From the System Utilities screen select System Configuration BIOS Pl...

Страница 107: ...sabled Does not adjust the local time displayed for Daylight Savings Time Time Format Coordinated Universal Time UTC Calculates the time stored in the hardware Real Time Clock RTC from the associated Time Zone setting Local Time Removes the use of the Time Zone setting 3 Save your settings Resetting system defaults System Default Options Restore Default System Settings Restore Default Manufacturin...

Страница 108: ...estore Default System Settings 2 Select Yes restore the default settings 3 Reboot the server Restore Default Manufacturing Settings Use this option to reset all BIOS configuration settings to their default manufacturing values and delete all UEFI non volatile variables such as boot configuration and Secure Boot security keys if Secure Boot is enabled Previous changes that you have made might be lo...

Страница 109: ...efault Options When the default configuration settings are loaded the settings from the saved Default UEFI Device Priority list are used instead of the system or factory defaults Changing the default UEFI device priority Use the Default UEFI Device Priority option to change the UEFI device priority that is used when default system settings are restored The initial UEFI Boot Order list is created b...

Страница 110: ...ies screen select System Configuration BIOS Platform Configuration RBSU System Default Options User Default Options 2 Select an option Save User Defaults Yes Save Saves the current settings as the system default settings No Cancel Does not save the current settings as the system default settings Erase User Defaults Yes erase the current settings Erases deletes the current user defined default sett...

Страница 111: ...Scripted configuration flows Scripted configuration flows 111 ...

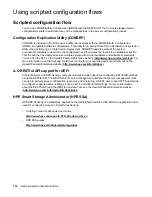
Страница 112: ...formation see the Scripting Toolkit User Guide for your operating system environment on the Hewlett Packard Enterprise website http www hpe com info stk docs iLO RESTful API support for UEFI ProLiant servers and HPE Synergy compute modules include support for configuring UEFI BIOS settings using the RESTful API The RESTful API Tooi is a management interface that server management tools can use to ...

Страница 113: ...Troubleshooting Troubleshooting 113 ...

Страница 114: ...must also configure the DHCP server to support x64 EFI DHCP boot requests For more information see the UEFI Information Library http www hpe com info ProLiantUEFI docs 2 Retry the boot procedure Solution 2 Cause You are attempting to boot to an option that is not supported or is not running the latest firmware Action 1 Refer to the Quick Specs or Read This First card for your server to make sure t...

Страница 115: ...the Restore Default Manufacturing Settings option to restore your settings 2 Retry the procedure Cannot download the file in the network boot URL Symptom You see an error message when you try to download the file in the URL you specified for a network boot Solution 1 Cause The network URL you specified during static configuration are incorrect Action 1 Use the Embedded UEFI Shell ping command to c...

Страница 116: ... privileges to download it 2 Try to download the file in the URL again Solution 5 Cause The HTTP or FTP server is down or did not respond Action 1 Ensure that the HTTP or FTP server you specified is available and that it is operational 2 Try to download the file in the URL again Cannot network boot with the downloaded image file Symptom Booting from the image specified in the URL fails Solution 1 ...

Страница 117: ...rides other boot options to load c UEFI Shell Script Auto Start is enabled d The correct startup nsh script file location in attached media or a network location is specified If it is in attached media the startup nsh script must be either inside the fsX or the fsX efi boot directory e The nsh script only contains supported commands f Your system has enough RAM memory to create RAM disks during au...

Страница 118: ... system Action 1 Reboot the system 2 Verify that your device appears in the Boot Order list Invalid Server Serial Number and Product ID Symptom You see an error message that the Server Serial Number and Product ID are invalid corrupted or lost Cause The serial number product ID or both are invalid corrupted or lost Action 1 Enter the correct values for these fields 2 Verify that the error message ...

Страница 119: ...Action 1 Use the Date and Time option to change the settings 2 Verify that the message does not appear again Troubleshooting 119 ...

Страница 120: ...Support 120 Support ...

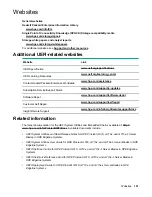
Страница 121: ...Customer Self Repair www hpe com support selfrepair Insight Remote Support www hpe com info insightremotesupport docs Related information The latest documentation for the UEFI System Utilities and Embedded Shell is available at http www hpe com info ProLiantUEFI docs Available documents include UEFI System Utilities and Shell Release Notes for HPE ProLiant m510 m710x and m710x L Server Blades in H...

Страница 122: ...eline Systems Important UEFI Requirements UEFI System Utilities and Shell Command Mobile Help for HPE m510 m710x and m710x L Server Blades in HPE Edgeline Systems is available by scanning the QR code at the bottom of the System Utilities screen or at http www hpe com qref ProLiantUEFI Help 122 Websites ...

Страница 123: ... components Accessing updates Some software products provide a mechanism for accessing software updates through the product interface Review your product documentation to identify the recommended software update method To download product updates Hewlett Packard Enterprise Support Center www hpe com support hpesc Hewlett Packard Enterprise Support Center Software downloads www hpe com support down...

Страница 124: ...on your product s service level Hewlett Packard Enterprise strongly recommends that you register your device for remote support If your product includes additional remote support details use search to locate that information Remote support and Proactive Care information HPE Get Connected www hpe com services getconnected HPE Proactive Care services www hpe com services proactivecare HPE Proactive ...

Страница 125: ...nfo reach For Hewlett Packard Enterprise product environmental and safety information and compliance data including RoHS and REACH see www hpe com info ecodata For Hewlett Packard Enterprise environmental information including company programs product recycling and energy efficiency see www hpe com info environment Documentation feedback Hewlett Packard Enterprise is committed to providing documen...

Отзывы: