Page
50
SmartFOAM
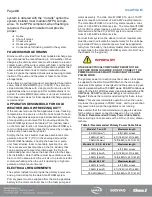
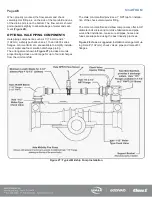
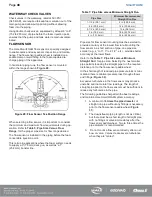
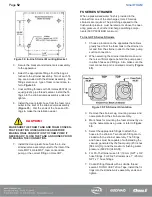
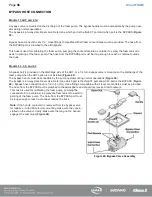
Align the indexing pin of the saddle clamp to the index-
ing hole of the spacer to align the saddle clamp mount.
Secure with four 1/2-in machine screws, no lock wash-
ers. Torque to 8.5 in.-lbs. (1.0 N-m).
Align the paddle wheel indexing pin to the indexing hole
in the spacer and secure using four 3/4” screws and lock
washers. Torque to 7.5 in.-lbs. (0.9 N-m).
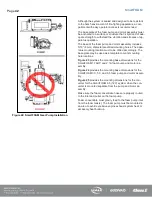
Apply a small amount of grease to the saddle clamp gas-
ket before the final installation of the assembly onto the
pipe. Firmly tighten the saddle clamp onto the pipe.
FOAM PUMP FLUSH SYSTEM
Dual Tank System
Flushing water must be provided to flush the system of
foam concentrate after each use. This prevents adverse
reactions of some foam concentrates should they mix to-
gether. The Hale ADT and MDT II each have provisions
for connecting flushing water to the foam concentrate in-
jection system. If 2 MDT II are required, each will need
its own flush line.
Single Tank System
The Hale MST provides a selector valve and gives the
system flush capabilities for NFPA compliance. A fitting
provided on the Hale MST simplifies the flushing water
connection.
No Tank Option
The system installer must provide a flushing water sup-
ply to comply with NFPA standards.
The flushing water hose must be a minimum of 1/2-in
(12 mm) inside diameter and capable of withstanding the
maximum fire pump discharge pressure, 500 PSI (34
BAR) minimum. The flush water supply should be pro-
vided from one of the pressure taps on the discharge of
the fire pump.
It is recommended that a check valve be installed at the
pressure tap to prevent contamination. Flush water
thread connections are:
❑
ADT - 1/2-in (13 mm) NPT
❑
MDT II and MST - 1/4” (6.4 mm) NPT
The system installer must provide proper fittings for
these connections.
FOAM CONCENTRATE PLUMBING
CAUTION!
MAKE SURE THE FOAM TANK AND FOAM CONCEN-
TRATE SUCTION HOSES ARE CLEAN BEFORE
MAKING A FINAL CONNECTION TO FOAM PUMP.
FLUSH TANK(S) AND HOSES PRIOR TO MAKING
CONNECTIONS. MAKE SURE THE FOAM CONCEN-
TRATE IS GRAVITY FED FROM THE TANK TO THE
PUMP.
Foam concentrate plumbing consists of:
❑
Foam concentrate suction hose
❑
Foam strainer
❑
Foam concentrate discharge hose
❑
Check valve/injector fitting
FOAM STRAINER CONNECTION
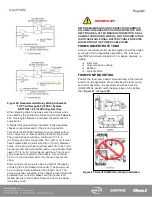
CAUTION!
THE FOAM CONCENTRATE STRAINER ASSEMBLY,
MOUNTED ON THE FOAM PUMP INLET, IS A LOW
PRESSURE DEVICE. IT WILL NOT WITHSTAND
FLUSHING WATER PRESSURE. IF FLUSHING WA-
TER IS TO BE PROVIDED THE PRESSURE MUST BE
LIMITED TO 50 PSI (3.5 BAR).
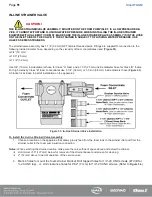
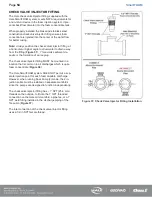
The strainer/valve assembly has 1/2-in (12 mm) NPT fe-
male threaded ports. A 1/2-in hose barb fitting is sup-
plied to connect the 1/2-in ID hose, provided with the
Hale SmartFOAM 2.1A installation kit.
The hose from the foam tank to the strainer must have
adequate wall stiffness to withstand the vacuum of the
foam pump while it is operating (23” [584 mm] Hg and
50 PSI [3 BAR], Kuriyama, Kuri-tec K-3130 or K-7130
series or equal).
After the foam pump is mounted on the apparatus, con-
nect the PVC hose provided to the strainer inlet.
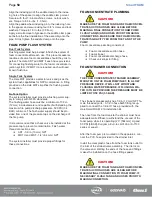
Install the clear plastic hose from the foam tank outlet to
the inlet of the strainer/valve assembly. The inlet is on
the valve end. Wetting the ends of the hose and fittings
makes the installation on the hose fittings easier.
CAUTION!
MAKE SURE THE FOAM TANK AND FOAM CONCEN-
TRATE SUCTION HOSES ARE CLEAN BEFORE
MAKING FINAL CONNECTION TO FOAM PUMP. IF
NECESSARY FLUSH TANK AND HOSES PRIOR TO
MAKING CONNECTION.
Содержание MiniCAFS 2.1A
Страница 3: ...Page 2 SmartFOAM NOTES...
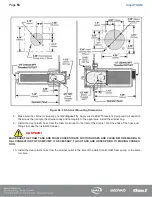
Страница 12: ...Page 11 SmartFOAM HALE FOAM PUMP DIMENSIONS Figure 1 1 7 and 2 1 Foam Pump Installation Envelope Dimensions...
Страница 15: ...Page 14 SmartFOAM Figure 5 Converter Installation Envelope Dimensions Located Remote for 6 5 12VDC Systems...
Страница 16: ...Page 15 SmartFOAM SYSTEM DIAGRAM Figure 6 Typical Hale SmartFOAM 2 1A and 1 7AHP System...
Страница 17: ...Page 16 SmartFOAM Figure 7 SmartFOAM 3 3 5 0 6 5 Single Tank System with In line Strainer...
Страница 18: ...Page 17 SmartFOAM Figure 8 SmartFOAM 3 3 5 0 6 5 Single Tank withMSTandIn lineStrainer...
Страница 19: ...Page 18 SmartFOAM Figure 9 SmartFOAM 3 3 5 0 6 5 Single Tank withMSTandFSSeriesStrainer...
Страница 20: ...Page 19 SmartFOAM Figure 10 SmartFOAM 3 3 5 0 6 5 Dual Tank withMDTIIandIn lineStrainers...
Страница 21: ...Page 20 SmartFOAM Figure 11 SmartFOAM 3 3 5 0 6 5 Dual Tank withMDTIIandFSSeriesStrainer...
Страница 22: ...Page 21 SmartFOAM Figure 12 SmartFOAM 3 3 5 0 6 5 Dual Tank withADTandIn lineStrainers...
Страница 23: ...Page 22 SmartFOAM Figure 13 SmartFOAM 3 3 5 0 6 5 Dual Tank withADTandFSSeries Strainers...
Страница 24: ...Page 23 SmartFOAM Figure 14 SmartFOAM Dual Pump 1 Single Tank with Valve Options and In Line Strainers...
Страница 25: ...Page 24 SmartFOAM Figure 15 SmartFOAM Dual Pump 1 Single Tank System with MST and FS Series Strainers...
Страница 26: ...Page 25 SmartFOAM Figure 16 SmartFOAM Dual Pump 1 Dual Tank System with MDT II and FS Series Strainers...
Страница 27: ...Page 26 SmartFOAM Figure 17 SmartFOAM Dual Pump 2 Single Tank System with valve options and In Line Strainers...
Страница 28: ...Page 27 SmartFOAM Figure 18 SmartFOAM Dual Pump 2 Single Tank System with MST and FS Series Strainers...
Страница 29: ...Page 28 SmartFOAM Figure 19 SmartFOAM Dual Pump 2 Dual Tank System with MDT II and FS Series Strainers...
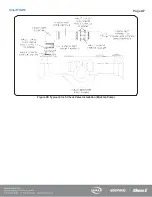
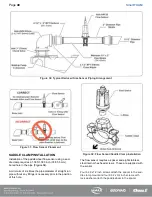
Страница 48: ...Page 47 SmartFOAM Figure 28 Typical 4 Inch Check Valve Installation Midship Pump...
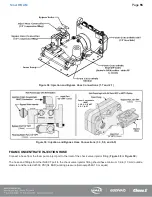
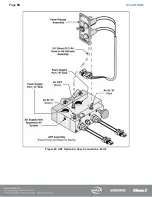
Страница 59: ...Page 58 SmartFOAM Figure 43 ADT Option Air Hose Connections Part 2...
Страница 68: ...Page 67 SmartFOAM Figure 55 Top Mount Low Level Sensor Assembly...
Страница 77: ...Page 76 SmartFOAM NOTES...
Страница 90: ...89 Page 89 SmartFOAM NOTES...

