


249
Chapter 24:
Five Steps to Successful Output
Overview: 5 steps to successful thermal printer output
Once the objects and shapes of a design are created, a successful thermal printer job can be
accomplished in a few simple steps.
1
Check and assign the vinyl color for the job.
2
Check and assign the fills and strokes for objects.
3
Check and assign or remove cut lines for objects.
4
Check and rearrange objects in the stacking order using layers and/or To Front/To
Back, Front 1/Back 1, and In Front Of/In Back Of.
5
Check and assign the combines of objects.
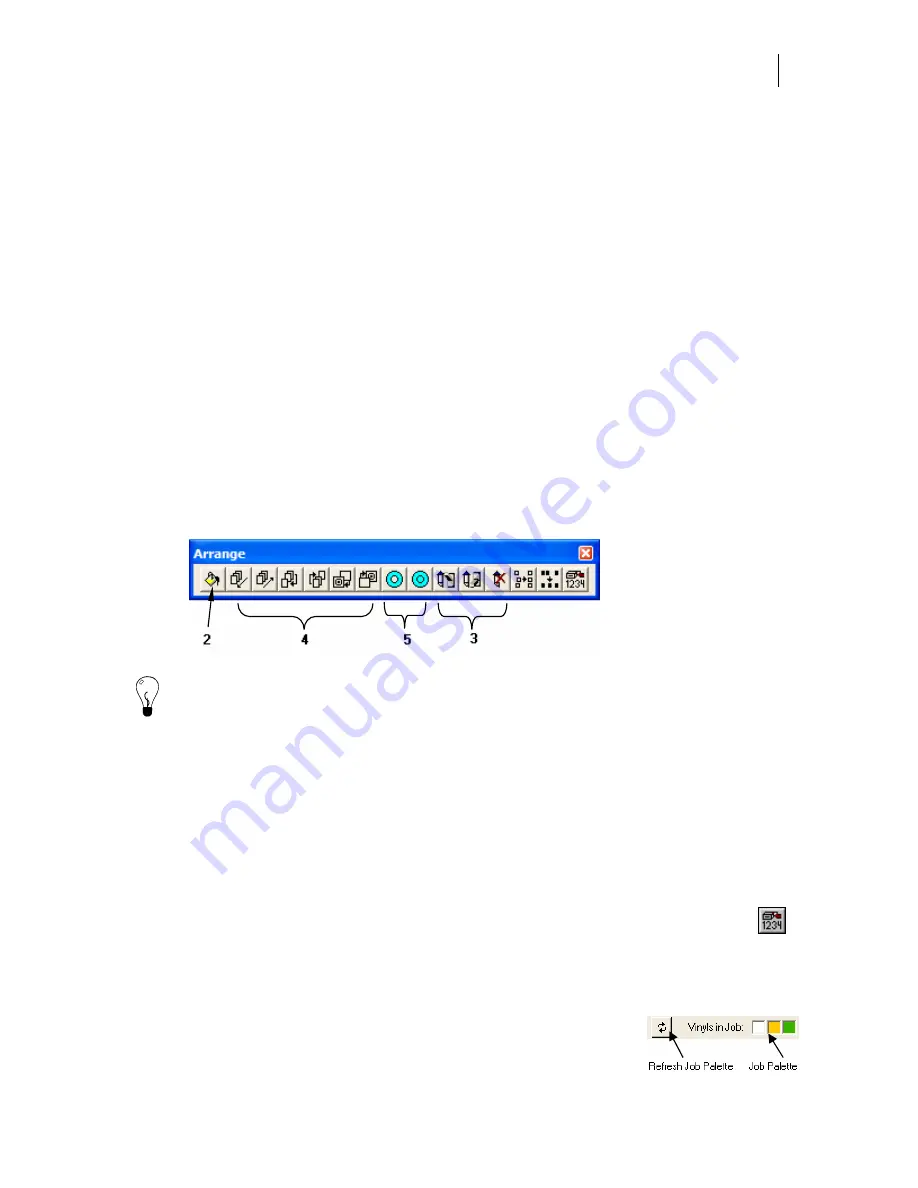
Tip: After you check and assign the vinyl color using the vinyl palette, the Arrange toolbar
contains the tools for steps two through five to successfully create a Gerber thermal printer
job. Click View > Toolbars and turn on Arrange to display the toolbar.
As you create your job, it can be viewed in several ways: Filled or Wireframe. Press F8 on your
keyboard to change the view or click View > Filled or Wireframe.
1. Check and assign the vinyl color
While thermal printer jobs can include multiple vinyl colors, in most cases you only intend to
print on one vinyl color. If a job mistakenly has more than one vinyl color it can lead to wasted
material and foils. The vinyl colors in a job can be checked in several ways:
♦
Click the
Print Order
button on the Arrange toolbar to open the Print/Output
Order dialog box. The vinyls in the job display on the left side. If the job has
layers you can choose which layer to display from the drop-down list.
♦
Click
Select > Vinyl Color
to display all the vinyl colors in a job in the Select By Vinyl
dialog box.
♦
Be sure
View > Vinyl Palette > Show Job Palette
is checked
to display the vinyl Job Palette at the bottom of the Composer
Содержание OMEGA CP
Страница 16: ......
Страница 20: ......
Страница 36: ......
Страница 42: ...28 Chapter 4 Saving Files...
Страница 44: ......
Страница 68: ......
Страница 92: ......
Страница 96: ...82 Chapter 7 Selecting Elements of the Design...
Страница 98: ......
Страница 132: ......
Страница 146: ......
Страница 154: ......
Страница 162: ......
Страница 182: ......
Страница 188: ......
Страница 204: ......
Страница 234: ......
Страница 238: ......
Страница 244: ......
Страница 254: ...240 Chapter 22 Strokes Adding Print Thickness to the Outline of Objects...
Страница 256: ......
Страница 282: ......
Страница 320: ......
Страница 346: ......
Страница 358: ......
Страница 380: ......
Страница 386: ......
Страница 418: ......
Страница 422: ......
Страница 452: ......
Страница 462: ......
Страница 476: ......
Страница 512: ...498 Chapter 44 Creating Special Effects...
Страница 514: ......
Страница 520: ......
Страница 530: ......
Страница 540: ......
Страница 552: ......
Страница 564: ......
Страница 606: ......
Страница 614: ...600 Chapter 51 Sending the Job to a Plotter or Printer...
Страница 694: ......
Страница 700: ......
Страница 734: ......
Страница 748: ......
Страница 760: ...746...
Страница 776: ......
Страница 786: ......
Страница 790: ......
Страница 800: ...786 Chapter 74 CP320 Colorimeter Operations...


