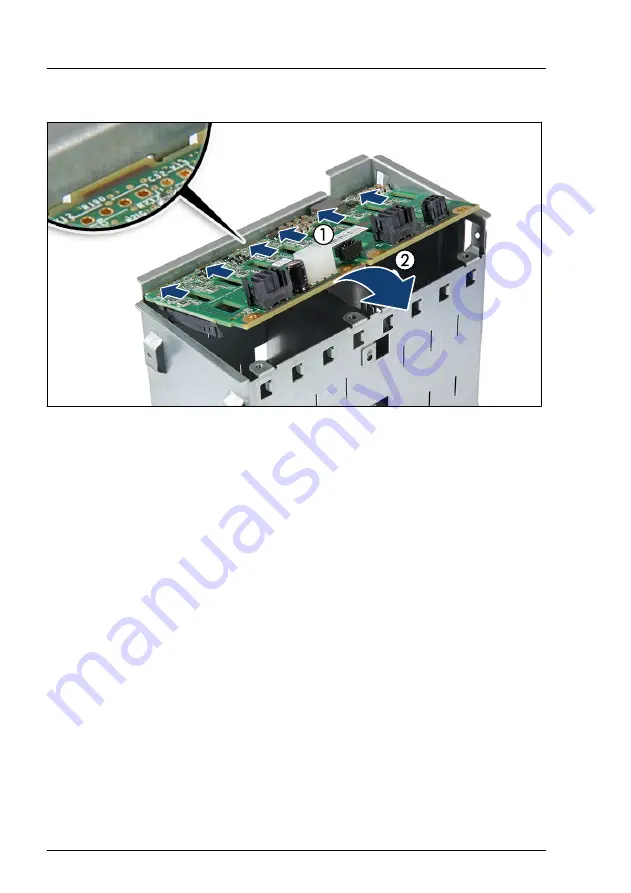
Installing the new HDD/SSD backplane
Figure 167: Installing the HDD/SSD backplane
▶
At a slight angle, fit the HDD/SSD backplane into the six recesses in the
HDD extension box (1).
▶
Fold down the HDD/SSD backplane (2).
▶
Fasten the HDD/SSD backplane with four screws (see
).
▶
Install the 8x 2.5-inch HDD/SSD extension box, see
HDD/SSD extension box" on page 266
.
Concluding steps
▶
Install the fan bridge, see
"Handling the fan bridge" on page 92
▶
"Installing the system air duct" on page 68
▶
.
▶
Install all HDD/SSD modules or dummy modules into their original slots in
the HDD/SSD extension box, see
"Installing 2.5-inch HDD/SSD modules"
and
"Installing a 2.5-inch dummy module" on page 222
.
▶
"Connecting the power cord" on page 82
.
Hard disk drive (HDD) / solid state disk (SSD)
276
Upgrade and Maintenance Manual
TX2550 M5
Содержание PRIMERGY TX2550 M5
Страница 20: ...Content Upgrade and Maintenance Manual TX2550 M5 ...
Страница 106: ...Basic hardware procedures 106 Upgrade and Maintenance Manual TX2550 M5 ...
Страница 322: ...Fans 322 Upgrade and Maintenance Manual TX2550 M5 ...
Страница 392: ...Expansion cards and backup units 392 Upgrade and Maintenance Manual TX2550 M5 ...
Страница 408: ...Main memory 408 Upgrade and Maintenance Manual TX2550 M5 ...
Страница 428: ...Processor CPU 428 Upgrade and Maintenance Manual TX2550 M5 ...
Страница 522: ...System board and components 522 Upgrade and Maintenance Manual TX2550 M5 ...
Страница 590: ...FUJITSU Server PRIMERGY TX2550 M5 System Cabling Overview System Cabling Overview English Cable plan for May 2019 ...
Страница 631: ...List of all used screws for PRIMERGY Servers Assembled in Germany and Japan February 2019 ...


