PosiDRIVE Security Gate
ZMA-330, Ver. 6
Installing the Gate Arm •
37
18.
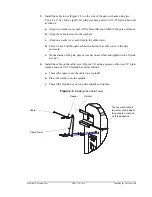
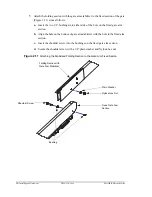
Insert and tighten the 1/4” flat washers and 1/4-20 hex bolts that hold the side shield
in place.
19.
Re-install the spring crank onto the mainshaft and slide the mainshaft into the
opposing mainshaft bearing.
20.
Align the end of the mainshaft so that it is flush with the mainshaft bearing.
Note:
A rubber hammer may be useful in moving the mainshaft through the
mainshaft bearing. Never use a steel hammer as it may damage the
mainshaft.
21.
Re-install the mainspring pivot bar onto the spring crank.
Note:
Make sure that the mainspring pivot bar is level and square with the
mainshaft crank and spring crank to avoid damaging the bearings.
22.
Re-install the mainsprings. See “Adding, Removing, or Replacing the Mainsprings”
on page 52.
23.
Re-install the gate arm. See “Installing the Gate Arm” on page 25.
a.
Position and hold the gate arm in the fully vertical “up” position.
b.
Tighten the mainshaft crank clamping bolts.
c.
Tighten the spring crank clamping bolts.
24.
Balance the gate arm. See “Setting the Mainsprings” on page 38.
25.
Turn on the power to the gate and re-connect the backup battery assembly, if
applicable.
26.
Replace the enclosure cap.
27.
Replace the enclosure door.
28.
Verify that the positioning of the arm is correct.
To avoid injury, stay clear of the gate arm path. When the gate powers
up, the gate arm raises and lowers as part of the homing process.
Содержание PosiDRIVE
Страница 1: ...PosiDRIVE Security Gate Installation Operation and Maintenance Manual ...
Страница 2: ......
Страница 26: ...18 Removing the Enclosure Cap ZMA 330 Ver 6 PosiDRIVE Security Gate ...
Страница 64: ...56 Aligning the Drive Mechanism ZMA 330 Ver 6 PosiDRIVE Security Gate ...
Страница 68: ...60 Accessing the Distributor Resource Center ZMA 330 Ver 6 PosiDRIVE Security Gate ...
Страница 90: ...82 Requesting a Repair ZMA 330 Ver 6 PosiDRIVE Security Gate ...
Страница 94: ...86 Index ZMA 330 Ver 6 PosiDRIVE Security Gate ...
Страница 95: ......


