


DLQ-3000+
Rev. A
1-42
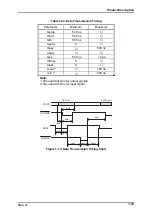
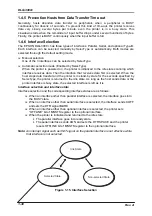
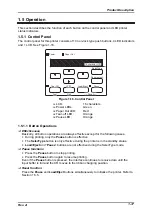
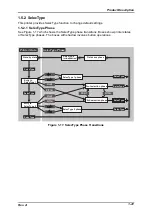
1.5.2.2 SelecType Operation
SelecType 1 and 2 operations
Step 1. Selecting the feature
When the SelecType 1 or 2 starts, the first feature appears on the LCD. Scroll the
features by pressing the “
↑
” (next) or “
↓
” (previous) button until the desired feature
appears. Then press the “
→
” (enter) button, and the option menu for the selected
feature is displayed.
Step 2. Keeping/Changing the option
The current option marked with “*” for the menu appears. To keep the option as it is,
press the “
←
” button (escape) to return to the feature menu. To change the option,
press the “
↑
” (next) or “
↓
” (previous) button to scroll the option menu. Then press the
“
→
” (enter) button to fix the desired option. If the “Other” is selected, another option
menu appears. In this case, select the desirable option in the above mentioned way.
Step 3. Return to the previous menu
Press the “
←
” button (escape) to return to the previous menu. Pressing the button
several times to return to the SelecType 1 or 2 entry state.
Step 4. Exit
Press the “SelecType” button to exit the SelecType phase. With this operation, new
settings are automatically stored in the EEPROM and are effective until they are
changed again. This process is automatically followed by the SelecType initialization
phase and the printer returns to the stand-by status.
[Initializing all settings to the standard]
Select “Standard Setting” in the SelecType 2 menu. The message “Ready?” is
displayed. Then perform one of the followings:
To execute the initialization:
Press the “
→
” (enter) button. (All settings are reset to the standard and the printer
returns to the feature menu.
To return to the feature menu without executing the initialization
Press the “
←
” button (escape).
Press the “SelecType” button to exit the SelecType mode.
Font and Pitch Select Operation
Step 1. Displaying the current selection for the font/pitch
When the printer enters the Font/Pitch phase, the current option marked with “*”
appears.
Step 2. Changing the font/pitch
Press the “
↑
” (next) or “
↓
” (previous) button until the desired font/pitch appears.
Then press the “
→
” (enter) button to fix the selection. The selected font/pitch is
marked with “*” as the result.
Step 3. Exit
Press the “SelecType” button to exit the Font/Pitch phase.
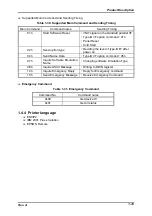
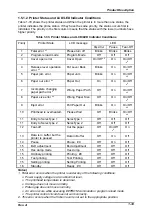
Содержание DLQ-3000 Minerva+
Страница 1: ...EPSON 24 PIN DOT MATRIX PRINTER EPSON DLQ 3000 SERVICE MANUAL SEIKO EPSON CORPORATION 4008259 ...
Страница 5: ...v REVISION SHEET Revision Issued Data Contents Rev A August 21 1997 First Release ...
Страница 61: ...2 3 12 Other Sensor Circuits 2 31 ...
Страница 160: ...Chapter 6 Maintenance 6 1 Maintenance 6 1 6 1 1 Lubrication and Adhesion 6 1 ...
Страница 171: ...DLQ 3000 Rev A A 6 ...
Страница 172: ...Appendix Rev A A 7 A 2 Circuit Diagrams Figure A 2 C210 MAIN Board Circuit Diagram 1 2 ...
Страница 173: ...DLQ 3000 Rev A A 8 ...
Страница 174: ...Appendix Rev A A 9 Figure A 3 C210 MAIN Board Circuit Diagram 2 2 ...
Страница 175: ...DLQ 3000 Rev A A 10 ...
Страница 177: ...DLQ 3000 Rev A A 12 Figure A 5 C124 PSB Board Circuit Diagram ...
Страница 179: ...DLQ 3000 Rev A A 14 A 3 Circuit Board Component Layout Figure A 7 C210 MAIN Board Component Layout 1 2 ...
Страница 180: ...Appendix Rev A A 15 Figure A 8 C210 MAIN Board Component Layout 2 2 ...
Страница 181: ...DLQ 3000 Rev A A 16 Figure A 9 C124 PSB Board Component Layout ...
Страница 182: ...Appendix Rev A A 17 Figure A 10 C124 PSE Board Component Layout ...
Страница 189: ...EPSON SEIKO EPSON CORPORATION ...