93
Step 3:
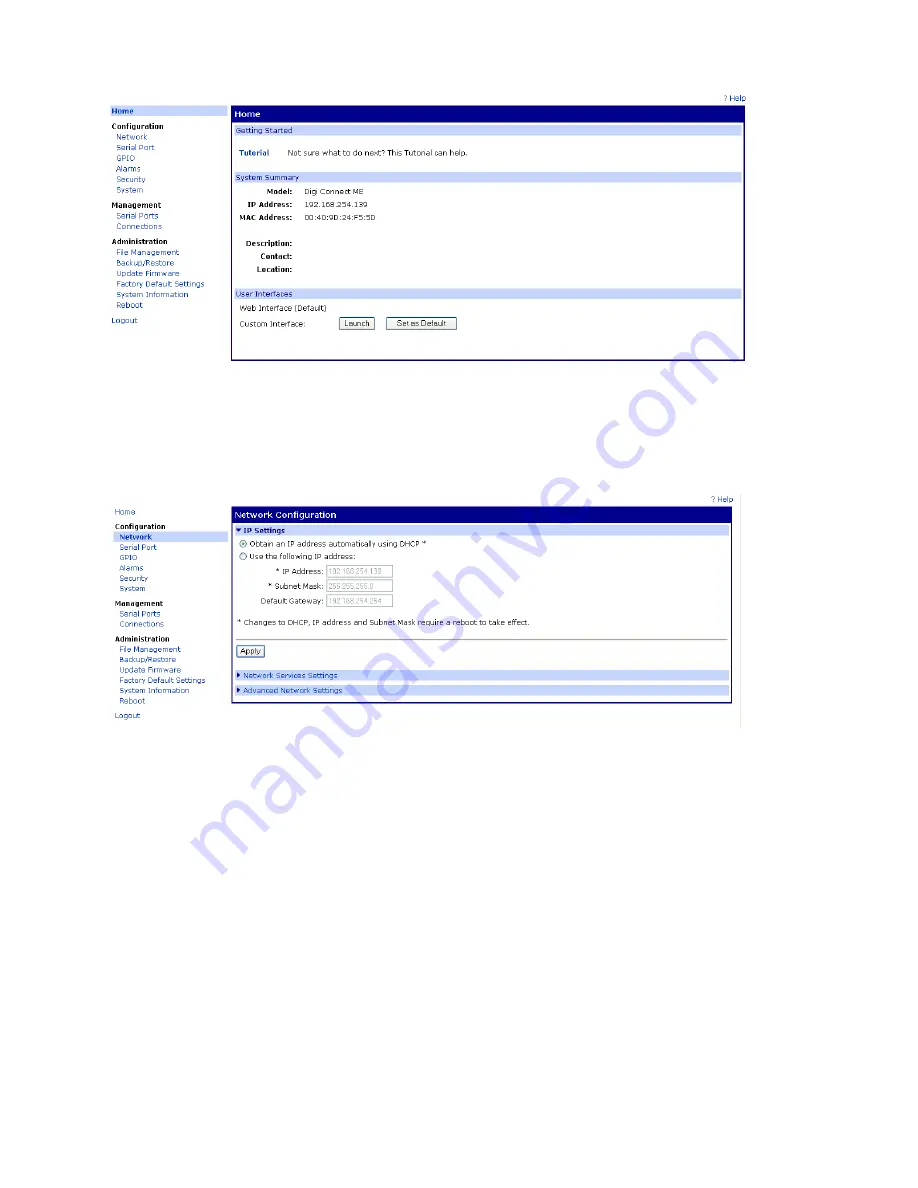
If you wish to have a Static IP address, click on “Network” under the
Configuration header on the left.
Step 4:
To configure a Static IP address, click on the “Use the following IP address”
radio button and fill in the required network IP address fields. The IP Address field
contains the current IP address assigned by the DHCP server. This IP address can
remain the same if desired. When configuring the static IP address, be sure that no
other device on your network is actively using this IP address. Be sure to reserve this
Static IP address in the DHCP server to ensure another device will not be assigned this
IP address. Once the IP address is confirmed and available on your network, click
“Apply” to accept the changes.
Step 5:
To implement the changes, click on “Reboot” to reset the Wired Ethernet
option. The webpage will briefly display “Reboot In Progress”. Once the reboot is
complete, the web page will return to the device configuration home page. The web
browser can now be closed.
Step 6:
Return to the Digi Device Discovery program from step 1 and click on “Refresh
View”. Check to see if the newly configured device appears on the list of connected
Содержание 2200 Series
Страница 2: ...1 ...
Страница 11: ...10 Scale Operation Fig 1 Model 2200 Front Panel Layout Fig 2 Model 2200B Front Panel Layout ...
Страница 118: ...117 ...
Страница 127: ...126 Fig 37 Mounting Dimensions ...
Страница 136: ...135 ...


