6
7
8
9
10
11
Cu
to
ff
・
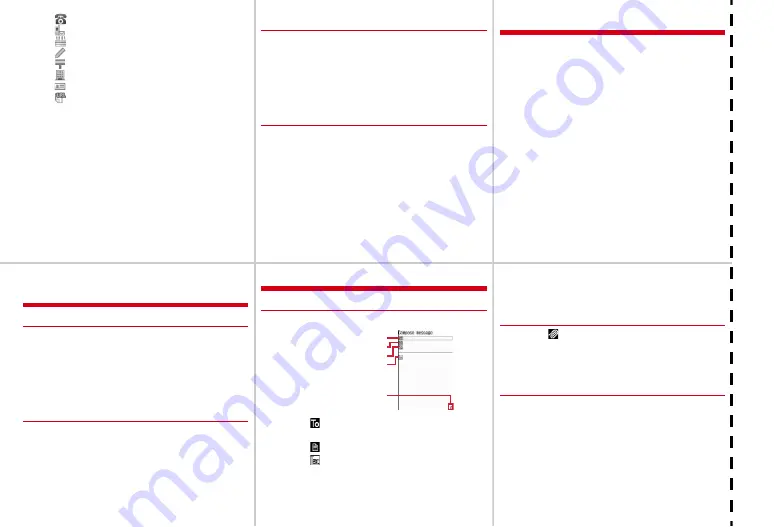
: Phone number
・
: Mail address
・
: Birthday
・
: Note
・
: Postal Code/Address
・
: Company name
・
: Job title
・
: URL
Adding to UIM phonebook
1
m
[Phonebook & Logs]
4
e
Enter a name
e
Set
required items
e
C
Adding from redial list or received call list
1
h
e
Move the cursor to a party
e
m41
・
Updating phonebook :
m42
2
1
(FOMA terminal phonebook) or
2
(UIM
phonebook)
・
To update phonebook, select the party to save.
3
Set required items
e
C
❖
Editing the phonebook
1
d
・
Switching phonebook :
C
2
Move the cursor to a party
e
m31
・
For UIM phonebook,
m3
.
3
Edit
e
C
・
An overwriting confirmation screen appears.
❖
Searching the phonebook
1
m
[Phonebook & Logs]
1
・
Switching phonebook :
C
2
1
-
6
・
For UIM phonebook,
1
-
3
.
Camera function
Shooting still images
C
e
Point the camera at the object and
g
e
g
Shooting moving pictures
C
(1 sec. or more)
e
Point the camera at the object
g
e
g
e
g
Displaying image
m
[Data Box]
11
e
Select an image
Playing moving picture
m
[Data Box]
42
e
Select a moving picture
Operation available in playing moving picture
j
: Adjust volume (rewind/fast forward play on the
horizontal display)
SD
: Adjust volume
h
: Rewind/Fast forward play (adjust volume on the
horizontal screen)
g
: Pause/Play
C
: Stop
Videophone
❖
Making videophone calls
1
Enter a phone number
e
C
2
Talk with the other party
・
Putting a call on-hold :
g
・
Switching earpiece/speaker :
n
・
Switching image to send :
I
3
When ending the call,
f
❖
Receiving videophone calls
1
A call comes in
e
I
or
n
・
On hold :
f
while receiving a call
・
Operation during a call is the same as Step 2 in
"Making videophone calls".
2
When ending the call,
f
i-mode mail
❖
Creating/Sending i-mode mail
1
a
(1 sec. or more)
2
Select
e
Select input method
e
Enter or select the
receiver
3
Select
e
Enter the subject
4
Select
e
Enter message text
・
Creating Deco-mail :
a
e
Select a decoration
icon
e
Decorate
Receiver field
Subject field
Attachment field
Message text field
Total bytes of characters and
decoration entered to text
5
C
・
Saving mail :
m3
・
Auto-send :
m2
❖
File attachment
1
Select
on the mail creation screen
・
Removing attachment :
a
e
"Yes"
2
Select the type of the file to attach
e
Select the
attachment source
e
Select a folder
e
Select a file
❖
Displaying received/sent mail
1
a
e
1
or
5
2
Select a folder
3
Select a mail
Содержание F-08A
Страница 256: ......
Страница 328: ......
Страница 344: ......
Страница 362: ...360 Appendix Troubleshooting Pictogram Reading Pictogram Reading...
Страница 363: ...361 Appendix Troubleshooting Pictogram Reading Pictogram Reading...
Страница 364: ...362 Appendix Troubleshooting Pictogram Reading Pictogram Reading...
Страница 365: ...363 Appendix Troubleshooting Pictogram Reading Pictogram Reading...
Страница 400: ...398 MEMO...
Страница 401: ...399 Index Quick Manual Index 400 Quick Manual 408...


