294
Convenient Functions
2
Select a schedule event
Changing :
Move the cursor to a schedule event
e
m2
The next procedure
→
P292 Step 2 and the following steps in "Saving schedules"
Deleting :
Move the cursor to a schedule event
e
m3
e
1
-
5
e
"Yes"
・
To delete 1 item, move the cursor to a schedule.
・
To delete selected items, select them
e
C
. To delete all items, authentication
is required.
・
When Long-term schedule events including the selected date have been
saved and "One day" or "Before date" is selected, a confirmation screen to
delete the Long term schedule events appears.
Displaying after specifying an item <Display by type> :
m42
e
Select an
item icon
The selected item icon appears in the upper-right corner of the calendar or Day
view screen and only the schedule for the item icon appears.
・
Press
m41
to restore the display.
Copying and pasting :
Move the cursor to a schedule
event
e
m61
e
c
e
Move the cursor to the date to
paste
e
m5
・
Only the latest copied schedule event is retained until the Scheduler is ended,
allowing the pasting of the event to other dates repeatedly.
Creating mail :
Move the cursor to a schedule event
e
m71
e
1
-
3
・
It is entered to the message text in the Date To format. If the schedule to be
entered exceeds the number of characters that can be entered in the message
text, the excess part is deleted.
Attaching to mail :
Move the cursor to a schedule event
e
a
Searching mail :
m72
e
1
or
2
✔
INFORMATION
・
If the displayed schedule data includes phone numbers, mail addresses or URL, Phone
To (AV Phone To), Mail To, SMS To or Web To functions can be used.
・
In "Normal", press
I
on the details screen to check an alarm image.
・
You can make a call or send mail to the birthday person on the birthday details screen.
・
When displayed in Display by type, only the displayed items are deleted or informed
via mail.
◆
Using schedule contact
In "Normal", select the phone number or mail address from the contact items in the
detail screen. In "Classic", perform the following operations.
1
u
e
Select the saved schedule day
e
Select a schedule
e
h
to
display the schedule contact
2
Move the cursor to a contact
e
Perform necessary operation
Making calls :
n
or
I
・
Press
m4
to make a call specifying conditions.
→
P57
Attaching to mail :
a
・
Press
m52
to send mail to all contacts.
Displaying a site :
m6
e
"i-mode" or "FBrowser"
✔
INFORMATION
・
To use the second or subsequent phone number or mail address saved in phonebook,
select a contact from Schedule contact screen and display the target phone number or
mail address from the phonebook details screen.
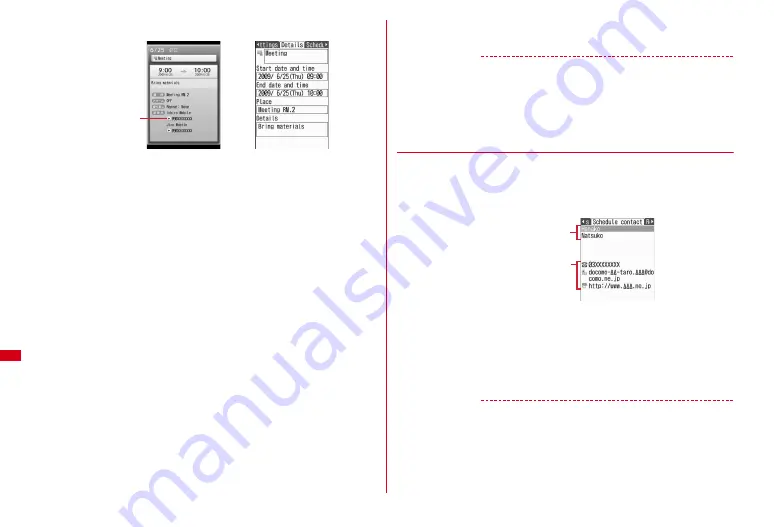
Details screen (Normal)
Details screen (Classic)
Cursor (yellow)
Saved members
The first phone number,
mail address and URL
saved for the member
at the cursor
Содержание F-08A
Страница 256: ......
Страница 328: ......
Страница 344: ......
Страница 362: ...360 Appendix Troubleshooting Pictogram Reading Pictogram Reading...
Страница 363: ...361 Appendix Troubleshooting Pictogram Reading Pictogram Reading...
Страница 364: ...362 Appendix Troubleshooting Pictogram Reading Pictogram Reading...
Страница 365: ...363 Appendix Troubleshooting Pictogram Reading Pictogram Reading...
Страница 400: ...398 MEMO...
Страница 401: ...399 Index Quick Manual Index 400 Quick Manual 408...


