9-18
DECcolorwriter 1000
9
Checks and Adjustments
Paper clamp adjustment (to correct misregistration)
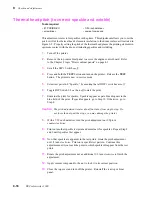
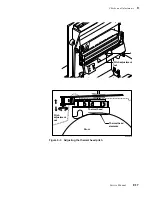
Before making this adjustment, be sure that the thermal head leaf spring (which presses
against the right end of the thermal head when it's in its print position) is in good contact
with the thermal head. If it isn't, bend the leaf spring until it makes good contact and
keeps the thermal head from making any side-to-side motion during printing.
This adjustment corrects for misregistration in the prints. Rake-like fingers on the paper
clamp force down a “bubble” that can form in the paper along the length of the clamp as
it holds the paper. This bubble can cause misregistration. To minimize misregistration,
you must ensure that the clamp holds the paper evenly across the width of the paper.
1.
Turn off the printer.
2.
Remove the left and right cabinet panels to access each side of the drum.
Refer to the Chapter 8 topic “Printer cabinet panels” on page 8-3.
3.
Rotate the drum so that the paper clamp is in the 12:00 position.
4.
With a spring removal tool (which resembles a crochet hook), unhook the
clamp springs from each end of the drum to unload the paper clamp.
Caution
Be sure to loosen the lock screws before rotating the eccentric nuts.
5.
Through an access hole on each side of the printer, loosen the lock screw
securing the eccentric nut on each end of the drum.
6.
At each end of the drum, rotate the eccentric nut to raise or lower the paper
clamp. Note the mark on the eccentric nut that denotes its high side. When
the mark faces straight up, the paper clamp is raised away from the drum.
When the mark faces straight down, the paper clamp is lowered to the drum.
The mark should face toward the front of the printer between these two
extremes. Set the eccentric nut to position the clamp so that the fingers of the
paper clamp gently scuff the drum's rubber surface. The fingers of the paper
clamp should deflect slightly off of the surface of the paper clamp as they
touch the surface of the drum.
7.
Tighten the lock screws to secure the eccentric nuts in the desired positions.
8.
Reinstall the drum springs.
9.
Reinstall the side cabinet panels.
10.
Turn on the printer and make a test print.
If the clamp grips the paper too tightly, misregistration can occur. This is characterized
by magenta and cyan shifting (fringing) with respect to yellow in the two top corner
crosshatch patterns of the inspection/check test pattern. (These are the corners closest to
the paper clamp.)
Содержание DECcolorwriter 1000
Страница 11: ...Service Manual xi...
Страница 16: ...Service Manual xv...
Страница 56: ...2 24 DECcolorwriter 1000 2 Installing the Printer and Drivers...
Страница 64: ...3 8 DECcolorwriter 1000 3 Verifying the Printer and Host Connections...
Страница 70: ...4 6 DECcolorwriter 1000 4 Key Operator Training...
Страница 170: ...8 46 DECcolorwriter 1000 8 FRU Disassembly Assembly...
Страница 190: ...9 20 DECcolorwriter 1000 9 Checks and Adjustments...
Страница 193: ...Service Manual A 3 Field Replaceable Units List A Figure A 1 The printer exterior FRUs 8699 76A 1 2 3 4 5 6 7 8 9...
Страница 195: ...Service Manual A 5 Field Replaceable Units List A...
Страница 198: ...A 8 DECcolorwriter 1000 A Field Replaceable Units List...
Страница 204: ...C 6 DECcolorwriter 1000 C Wiring Diagrams...
Страница 208: ...D 4 DECcolorwriter 1000 D Test Pattern Generator...

