Service Manual
8-43
FRU Disassembly/Assembly
8
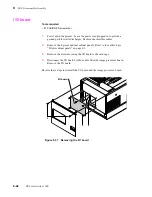
Image processor board
1.
Power down the printer. Leave the power cord plugged in to provide a
ground path for static discharges. Remove the interface cables.
2.
Remove the top-rear and rear cabinet panels. Refer to the earlier topic
“Printer cabinet panels” on page 8-3
3.
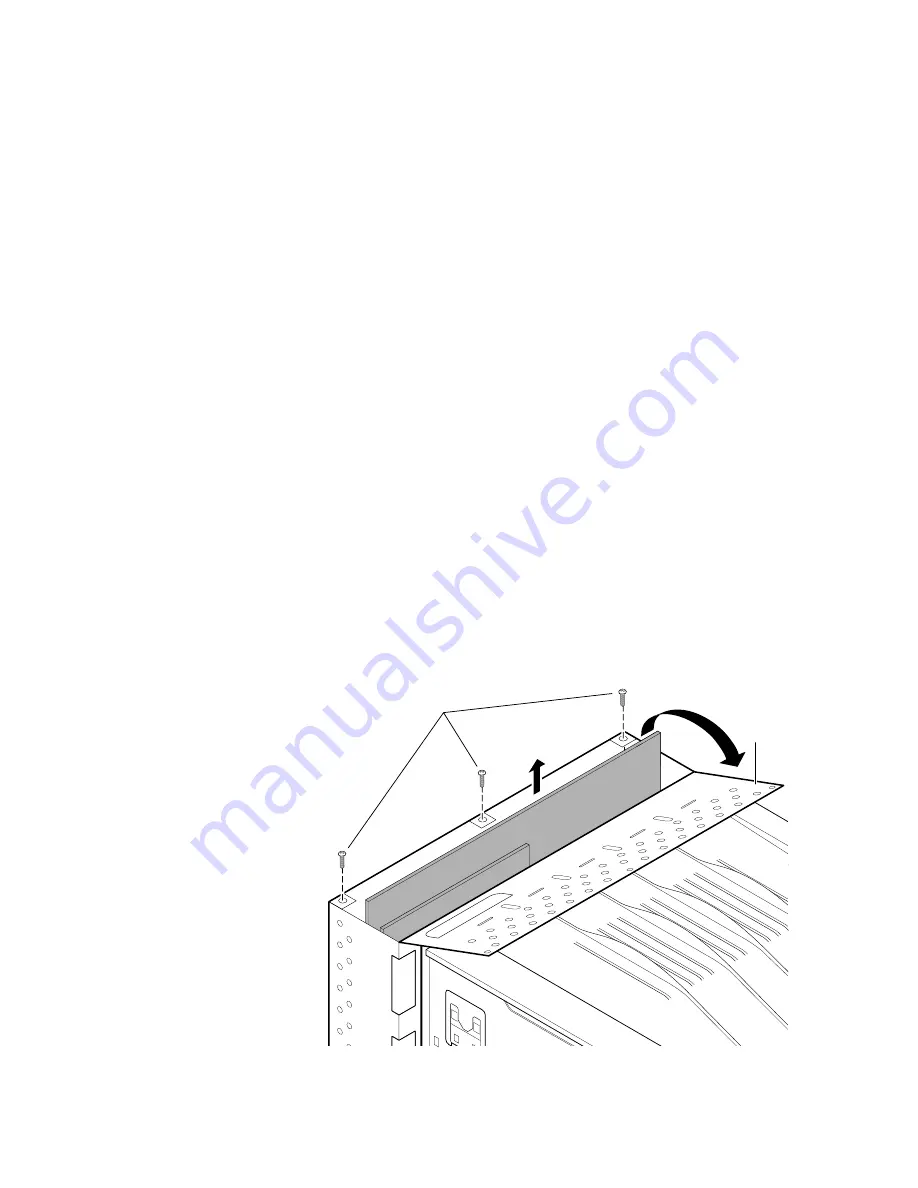
Remove the card cage top (3 screws).
4.
Flip over the hinged card cage top.
5.
Remove the I/O board as explained in the previous procedure “I/O board” on
page 8-42.
6.
Lift out the image processor board.
Note
If you are replacing an old image processor board for a new board,
swap the NVRAM IC (U672) from the old board into the new board.
The IC is a small, 8-pin socketed IC located near the RAM SIMMs.
This IC may not be socketed on early production printers.
Reverse these steps to reinstall the I/O board and the image processor board. When you
reinstall the card cage top, ensure that the tabs on the top edge of the image processor
board fit into the slots in the card cage top.
Tools required
n
#1 POSIDRIV® screwdriver
Figure 8-38 Removing the image processor board
4
6
3
8699-38
Содержание DECcolorwriter 1000
Страница 11: ...Service Manual xi...
Страница 16: ...Service Manual xv...
Страница 56: ...2 24 DECcolorwriter 1000 2 Installing the Printer and Drivers...
Страница 64: ...3 8 DECcolorwriter 1000 3 Verifying the Printer and Host Connections...
Страница 70: ...4 6 DECcolorwriter 1000 4 Key Operator Training...
Страница 170: ...8 46 DECcolorwriter 1000 8 FRU Disassembly Assembly...
Страница 190: ...9 20 DECcolorwriter 1000 9 Checks and Adjustments...
Страница 193: ...Service Manual A 3 Field Replaceable Units List A Figure A 1 The printer exterior FRUs 8699 76A 1 2 3 4 5 6 7 8 9...
Страница 195: ...Service Manual A 5 Field Replaceable Units List A...
Страница 198: ...A 8 DECcolorwriter 1000 A Field Replaceable Units List...
Страница 204: ...C 6 DECcolorwriter 1000 C Wiring Diagrams...
Страница 208: ...D 4 DECcolorwriter 1000 D Test Pattern Generator...

