


4. Install the filler brackets by performing the following steps:
a. Align the slot on the filler bracket with the tab on the expansion card slot.
b. Press the expansion card latch till the filler bracket locks into place.
NOTE:
Filler brackets must be installed in empty expansion-card slots to maintain FCC certification of the system.
The brackets also keep dust and dirt out of the system and aid in proper cooling and airflow inside the system.
Figure 81. Removing an expansion card
Figure 82. Installing the filler bracket
Next steps
1.
Installing an expansion card
Prerequisites
1. Follow the safety guidelines listed in
on page 65.
2.
3.
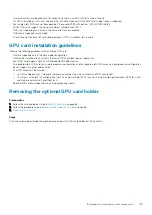
Remove the expansion card holder
.
Steps
1. Unpack the expansion card and prepare it for installation.
130
Installing and removing system components
Содержание 7CX5T
Страница 21: ...Figure 16 Configuration and layout Dell EMC PowerEdge T640 overview 21 ...
Страница 22: ...Figure 17 Electrical overview 22 Dell EMC PowerEdge T640 overview ...
Страница 23: ...Figure 18 Memory information Dell EMC PowerEdge T640 overview 23 ...
Страница 24: ...Figure 19 System tasks 24 Dell EMC PowerEdge T640 overview ...


