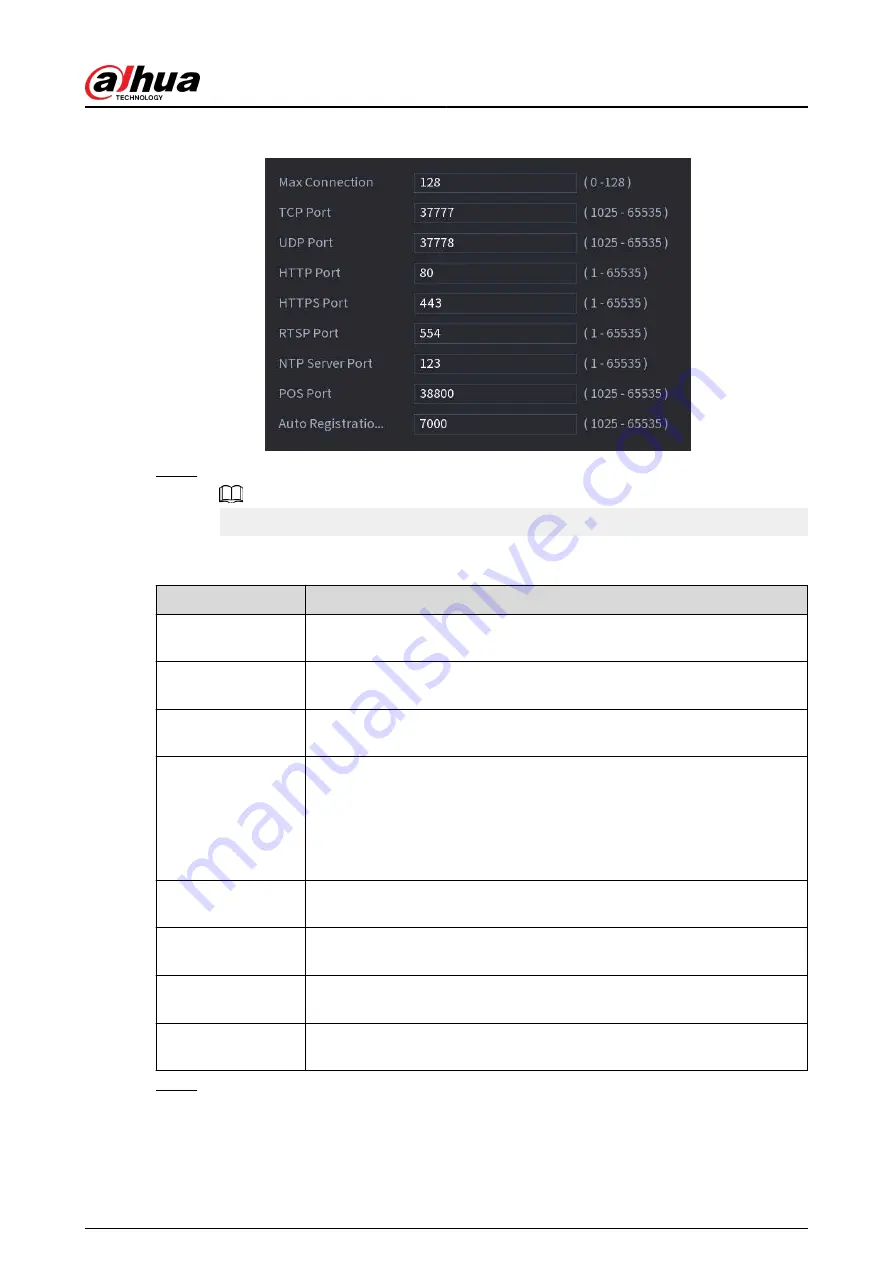
Figure 5-206 Port
Step 2
Configure the parameters.
The parameters except Max Connection take effect after the Device restarts.
Table 5-56 Port parameters
Parameter
Description
Max Connection
The allowable maximum clients accessing the Device at the same time,
such as web client, platform, and mobile client.
TCP Port
Transmission control protocol port. Enter the value according to your
actual situation.
UDP Port
User datagram protocol port. Enter the value according to your actual
situation.
HTTP Port
The default value setting is 80. You can enter the value according to your
actual situation.
If you change the HTTP port number to, for example, 70, then you need to
enter 70 after the IP address when logging in to the Device through the
browser.
HTTPS Port
HTTPS communication port. The default value is 443. You can enter the
value according to your actual situation.
RTSP Port
The default value is 554. You can enter the value according to your actual
situation.
POS Port
POS data transmission port. The value range from 1 through 65535. The
default value is 38800.
Auto Registration
Port
The auto registered port. Supports adding cameras through auto
registration.
Step 3
Click Apply.
User's Manual
325
Содержание DHI-NVR5432-EI
Страница 1: ...ZHEJIANG DAHUA VISION TECHNOLOGY CO LTD V2 3 4 Network Video Recorder User s Manual...
Страница 14: ...Appendix 4 Compatible Network Camera List 449 Appendix 5 Cybersecurity Recommendations 455 User s Manual XIII...
Страница 89: ...Figure 2 103 Alarm input port 1 User s Manual 75...
Страница 116: ...NVR21 S3 NVR21 P S3 NVR21 8P S3 NVR41 EI NVR41 P EI NVR41 8P EI Figure 3 47 Typical connection User s Manual 102...
Страница 118: ...S3 NVR21HS 8P S3 NVR41HS EI NVR41HS P EI NVR41HS 8P EI Figure 3 49 Typical connection User s Manual 104...
Страница 127: ...Figure 3 60 Typical connection 3 5 15 NVR616 4KS2 Series Figure 3 61 Typical connection User s Manual 113...
Страница 137: ...Figure 5 8 Unlock pattern login User s Manual 123...
Страница 152: ...Figure 5 23 AcuPick human detection User s Manual 138...
Страница 153: ...Figure 5 24 AcuPick motor vehicle detection Step 5 Configure the search conditions as needed User s Manual 139...
Страница 156: ...Figure 5 27 Shortcut menu 1 User s Manual 142...
Страница 184: ...Figure 5 59 Modify IP Step 7 Click Next Figure 5 60 Device initialization Step 8 Click Finished User s Manual 170...
Страница 217: ...Figure 5 87 AcuPick human detection User s Manual 203...
Страница 218: ...Figure 5 88 AcuPick motor vehicle detection Step 5 Configure the search conditions as needed User s Manual 204...
Страница 222: ...Figure 5 92 Thumbnails Step 7 Point to the target you want and then click to check the details User s Manual 208...
Страница 223: ...Figure 5 93 Custom search 2 Step 8 Configure the search conditions as needed User s Manual 209...
Страница 335: ...Figure 5 203 TCP IP Step 2 Click to configure the NIC card and then click OK User s Manual 321...
Страница 387: ...Figure 5 253 Pattern login User s Manual 373...
Страница 444: ...Figure 5 314 Shutdown 2 User s Manual 430...
Страница 453: ...Figure 6 5 Cluster log Step 2 Enter the start time and end time Step 3 Click Search User s Manual 439...
Страница 471: ......


