


Step 3
Select Enable and then set Type to People Approach Detection.
Step 4
Draw detection rule.
1. Click , and then draw a detection area on the video image. Right-click the image to
stop drawing.
2. Configure parameters.
Table 5-40 Parameters of people approach detection
Parameter
Description
Name
Customize the rule name.
Sensitivity
Set alarm sensitivity.
Duration
Set how long two people stay in the same detection area until an alarm
is triggered.
Repeat Alarm Time
Set repeat alarm time. If the alarm-triggering event continues, an alarm
will be triggered again when repeat alarm time passed.
Interval Threshold
When the distance between people in the area is greater than or less
than the defined threshold, an alarm will be triggered.
3. Click OK.
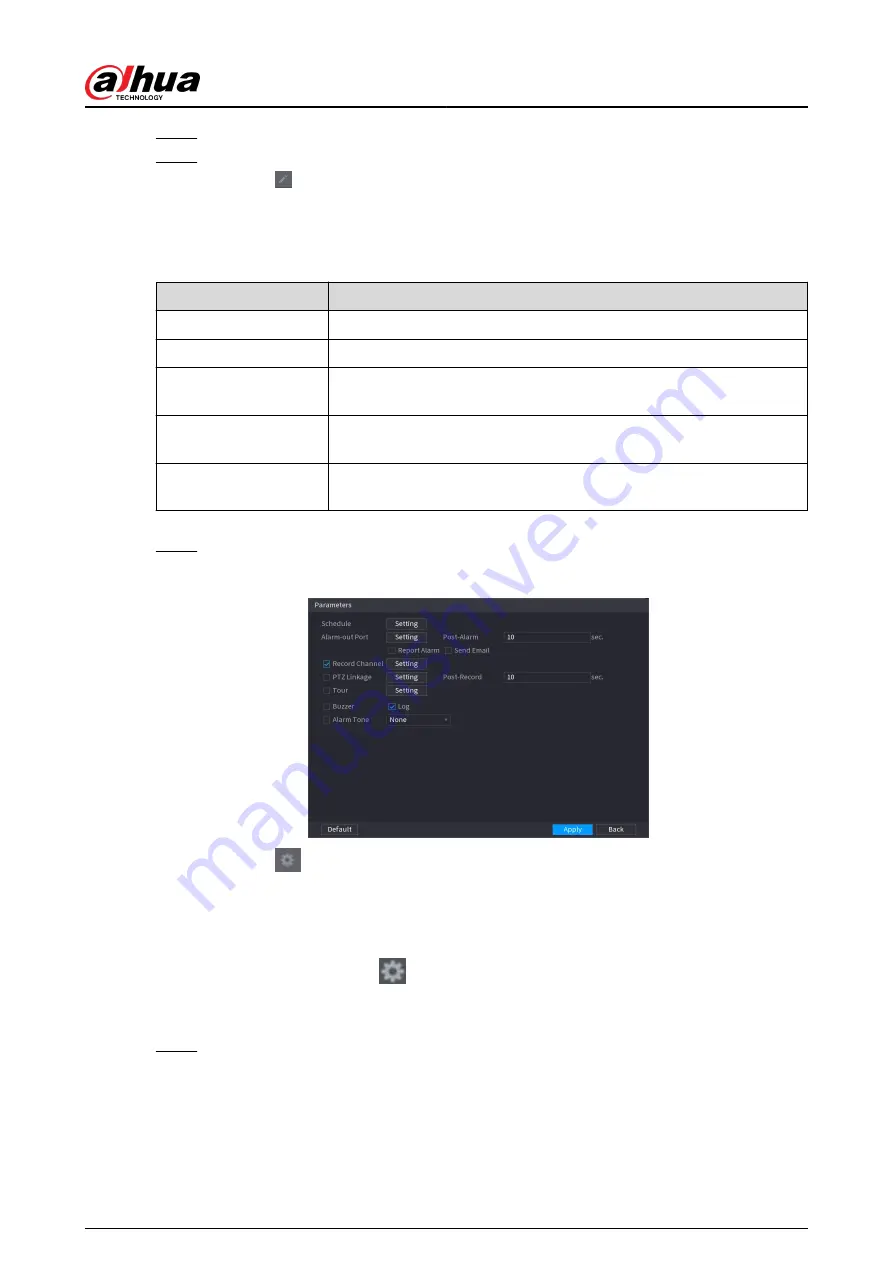
Step 5
Configure alarm schedule and linkage.
Figure 5-149 Schedule and alarm linkage
1. Click
.
2. Click Setting next to Schedule to configure the alarm period.
The system performs linkage actions only for alarms during the arming period.
●
On the time line, drag to set the period.
●
You can also click
to set the period.
3. Configure alarm linkage. For details, see Table 5-47 .
4. Click Apply.
Step 6
Click Apply.
User's Manual
262
Содержание DHI-NVR5432-EI
Страница 1: ...ZHEJIANG DAHUA VISION TECHNOLOGY CO LTD V2 3 4 Network Video Recorder User s Manual...
Страница 14: ...Appendix 4 Compatible Network Camera List 449 Appendix 5 Cybersecurity Recommendations 455 User s Manual XIII...
Страница 89: ...Figure 2 103 Alarm input port 1 User s Manual 75...
Страница 116: ...NVR21 S3 NVR21 P S3 NVR21 8P S3 NVR41 EI NVR41 P EI NVR41 8P EI Figure 3 47 Typical connection User s Manual 102...
Страница 118: ...S3 NVR21HS 8P S3 NVR41HS EI NVR41HS P EI NVR41HS 8P EI Figure 3 49 Typical connection User s Manual 104...
Страница 127: ...Figure 3 60 Typical connection 3 5 15 NVR616 4KS2 Series Figure 3 61 Typical connection User s Manual 113...
Страница 137: ...Figure 5 8 Unlock pattern login User s Manual 123...
Страница 152: ...Figure 5 23 AcuPick human detection User s Manual 138...
Страница 153: ...Figure 5 24 AcuPick motor vehicle detection Step 5 Configure the search conditions as needed User s Manual 139...
Страница 156: ...Figure 5 27 Shortcut menu 1 User s Manual 142...
Страница 184: ...Figure 5 59 Modify IP Step 7 Click Next Figure 5 60 Device initialization Step 8 Click Finished User s Manual 170...
Страница 217: ...Figure 5 87 AcuPick human detection User s Manual 203...
Страница 218: ...Figure 5 88 AcuPick motor vehicle detection Step 5 Configure the search conditions as needed User s Manual 204...
Страница 222: ...Figure 5 92 Thumbnails Step 7 Point to the target you want and then click to check the details User s Manual 208...
Страница 223: ...Figure 5 93 Custom search 2 Step 8 Configure the search conditions as needed User s Manual 209...
Страница 335: ...Figure 5 203 TCP IP Step 2 Click to configure the NIC card and then click OK User s Manual 321...
Страница 387: ...Figure 5 253 Pattern login User s Manual 373...
Страница 444: ...Figure 5 314 Shutdown 2 User s Manual 430...
Страница 453: ...Figure 6 5 Cluster log Step 2 Enter the start time and end time Step 3 Click Search User s Manual 439...
Страница 471: ......


