Initial Configuration
Configuration Overview
Page 34
•
User Name
•
SNMP Community strings
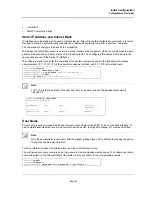
Static IP Address and Subnet Mask
IP interfaces can be configured on each port of the device. After entering the configuration command, it is recom-
mended to check if a port was configured with the IP address by entering the “show ip interface” command.
The commands to configure the device are port specific.
To manage the switch from a remote network, a static route must be configured, which is an IP address to where
packets are sent when no entries are found in the device tables. The configured IP address must belong to the
same subnet as one of the device IP interfaces.
To configure a static route, enter the command at the system prompt as shown in the following configuration
example where 101.101.101.101 is the specific management station, and 5.1.1.100 is the static route:
Note
100.1.1.33 is the IP address of the next hop that can be used to reach the management network
192.168.2.0.
User Name
A user name is used to manage the device remotely, for example through SSH, Telnet, or the Web interface. To
gain complete administrative (super-user) control over the device, the highest privilege (15) must be specified.
Note
Only the administrator (super-user) with the highest privilege level (15) is allowed to manage the device
through the Web browser interface.
For more information about the privilege level, see the CLI Reference Guide.
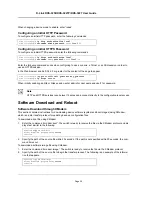
The configured user name is entered as a login name for remote management sessions. To configure user name
and privilege level, enter the command at the system prompt as shown in the configuration example:
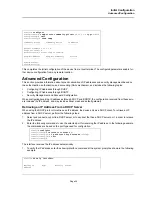
Console#
configure
Console(config)#
interface vlan
1
Console(config-if)#
ip address
100.1.1.1 255.255.255.0
Console(config-if)#
exit
Console#
ip route
192.168.2.0/24 100.1.1.33
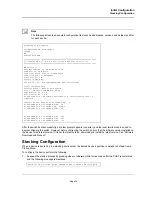
Console#
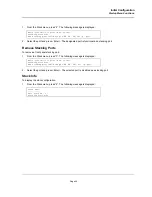
show ip interface
Proxy ARP is disabled
IP Address
I/F
Type
Directed
Broadcast
-----------
--------
-----------
-------------
100.1.1.1/24
vlan 1
static
disable
Console>
enable
Console#
configure
Console(config)#
username
admin
password
lee
privilege
15
Содержание DXS-3250 - xStack Switch - Stackable
Страница 9: ...Preface Intended Audience Page 8 ...
Страница 274: ......
Страница 275: ......
Страница 285: ...Contacting D Link Technical Support Page 278 ...
Страница 286: ...D Link DXS 3250 DXS 3227P DXS 3227 User Guide Page 279 ...
Страница 287: ...Contacting D Link Technical Support Page 280 ...
Страница 288: ...D Link DXS 3250 DXS 3227P DXS 3227 User Guide Page 281 ...
Страница 289: ...Contacting D Link Technical Support Page 282 ...
Страница 290: ...D Link DXS 3250 DXS 3227P DXS 3227 User Guide Page 283 ...
Страница 291: ...Contacting D Link Technical Support Page 284 ...
Страница 292: ...D Link DXS 3250 DXS 3227P DXS 3227 User Guide Page 285 ...
Страница 293: ...Contacting D Link Technical Support Page 286 ...
Страница 294: ...D Link DXS 3250 DXS 3227P DXS 3227 User Guide Page 287 ...
Страница 295: ...Contacting D Link Technical Support Page 288 ...
Страница 296: ...D Link DXS 3250 DXS 3227P DXS 3227 User Guide Page 289 ...
Страница 297: ...Contacting D Link Technical Support Page 290 ...
Страница 298: ...D Link DXS 3250 DXS 3227P DXS 3227 User Guide Page 291 ...
Страница 299: ...Contacting D Link Technical Support Page 292 ...
Страница 300: ...D Link DXS 3250 DXS 3227P DXS 3227 User Guide Page 293 ...
Страница 301: ...Contacting D Link Technical Support Page 294 ...
Страница 302: ...D Link DXS 3250 DXS 3227P DXS 3227 User Guide Page 295 ...
Страница 303: ...Contacting D Link Technical Support Page 296 ...
Страница 304: ...D Link DXS 3250 DXS 3227P DXS 3227 User Guide Page 297 ...
Страница 305: ...Contacting D Link Technical Support Page 298 ...
Страница 306: ...D Link DXS 3250 DXS 3227P DXS 3227 User Guide Page 299 ...
Страница 307: ...Contacting D Link Technical Support Page 300 ...
Страница 308: ...D Link DXS 3250 DXS 3227P DXS 3227 User Guide Page 301 ...
Страница 309: ...Contacting D Link Technical Support Page 302 ...
Страница 310: ...D Link DXS 3250 DXS 3227P DXS 3227 User Guide Page 303 ...


