


3.
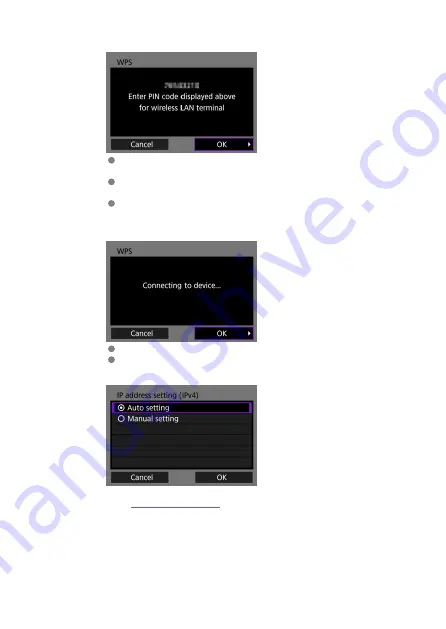
Specify the PIN code.
At the access point, specify the 8-digit PIN code displayed on the
camera's monitor.
For instructions on setting PIN codes at the access point, refer to the
access point's instruction manual.
After the PIN code is specified, select [
OK
].
4.
Connect to the access point.
Select [
OK
] to establish a connection with the access point.
When a connection with the access point is established, the next
screen is displayed.
36
Содержание WFT-R10
Страница 1: ...Wireless File Transmitter WFT R10 Advanced User Guide E CT2 D106 A CANON INC 2020 ...
Страница 12: ...Nomenclature 10 20 19 21 22 23 24 25 26 11 12 13 14 1 2 3 4 5 6 7 8 9 17 18 15 16 27 31 32 33 28 29 30 12 ...
Страница 14: ...Example of EOS R5 LCD panel 1 WFT battery level 2 WFT status wireless 3 WFT status wired 4 Charging via USB 14 ...
Страница 54: ...3 Select OK The next screen is displayed Go to Configuring Settings for the Communication Function 54 ...
Страница 57: ...6 Select OK The next screen is displayed Go to Configuring Settings for the Communication Function 57 ...
Страница 76: ...6 Select FTP transfer 7 Select OK The selected images are transferred to the FTP server 76 ...
Страница 95: ...6 Select Direct transfer 7 Select OK The selected images are transferred to the computer 95 ...
Страница 98: ...5 Select OK The selected images are transferred to the computer 98 ...
Страница 102: ...4 Register the captions to the camera Select Apply to camera to register your new captions to the camera 102 ...
Страница 110: ...Terminating the Connection and Reconnecting Terminating the Connection Reconnecting 110 ...
Страница 127: ...Editing Function Settings 1 Select WFT settings 2 Select Manual setting 3 Select Function settings 4 Select MODE 127 ...
Страница 138: ...Use a highly shielded Category 5e or higher STP Shielded Twisted Pair Gigabit Ethernet cable 138 ...
Страница 166: ...4 Select Comm settings for using IPv6 5 Select Change 6 Select TCP IPv6 7 Select the item to be set 166 ...


