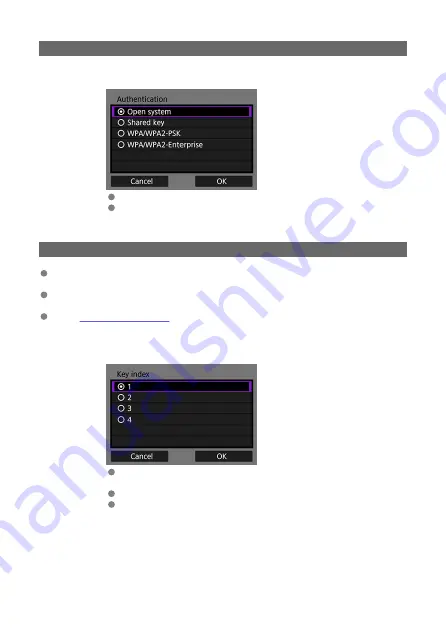
Specifying the Authentication for the Access Point
3.
Select the authentication.
Select an item and select [
OK
] to go to the next screen.
If you select [
Open system
], the [
Encryption settings
] screen will be
displayed. Select [
None
] or [
WEP
] on this screen.
Entering the Access Point Encryption Key
Enter the encryption key (password) specified for the access point. For details on the
specified encryption key, refer to the access point's instruction manual.
The screens displayed in steps 4 and 5 below vary depending on the authentication and
encryption specified for the access point.
Go to
when the [
IP address set.
] screen is displayed instead of
the screens for steps 4 and 5.
4.
Select a key index.
The [
Key index
] screen is displayed when [
Shared key
] and [
WEP
]
are selected in step 3.
Select the key index number specified for the access point.
Select [
OK
] to proceed to the next screen.
35
Содержание WFT-E9
Страница 12: ...Nomenclature 1 4 2 3 1 Attachment pin 2 Tightening screw 3 Terminal 4 Terminal cap 12 ...
Страница 48: ...3 Select OK The next screen is displayed Go to Configuring Settings for the Communication Function 48 ...
Страница 51: ...6 Select OK The next screen is displayed Go to Configuring Settings for the Communication Function 51 ...
Страница 53: ...2 Configure the connection settings for the communication function FTP Transfer EOS Utility Browser Remote 53 ...
Страница 59: ...10 Select OK This is not displayed for offline settings 11 Select OK 59 ...
Страница 71: ...6 Select Transfer 7 Select OK The selected images are transferred to the FTP server 71 ...
Страница 74: ...When OK is selected the selected image is transferred to the FTP server 74 ...
Страница 91: ...7 Select OK The selected images are transferred to the computer 91 ...
Страница 94: ...When OK is selected the selected image is transferred to the PC 94 ...
Страница 100: ...4 Register the captions to the camera Select Apply to camera to register your new captions to the camera 100 ...
Страница 114: ...114 ...
Страница 150: ...Terminating the Connection and Reconnecting Terminating the Connection Reconnecting 150 ...
Страница 200: ...4 Select Comm settings for using IPv6 5 Select Change 6 Select TCP IPv6 7 Select the item to be set 200 ...
Страница 204: ...Operation Environment Working temperature range 0 45 C 32 113 F Working humidity 85 or less 204 ...


