4
Printer Part Names and Functions
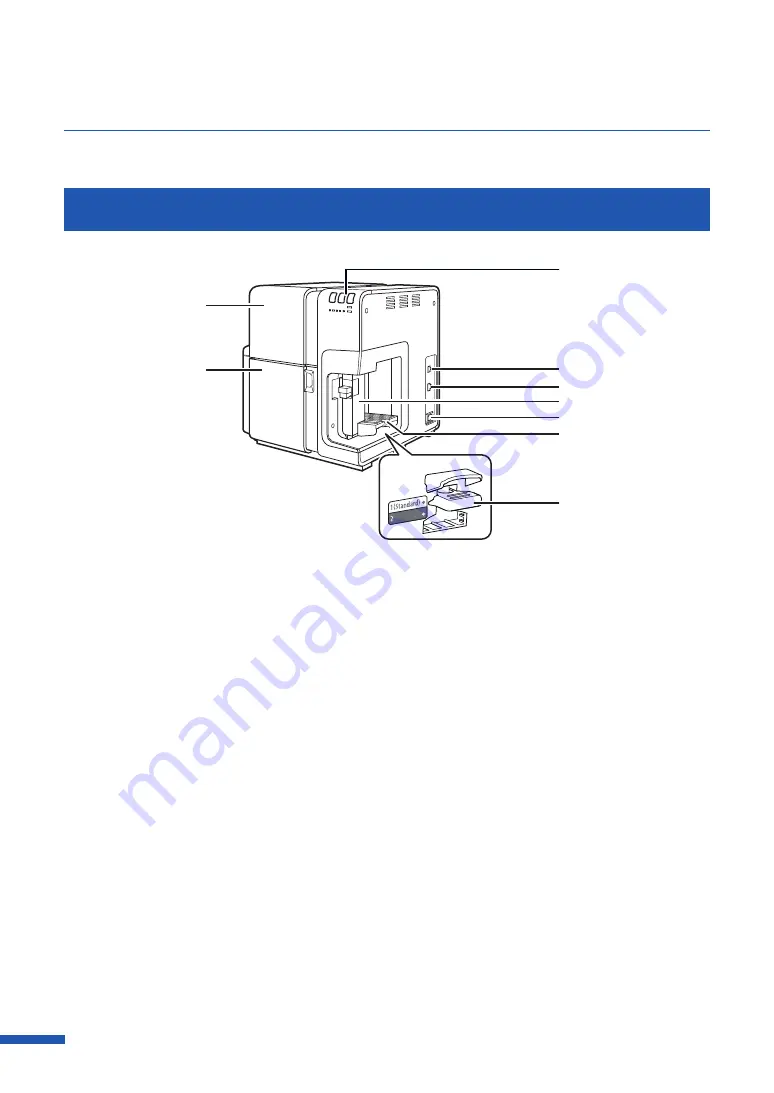
Names and functions of the components of this printer are described below.
Front/Right Side View
[1]
[2]
[3]
[5]
[6]
[7]
[9]
[4]
[8]
[
1
]
Operation panel
[
7
]
Tray switch lever
Keys necessary for operation and lamps to
indicate the state of printer are provided
on this panel.
Use in the "1 (Standard)" position.
Normally, this does not need to be
changed. If paper cannot be fed properly,
switch the lever position.
[
2
]
USB port
[
8
]
Ink tank door
Connect a USB cable here to connect to
the computer.
Open this door when replacing ink tanks
or opening the upper unit.
[
3
]
LAN port
[
9
]
Upper unit
Connect a LAN cable here to connect to
the computer.
Open this unit when loading paper or
removing the paper jammed in the paper
feed path or cleaning inside of the
machine. Holds the printhead.
[
4
]
Side guide
Adjust the position of this guide according
to the paper width.
[
5
]
Power socket
Connect the power cord here.
[
6
]
Feeder lift tray
Load the paper.
Содержание CX-G6400
Страница 1: ...CX G6400 COLOR CARD PRINTER User s Guide CANON FINETECH NISCA INC 2017 4Y1 8612 010 ...
Страница 55: ...51 Using Page Setup Features 6 Click Register A confirmation message appears 7 Click Yes 8 Click OK ...
Страница 108: ...104 Chapter 3 How to Use the Printer Driver ...
Страница 141: ...137 Detailed Printhead Position Adjustment 12 Click Close A confirmation message appears 13 Click Yes ...
Страница 147: ...143 Replacing the Ink Tank 1 Open the ink tank door 2 Open the ink tank cover 3 Slowly remove the ink tank ...
Страница 165: ...Chapter 6 Troubleshooting For Troubleshooting Operations 162 List of Error Messages Warning Messages 176 ...
Страница 199: ...195 Uninstall Printer Driver 3 Click Start Note A user account control dialog box may appear In this case click Yes ...


