


2002 Buell P3: Maintenance
1-17
HOME
TRANSMISSION/PRIMARY FLUID
1.10
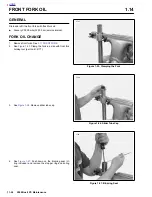
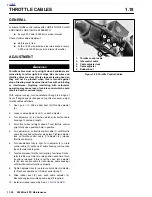
GENERAL
The transmission should be drained and refilled with fresh
fluid:
●
At the 1,000 mile (1,600 km) initial service and at
every 5,000 (8,000 km) service interval thereafter.
Transmission fluid capacity is 1.0 quart (0.95 liter). For best
results, drain fluid while it is hot.
INSPECTION
1.
Remove seat. See
2.28 SEAT.
1
1
WARNING
1
WARNING
To protect against shock and accidental start-up of vehi-
cle, disconnect the negative battery cable before pro-
ceeding. Inadequate safety precautions could result in
death or serious injury.
2.
Disconnect negative battery cable from battery.
3.
Remove left footpeg support bracket. See
2.21 FOOT-
PEGS AND FOOTPEG SUPPORT BRACKETS.
4.
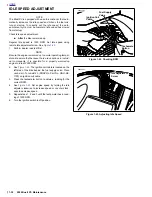
Remove three TORX screws with washers (1) from
clutch inspection cover (2). Remove clutch inspection
cover from primary cover.
5.
See
Figure 1-15.
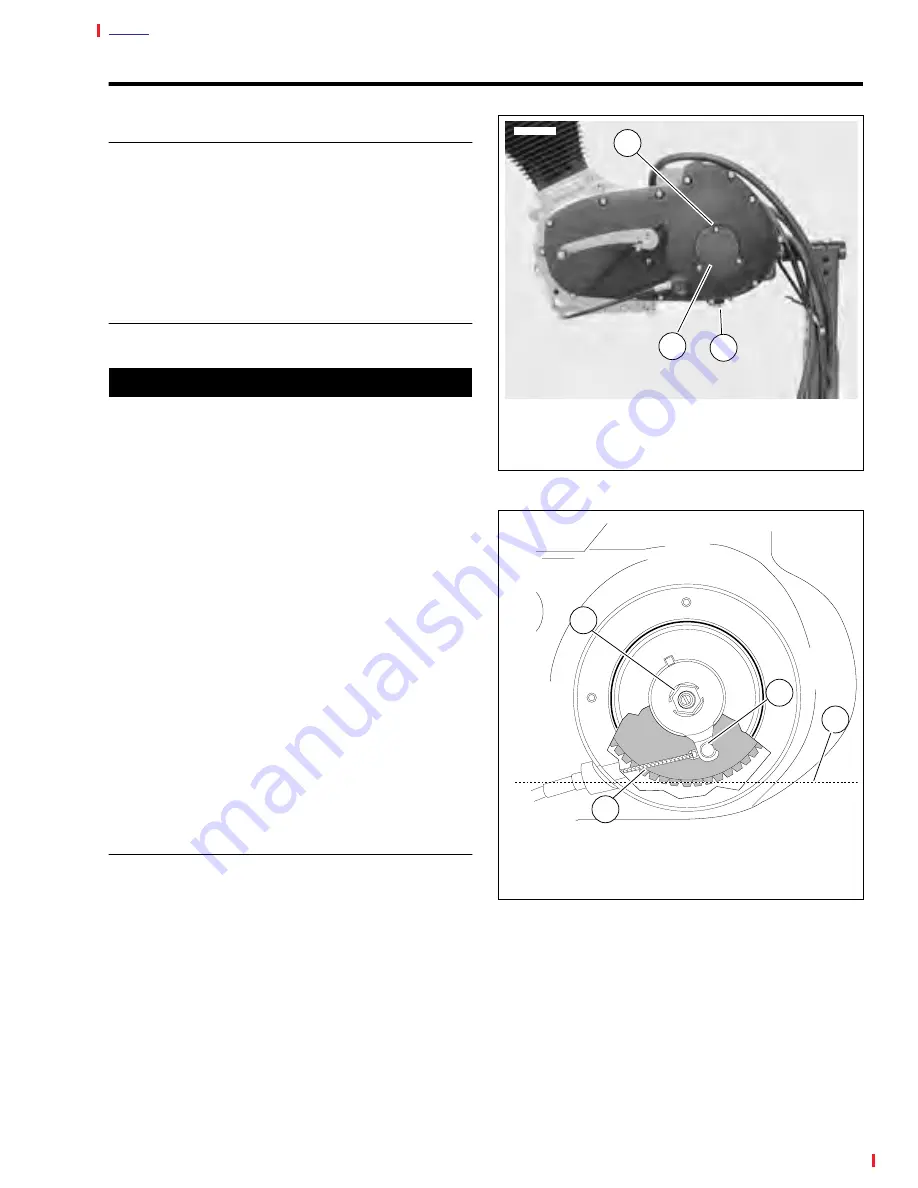
Inspect fluid level with motorcycle in
upright position.
6.
See
Figure 1-14.
Install clutch inspection cover using
three TORX screws with washers. Tighten in a crosswise
pattern to 7-9 ft-lbs (9.5-12.2 Nm).
7.
Install left footpeg support bracket. See
2.21 FOOT-
PEGS AND FOOTPEG SUPPORT BRACKETS
.
8.
Connect negative battery cable to battery. See
1.4 BAT-
TERY
.
9.
Install seat. See
2.28 SEAT
.
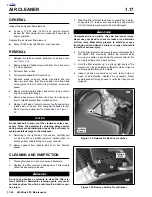
CHANGING TRANSMISSION FLUID
1.
Raise rear wheel off floor using REAR WHEEL SUP-
PORT STAND (Part No. B-41174). This prevents trans-
mission fluid from spilling out of the clutch inspection
cover opening.
2.
See
Figure 1-14.
Position a suitable container under
drain plug (3). Remove magnetic drain plug with O-ring
and drain fluid.
3.
Wipe any foreign material from the magnetic drain plug
(3). Inspect O-ring for deterioration and replace as
required. Reinstall drain plug with O-ring. Tighten drain
plug to 14-30 ft-lbs (19.0-54 Nm).
4.
Remove seat. See
2.28 SEAT
.
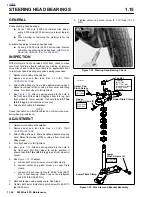
Figure 1-14. Primary Cover
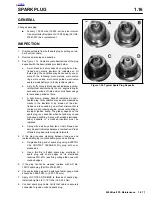
Figure 1-15. Fluid Level
7667
1.
Torx Screws with washers (3)
2.
Clutch Inspection Cover
3.
Magnetic Drain Plug (with O-ring)
1
2
3
1.
Adjusting Screw
2.
Cable End
3.
Coupling
4.
Correct Fluid Level
a0126x6x
1
4
3
2
Содержание 2002 P3
Страница 2: ......
Страница 17: ...A 15 Appendix A Tools HOME ...
Страница 32: ...C 3 Appendix C Metric Conversions HOME ...
Страница 41: ...1 8 2002 Buell P3 Maintenance HOME NOTES ...
Страница 75: ......
Страница 111: ...2 36 2002 Buell P3 Chassis HOME NOTES ...
Страница 143: ...2 68 2002 Buell P3 Chassis HOME NOTES ...
Страница 144: ...2002 Buell P3 Chassis 2 69 HOME ...
Страница 146: ......
Страница 147: ......
Страница 223: ...3 76 2002 Buell P3 Engine HOME NOTES ...
Страница 225: ......
Страница 256: ...2002 Buell P3 Fuel System 4 31 HOME ...
Страница 258: ......
Страница 259: ......
Страница 279: ...5 20 2002 Buell P3 Electric Starter HOME NOTES ...
Страница 281: ......
Страница 327: ......
Страница 398: ...2002 Buell P3 Electrical 7 71 HOME ...
Страница 399: ...SUBJECT PAGE NO A 1 TOOLS A 1 B 1 ELECTRICAL CONNECTORS B 1 C 1 METRIC INFORMATION C 1 Table Of Contents APPENDICES ...
Страница 400: ...Product 1 2 ...