MasterDirectory User's Guide
126
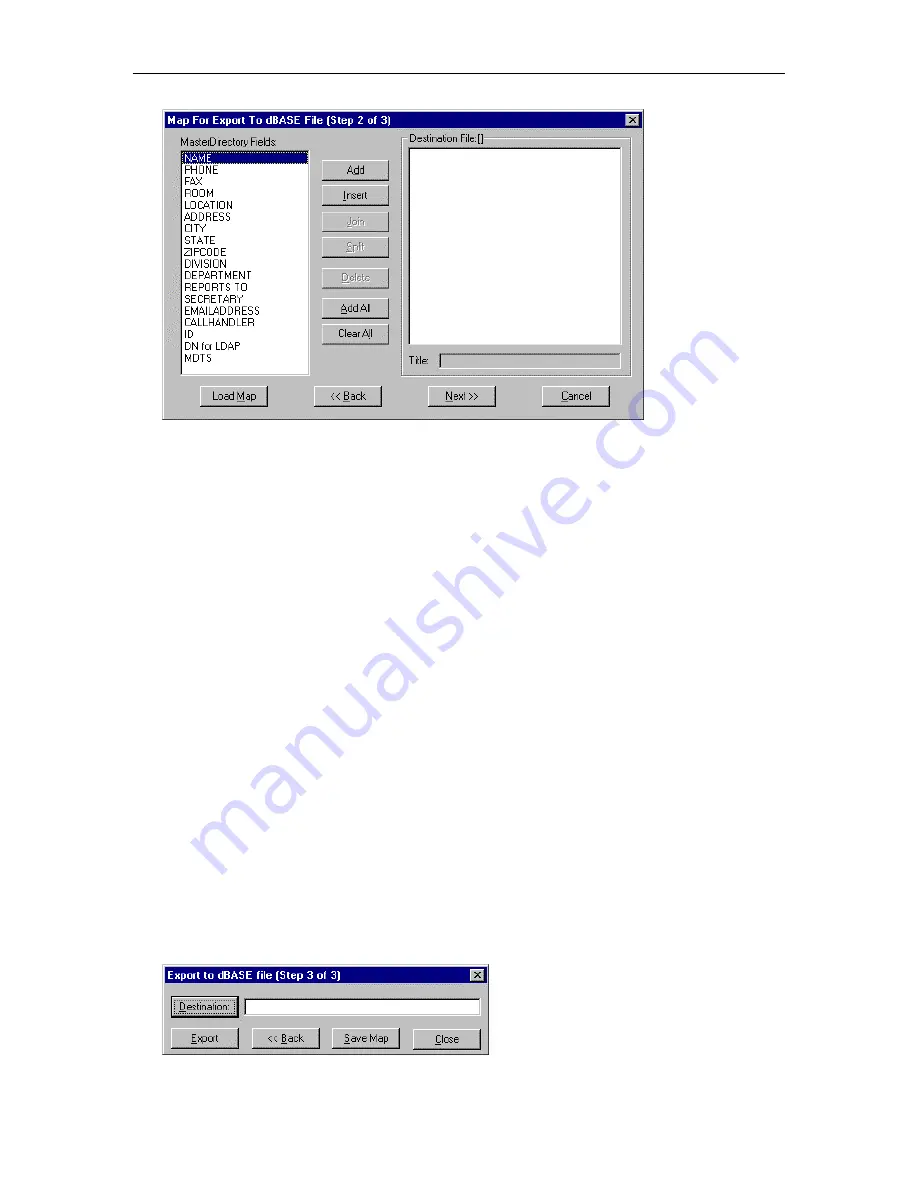
6. In the MasterDirectory Fields box, select the first field that you want to export.
7. Choose the
Add
button.
The selected field appears in the Destination File box.
8. If you want to change the title of the field, type the new title in the Title box, and press the ENTER key
on your PC keyboard.
9. Select the next field that you want to export.
10. Perform one of the following steps:
•
If you want to combine the selected field with the first field selected in the Destination File box,
choose the
Join
button.
The field appears next to the other field in the Destination File box.
•
If you want to add the selected field after the field selected in the Destination File box, choose the
Add
button.
The field appears after the selected field in the Destination File box.
•
If you want to add the selected field before the field selected in the Destination File box, choose
the
Insert
button.
The field appears before the selected field in the Destination File box.
11. If you want to change the title of the field, type the new title in the Title box, and press the ENTER key
on your PC keyboard.
12. Repeat steps 9 and 11 for any other fields that you want to export.
13. When you are finished mapping fields for export, choose the
Next
button.
The Export to dBASE File (Step 3 of 3) dialog box appears.
Содержание MasterDirectory
Страница 1: ...MasterDirectory Data Manager Version 4 3 User s Guide March 2002...
Страница 8: ......
Страница 126: ...MasterDirectory User s Guide 118...
Страница 164: ...MasterDirectory User s Guide 156...
Страница 188: ...MasterDirectory User s Guide 180...
Страница 196: ...MasterDirectory User s Guide 188...
Страница 210: ...MasterDirectory User s Guide 202...


