


Deploying Avaya IP Office™ Platform IP500 V2
Page 101
15-601042 Issue 30j (18 May 2015)
IP Office™ Platform 9.1
Comments on this document? [email protected]
Initial Configuration Using IP Office Manager: Setting the System Locale
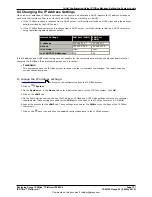
8.4 Changing the IP Address Settings
When a new or defaulted IP Office is switched on, the control unit will make a DHCP requests for IP address settings on
each of its LAN interfaces. That is on its LAN port (LAN1) and on its WAN port (LAN2).
·
If the IP Office receives a response from a DHCP server, it will configure itself as a DHCP client using the address
details provided by the DHCP server.
·
If the IP Office does not receive a response from a DHCP server, it will still configure itself as a DHCP server but
using the following default address details:
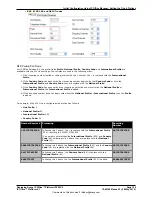
Network Settings
LAN Port (LAN1) WAN Port
(LAN2)
IP address
192.168.42.1.
192.168.43.1
IP Mask
255.255.255.0
255.255.255.0
DHCP Mode
Client
Client
No of DHCP IP Addresses
200.
200.
If the IP address and DHCP mode settings are not suitable for the customers network they should changed. Note that
changing the IP Office's IP address settings requires it to restart.
·
!
WARNING
This process requires the IP Office system to reboot in order to complete the changes. The reboot ends any
current calls and services.
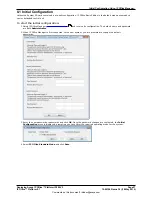
To change the IP address settings:
1.
Start IP Office Manager
and receive the configuration from the IP Office system.
2. Click on
System.
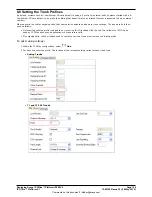
3. On the System tab, in the Name field enter a distinctive name for the IP Office system. Click OK.
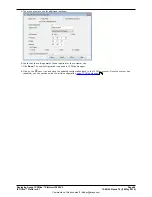
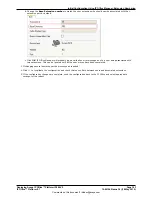
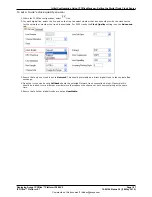
4. Click on the LAN1 tab.
5. On the LAN Settings sub-tab, change the IP Address, IP Mask and DHCP Mode settings to match the customer
requirements. These settings are used for the LAN port on the back of the IP Office control unit. Click OK.
6. Repeat the process for the LAN2 tab. Those settings are used for the WAN port on the back of the IP Office
control unit.
7. Click on the
save icon and save the updated configuration back to the IP Office system.
68


