


CV10 Touch Panel Accessories
28
10" Modero Touch Panels
3.
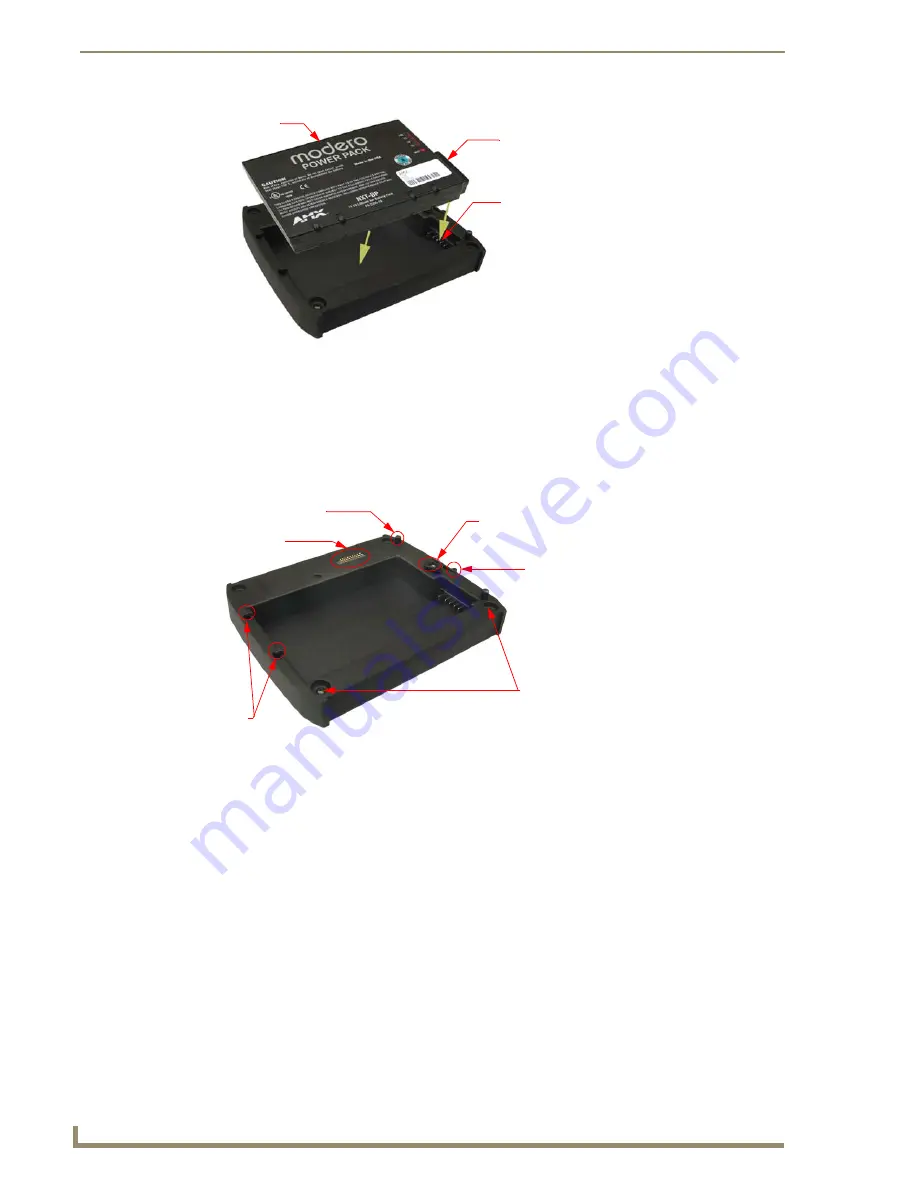
Carefully insert the NXT-BP into the base until the battery securely fits onto the Battery Connector Port.
Installing the NXA-BASE/1 below an NXT-CV10 Panel
1.
Power Off the panel before attempting to attach the NXA-BASE/1.
2.
Place the battery base (with battery) onto a flat/level surface.
3.
Turn the battery locking slider (FIG. 30) to one side until the locking mechanism is horizontal to the base
(going left to right) and the rear battery latch is pointing directly outward (away from the LCD).
4.
Carefully angle the NXT-CV10 panel over the front alignment pegs (FIG. 31). The pegs assist in both
aligning and securing the panel to the base (the locking mechanism secures the base to panel when done).
FIG. 29
Battery installation
FIG. 30
NXA-BASE/1 showing Panel Interface and connector locations
NXT-BP Battery
Battery
Connector
Battery
Connector
Port
FRONT
Panel Interface
connector (male)
Securing
pegs (2)
Front
Back
Battery
locking
mechanism
Battery
locking slider
Insert holes for
NXT-CV10 feet
Alignment
pegs (2)
(Battery not shown
for illustration purposes)
Содержание modero NXD-CV10
Страница 1: ...Operation Reference Guide Touch Panels NXT D CV10 10 Modero Touch Panel Last Revised 7 2 2012 ...
Страница 44: ...CV10 Touch Panel Accessories 32 10 Modero Touch Panels ...
Страница 58: ...Installation 46 10 Modero Touch Panels ...
Страница 88: ...Configuring Communication 76 10 Modero Touch Panels ...
Страница 98: ...Upgrading Modero Firmware 86 10 Modero Touch Panels ...
Страница 192: ...Appendix A 180 10 Modero Touch Panels ...
Страница 206: ...Troubleshooting 194 10 Modero Touch Panels ...
Страница 207: ...Appendix 195 10 Modero Touch Panels ...


