


Configuring Communication
66
12” and 15” Modero Touch Panels
14.
Press the blue
ICSNET/Ethernet
field (
from the Master Connection section
) until the choices cycle to the
word
Ethernet
.
15.
Press the
Mode
field until the choices cycle to the word
URL
.
By selecting
URL
, the System Number field becomes read-only (grey) because the panel pulls this
value directly from the communicating target Master (virtual or not). A virtual Master system value
can be set within the active AMX software applications such as: NetLinx Studio, TPD4, or IREdit.
16.
Press the
Master IP/URL
field to open a Keyboard and enter the IP Address of the PC used as the Virtual
Master.
17.
Click
Done
to accept the new value and return to the System Connection page.
18.
Do not alter the Master Port Number value (
this is the default value used by NetLinx
).
19.
Press the
Back
button to open the Protected Setup page.
20.
Press the on-screen
Reboot
button to both save any changes and restart the panel.
Master Connection section - NetLinx Master Ethernet IP Address - URL Mode
In this mode, enter the System Number (zero for an unknown System Number) and the IP/URL of the Master
(Master Port Number is defaulted to
1319
).
1.
Press the
ICSNET/Ethernet
field (
from the Master Connection section
) until the choices cycle to the
word
Ethernet
. Refer to the
System Connection Page
section on page 103 for more information about the
fields on this page.
2.
Press the
Mode
field until the choices cycle to the word
URL
.
By selecting
URL
, the System Number field becomes read-only (grey) because the panel pulls this
value directly from the communicating target Master (virtual or not). A virtual Master system value
can be set within the active AMX software applications such as: NetLinx Studio, TPD4, or IREdit.
3.
Press the
Master IP/URL
field to open a Keyboard and enter the Master IP Address
(obtained from the
Diagnostics - Networking Address dialog
of the NetLinx Studio application)
.
4.
Click
Done
to accept the new value and return to the System Configuration page.
5.
Do not alter the Master Port Number value (
this is the default value used by NetLinx
).
6.
Enter a username and password (
into their respective fields
) if the target Master has been previously
secured.
7.
Press the
Back
button to open the Protected Setup page.
8.
Press the on-screen
Reboot
button to both save any changes and restart the panel.
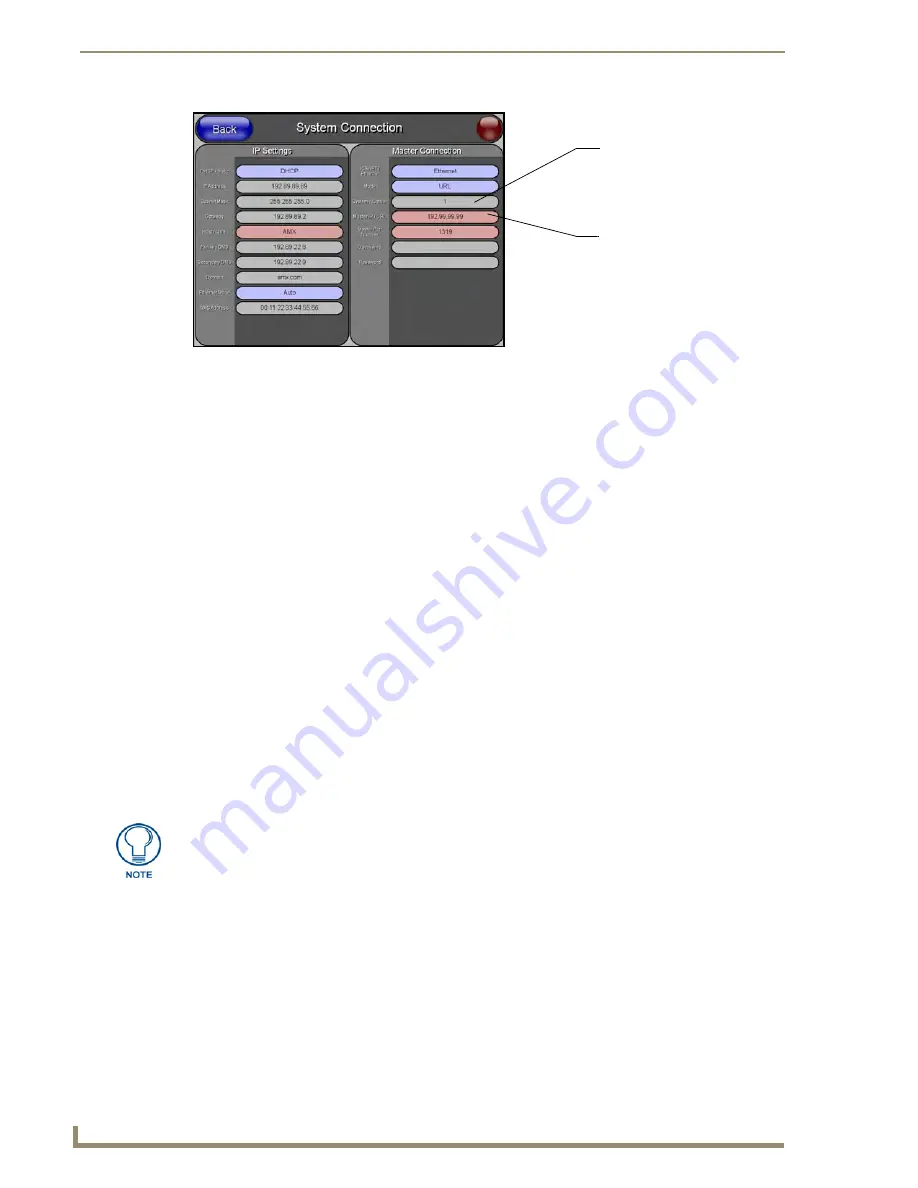
FIG. 64
Sample System Connection page (for Virtual Master communication)
Enter the IP Address
information of the PC
used as a Virtual
Master
The System Number is
assigned to the Virtual
Master within the AMX
software application
(these must match)
If the panel does not appear within the OnLine Tree tab of the Workspace window of
NetLinx Studio, check to make sure that the NetLinx Master System Number (from
within the Device Addressing dialog) is correctly assigned.
Содержание Modero NXD-CA12
Страница 20: ...Introduction 10 12 and 15 Modero Touch Panels...
Страница 60: ...Installation Procedures 12 and 15 Panels 50 12 and 15 Modero Touch Panels...
Страница 82: ...Configuring Communication 72 12 and 15 Modero Touch Panels...
Страница 90: ...Upgrading Modero Firmware 80 12 and 15 Modero Touch Panels...


