


Touch Panel Accessories
29
12” and 15” Modero Touch Panels
7.
Gently place the touch panel LCD facedown onto a soft cloth (this prevents scratching of the LCD while
the battery base is being secured
).
8.
Locate the captive fasteners on the underside of the battery base by angling the base combo slightly
forwards.
9.
Secure each captive fastener head using a grounded flat-head screwdriver until the NXA-BASE/B is
securely attached to the underside of the NXT Modero touch panel.
10.
Firmly grip the panel LCD/base combo and gently rotate the unit back onto the base.
Installing an NXT-BP into the NXA-BASE/B
The battery base does not directly connect to a power supply, but rather receives its power directly from the
Modero panel, through the Panel Interface connector.
1.
With the panel mounted on the battery base, open the battery compartment (FIG. 30) by pulling the
handle outwards. This compartment houses two NXT-BP batteries.
2.
Install the NXT-BP battery. label-side down.
3.
Align the battery connectors with the corresponding battery connector port (located inside the battery
compartment), as shown in FIG. 30.
4.
Insert the NXT-BP battery until the connectors securely fit into the battery connector port.
5.
Repeat steps 2 through 4 for the other battery.
6.
Apply a small amount of pressure to close the battery compartment until the compartment latches.
After a few seconds, the panel will turn On and the AMX logo will appear (indicating the panel is
receiving power.
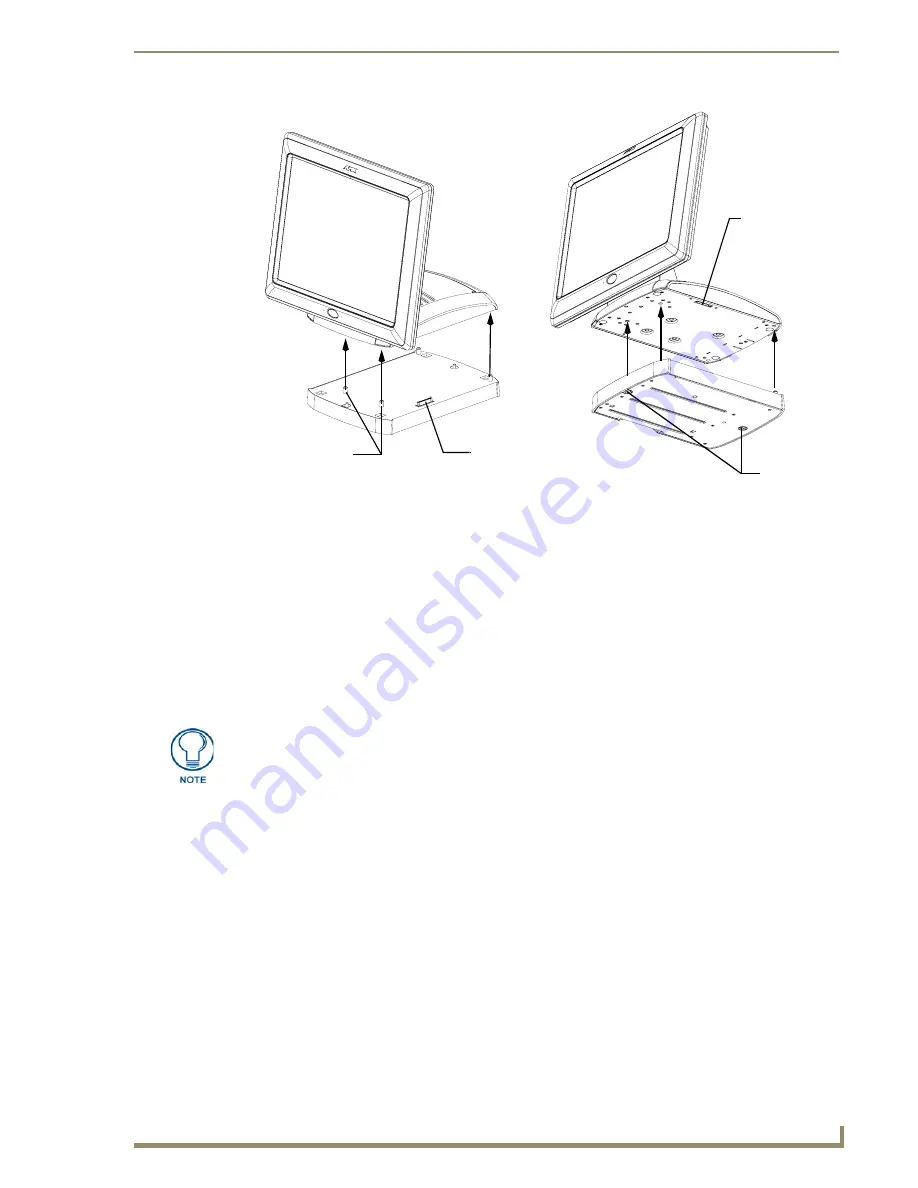
FIG. 29
NXA-BASE/B shown aligning with NXT panel
Panel Interface
connector
Alignment
pegs
Interface
connector
Captive
fasteners
(male)
Top view
Bottom view
(female)
Remove any connectors from the rear of the Modero NXT panel before continuing
with the installation of the batteries. Power can only be supplied after the batteries
have been installed.
Содержание Modero NXD-CA12
Страница 20: ...Introduction 10 12 and 15 Modero Touch Panels...
Страница 60: ...Installation Procedures 12 and 15 Panels 50 12 and 15 Modero Touch Panels...
Страница 82: ...Configuring Communication 72 12 and 15 Modero Touch Panels...
Страница 90: ...Upgrading Modero Firmware 80 12 and 15 Modero Touch Panels...


