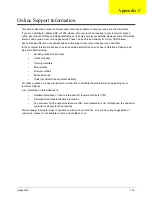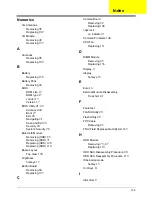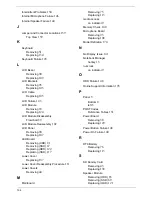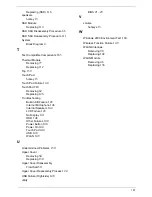
197
Replacing (SSD)
116
speakers
hotkey
13
SSD Module
Replacing
114
SSD SKU Disassembly Procedure
66
SSD SKU Reassembly Procedure
111
System
Block Diagram
4
T
Test Compatible Components
183
Thermal Module
Removing
77
Replacing
112
Top
159
Touch Pad
hotkey
13
Touch Pad Failure
144
TouchPad FFC
Removing
62
Replacing
126
Troubleshooting
Built-in KB Failure
143
Internal Microphone
146
Internal Speakers
144
LCD Failure
143
No Display
141
ODD
148
Other Failures
149
Power Button
148
Power On
140
Touch Pad
144
USB
148
WLAN
149
U
Undetermined Problems
150
Upper Cover
Removing
54
Replacing
130
Upper Cover Disassembly
Flowchart
50
Upper Cover Reassembly Process
124
USB Failure (Rightside)
148
utility
BIOS
21–29
V
volume
hotkeys
13
W
Windows 2000 Environment Test
184
Wireless Function Failure
149
WLAN Antennas
Removing
98
Replacing
102
WLAN Module
Removing
46
Replacing
136
Содержание Aspire One AO531h
Страница 6: ...VI ...
Страница 10: ...X Table of Contents ...
Страница 30: ...20 Chapter 1 ...
Страница 48: ...38 Chapter 2 ...
Страница 63: ...Chapter 3 53 8 Disconnect the FFC and remove the Keyboard ...
Страница 69: ...Chapter 3 59 4 Remove the board from the Upper Cover ...
Страница 82: ...72 Chapter 3 5 Disconnect the Bluetooth cable from the module ...
Страница 89: ...Chapter 3 79 4 Lift the CPU Fan clear of the Mainboard ...
Страница 101: ...Chapter 3 91 4 Lift up the bezel and remove it from the LCD Module ...
Страница 107: ...Chapter 3 97 7 Disconnect the cable from the LCD panel as shown ...
Страница 120: ...110 Chapter 3 4 Press down around the edges of the bezel to secure it in place 5 Replace the six screws and screw caps ...
Страница 138: ...128 Chapter 3 6 Insert the FFC in to the Button Board and close the locking latch ...
Страница 202: ...192 Appendix B ...
Страница 204: ...194 Appendix C ...
Страница 208: ...198 ...


