


User Manual|
VISIX Network Camera
10225 Westmoor Drive, Suite 300, Westminster, CO 80021 | www.3xlogic.com | (877) 3XLOGIC
52
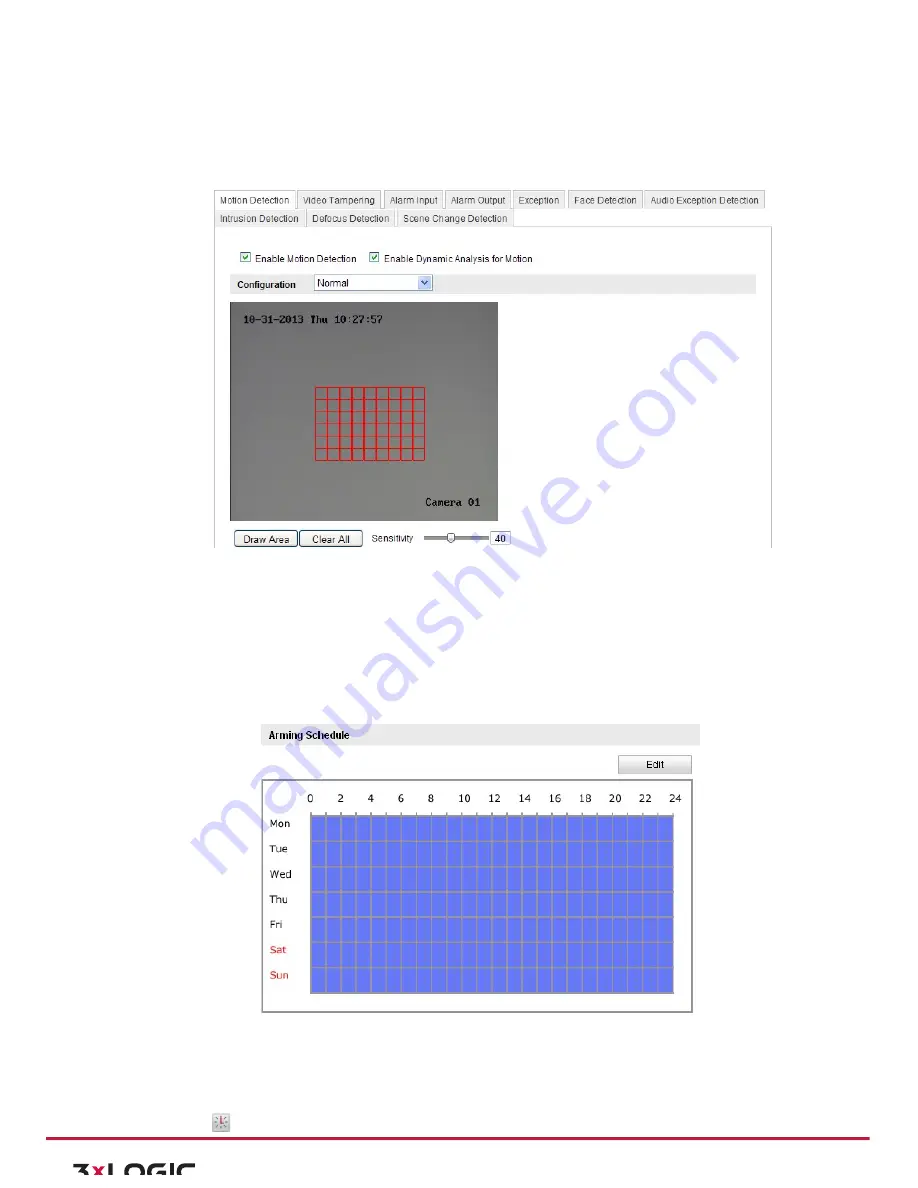
3)
Check the checkbox of Enable Dynamic Analysis for Motion if you want to mark the detected objects
with green rectangles.
Note:
Select Disable for rules if you don’t want the detected objected displayed with the
rectangles. Select disable from
Configuration-‐Local Configuration-‐Live View Parameters-‐rules
.
Figure 6-‐33
Enable Motion Detection
4)
Click
Draw Area
. Click and drag the mouse on the live video to draw a motion detection area.
5)
Click
Stop Drawing
to finish drawing one area.
6)
(Optional) Click
Clear All
to clear all of the areas.
7)
(Optional) Move the slider to set the sensitivity of the detection.
Set the Arming Schedule for Motion Detection.
Steps:
Figure 6-‐34
Arming Time
1)
Click
Edit
to edit the arming schedule. The Figure 6-‐34 shows the editing interface of the arming
schedule.
2)
Choose the day you want to set the arming schedule.
3)
Click
to set the time period for the arming schedule.