


User Manual|
VISIX Network Camera
10225 Westmoor Drive, Suite 300, Westminster, CO 80021 | www.3xlogic.com | (877) 3XLOGIC
26
5.2
Starting Live View
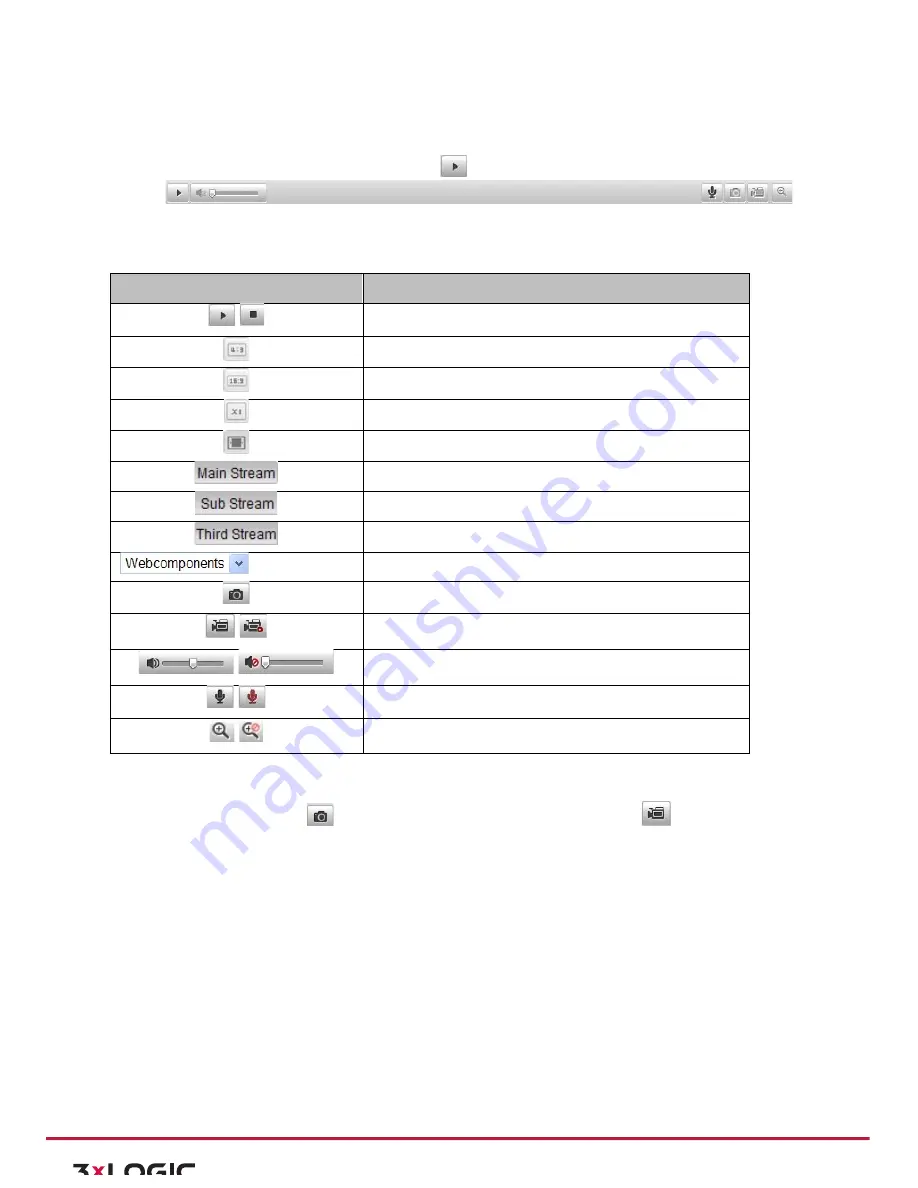
In the live view window as shown in Figure 5-‐2, click
on the toolbar to start the live view of the camera.
Figure 5-‐2
Live View Toolbar
Table 5-‐1
Descriptions of the Toolbar
Icon
Description
Start/Stop live view.
The window size is 4:3.
The window size is 16:9.
The original widow size.
Self-‐adaptive window size.
Live view with the main stream.
Live view with the sub stream.
Live view with the third stream.
Click to select the third-‐party plug-‐in.
Manually capture the picture.
Manually start/stop recording.
Audio on and adjust volume /Mute.
Turn on/off microphone.
Turn on/off 3D zooming function.
5.3
Recording and Capturing Pictures Manually
In the live view interface, click
on the toolbar to capture the live pictures or click
to record the live
view. The saving paths of the captured pictures and clips can be set on the
Configuration > Local Configuration
page. To configure remote scheduled recording, please refer to
Section 7.2
.
Note:
The captured image will be saved as JPEG file or BMP file in your computer.
5.4
Operating PTZ Control
Purpose:
In the live view interface, you can use the PTZ control buttons to realize pan/tilt/zoom control of the camera.
Before you start:
To realize PTZ control, the camera connected to the network must support the PTZ function or a pan/tilt unit
has been installed to the camera. Please properly set the PTZ parameters on RS-‐485 settings page referring to
Section 10.8 RS-‐485 Settings.
PTZ CONTROL PANEL
/
/
/
/
/