Copyright 1010music LLC 2023
Page 66 of 97
Page 67 of 97
Copyright 1010music LLC 2023
Bitbox MK2 2.1 User Manual
Mar 1, 2023
Bitbox MK2 2.1 User Manual
Mar 1, 2023
To Rename a Preset:
1.
Press the HOME button repeatedly until you see the Menu screen, then touch
Presets to display the Preset Management screen.
2.
Use the control knobs to scroll through the list of presets. The blue highlight
indicates the currently selected preset.
3.
Touch File to display the Preset File Menu.
4.
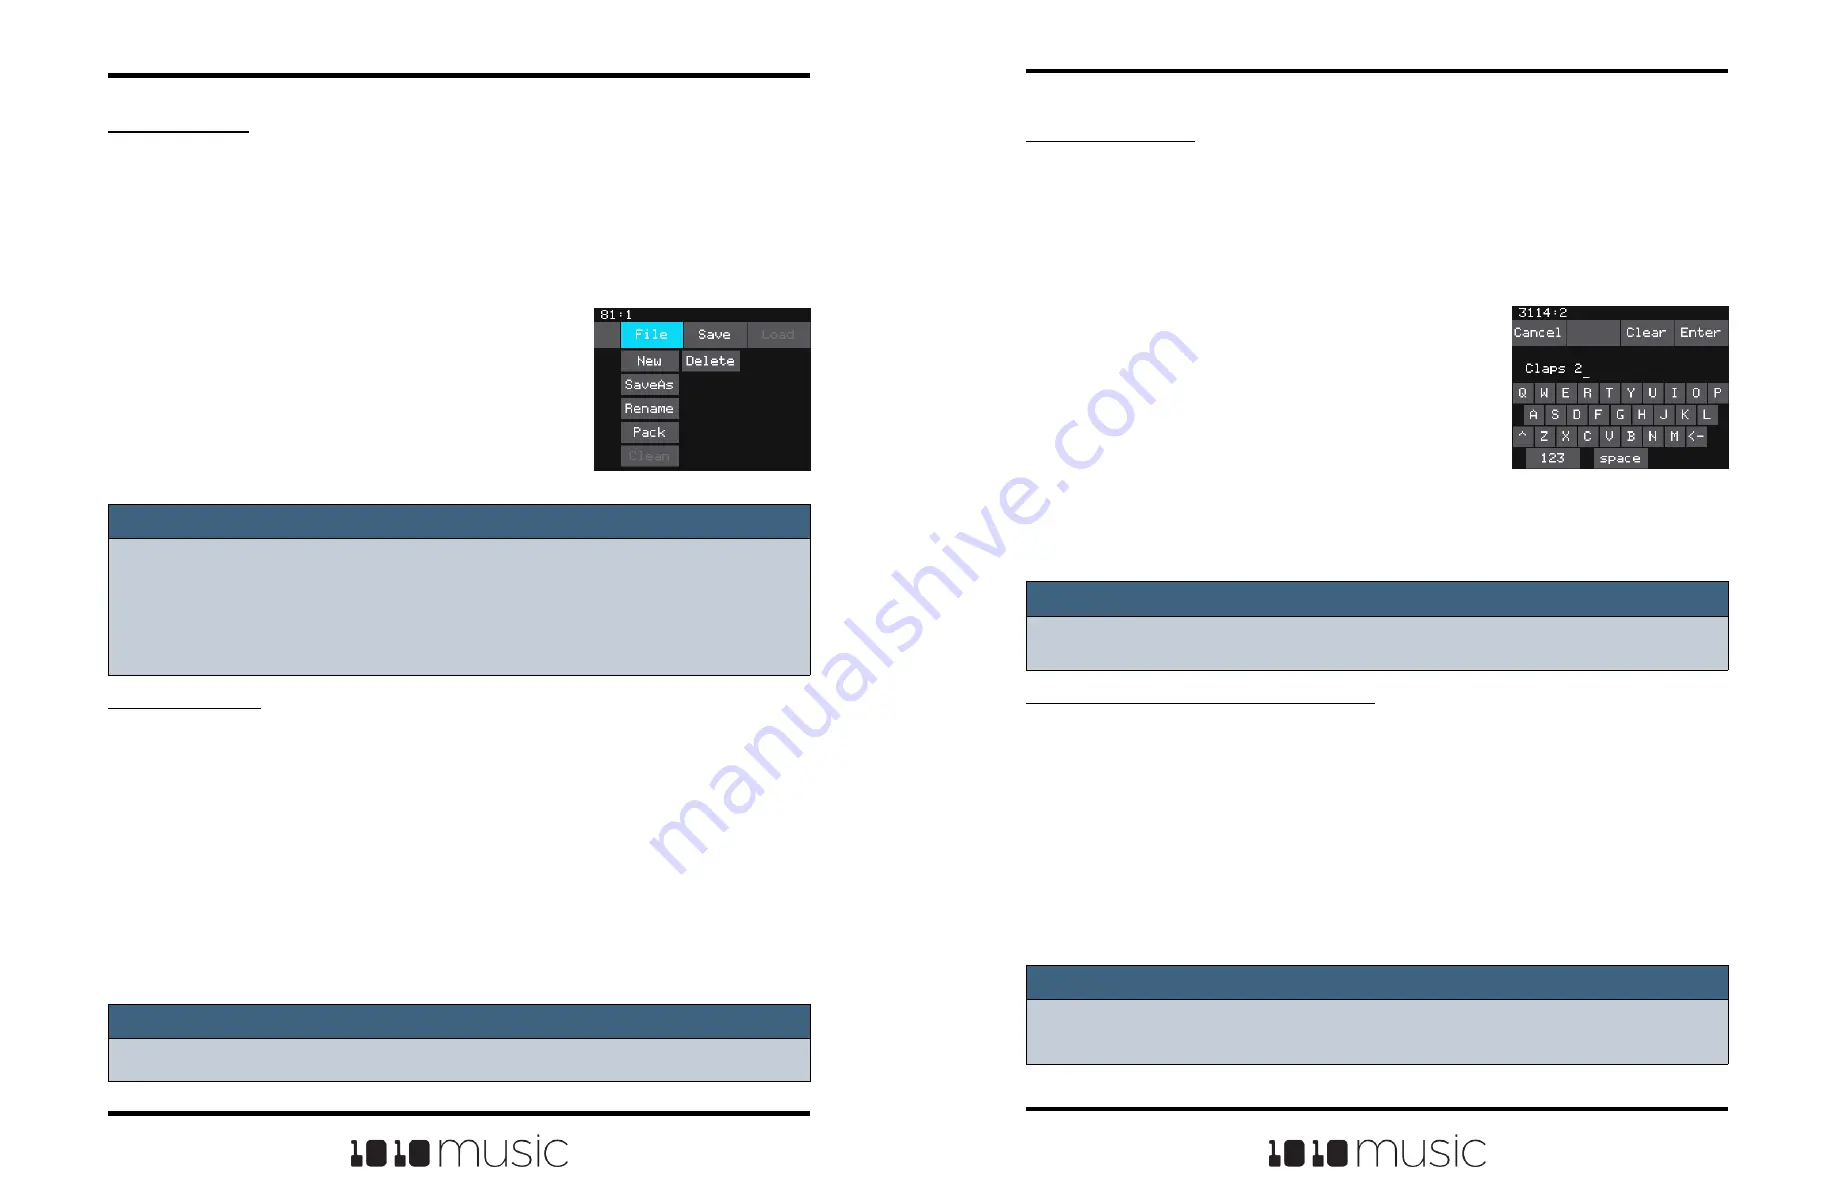
Touch Rename to display the keyboard screen.
5.
Touch the back arrow <- to erase the previous
character in the preset name, or touch Clear to
start over. Turn a knob to position the cursor
where you want type. Use the onscreen
keyboard to type in a new name. Use the carat
button ^ to toggle between upper- and lower-
case letters. Touch the 123 button to display
the numeric keyboard if needed. When the
name is complete, touch Enter to save the
name and return to the Presets screen with the
preset selected, but not loaded.
Keyboard Screen
Note:
► Renaming a preset does not load that preset.
Note:
► If you enter a name that is already in use, you will replace the old file with the
current preset.
To Save Current Changes as a New Preset:
Sometimes while working on a preset, you decide to save your changes to a different
preset in order to save your work while still preserving the original preset state. To save
current changes as a new preset:
1.
Press the HOME button repeatedly until you see the Menu screen, then touch
Presets to display the Preset Management screen.
2.
Touch File to display the Preset File Menu.
3.
Touch Save As. Bitbox mk2 displays a touch screen keyboard you can use to
enter a new name. Touch the enter button to save the changes and go back
to the Pads screen with the renamed preset loaded.
Note:
► If you continue to add WAV files to your preset after you pack it, the preset will
still point to these WAV files in their source folders. Pack the preset again to copy
these files over.
► If the Pack option is disabled, then the preset is fully packed already.
Note:
► You cannot undo deleting a preset.
To Pack a Preset:
After you spend time carefully creating a preset, you don’t want to worry about it getting
broken if you make changes to that WAV file or re-organize your sample library. You
may also want to gather up all of the files used in a preset so you can move it to another
microSD card or archive it on your computer. The Pack feature was created to address
these needs.
1.
Load the preset you want to pack.
2.
Push HOME until you see the Menu screen,
then touch Presets to display the Preset
Management screen.
3.
Touch File, then Pack. Bitbox mk2 will copy all
of the WAV files used by this preset into the
preset’s folder. Any multi-sample banks will be
copied with their folder. The preset.xml file will
be updated to point to these copies of the WAV
files and will be saved.
To Delete a Preset:
When you delete a preset, you remove the preset from the list of presets on the Preset
Management Screen, and you delete the corresponding folder and XML file from the
microSD card. All files in the preset folder, including new recordings, will be deleted. To
delete a preset:
1.
Press the HOME button repeatedly until you see the Menu screen, then touch
Presets to display the Preset Management screen.
2.
Use the control knobs to scroll through the list of presets.
3.
Touch File to display the Preset File Menu.
4.
Touch Delete to delete the highlighted preset. Touch OK on the confirmation
prompt to continue with Delete, or touch anywhere else to cancel.
Preset File Menu


