Copyright 1010music LLC 2023
Page 52 of 97
Page 53 of 97
Copyright 1010music LLC 2023
Bitbox MK2 2.1 User Manual
Mar 1, 2023
Bitbox MK2 2.1 User Manual
Mar 1, 2023
Manage WAV Files
Bitbox mk2 comes with hundreds of WAV files bundled with the firmware. You can load
WAV files into pads in order to add them to a preset. We talked about how to configure
pads previously in this document. Here we will discuss what tasks you can perform to
manage the WAV files themselves.
Working with WAV Files on the microSD Card
You can use the microSD card with your computer to manage the WAV files on the card.
You can load new WAV files onto the card or backup your existing WAV files for
safekeeping. Bitbox mk2 is compatible with all standard WAV files.
You can use a microSD Adapter to insert your microSD card into your computer. Then
you may use standard file techniques to rename the WAV files, reorganize them into
directories, delete them, copy them onto your computer or copy them onto other
microSD cards. We recommend that you occasionally make backup copies of your WAV
files, especially before upgrading to new firmware.
Bitbox mk2 supports organizing WAV files into folders and sub-folders. You can create
your own folder structure on the microSD card.
When you create a new recording, bitbox mk2 will store it in the folder for that preset.
For example, the first new recording for the My Kickin Grooves preset will be saved as
\Presets\My Kickin Grooves\RC000001.wav. When you load an existing WAV file into a
pad, the preset will have a pointer to that WAV file in its source folder. If you want to
gather copies of all of the files for a preset into the preset folder, use the
. We will discuss how to do this below.
Note:
► If you delete, move or rename a WAV file, it will no longer be available for use by
presets that were previously using it. The name of the WAV file will still appear in
the Preset, but the Waveform screen will be blank until you load a new WAV file
into the pad.
► Bitbox mk2 supports samples in the WAV file format. It supports 1 or 2 channel
files with 16, 24 or 32 bit resolution at any sample rate. 48kHz is the preferred
sample rate.
► WAV file names may use Alpha Numeric Characters (A-Z, 0-9) and some special
characters. The following characters are NOT allowed:
“ / \ ? * < > : |
File names must be less than 256 characters, including the path name. Files that
do not conform to these naming constraints will not be recognized by bitbox mk2.
6.
Pack up the target preset (MySong in our example) to copy the multi-sample
files into a sub-folder under the target preset’s folder. In this case, you would
end up with the following folder: \Presets\MySong\MyBank
7.
Now you are free to delete or move the original MyBank preset if desired, or
leave it there for future re-use.
Trim WAV Files
When recording new samples, you sometimes get some unwanted material at the start
or the end of the WAV file. Here’s how to trim the file:
1.
Open a pad with a WAV file you want to trim.
2.
Set the pad mode to Sample.
3.
On the WAV screen, turn the top left knob to set the left side of the pink
bracket to where you want the new file to begin. Turn the top right knob to set
the length of the pink bracket to the desired end point for the WAV file.
4.
Touch the name of the WAV file at the top of the screen to display the WAV
selection screen.
5.
Touch File and then Trim. Bitbox mk2 will ask if you want to Trim and Save?
Touch OK to overwrite the WAV file with the portions outside of the pink
bracket trimmed off. Touch anywhere else on the screen to cancel.
6.
Save your preset to save the change to the pad. Otherwise, the length
parameter for the pad will be wrong when you reload the preset.
Note:
► You may want to use File -> Save As before you trim the file to give yourself a
backup copy of the file.
Use Clipboard Functions with Cells
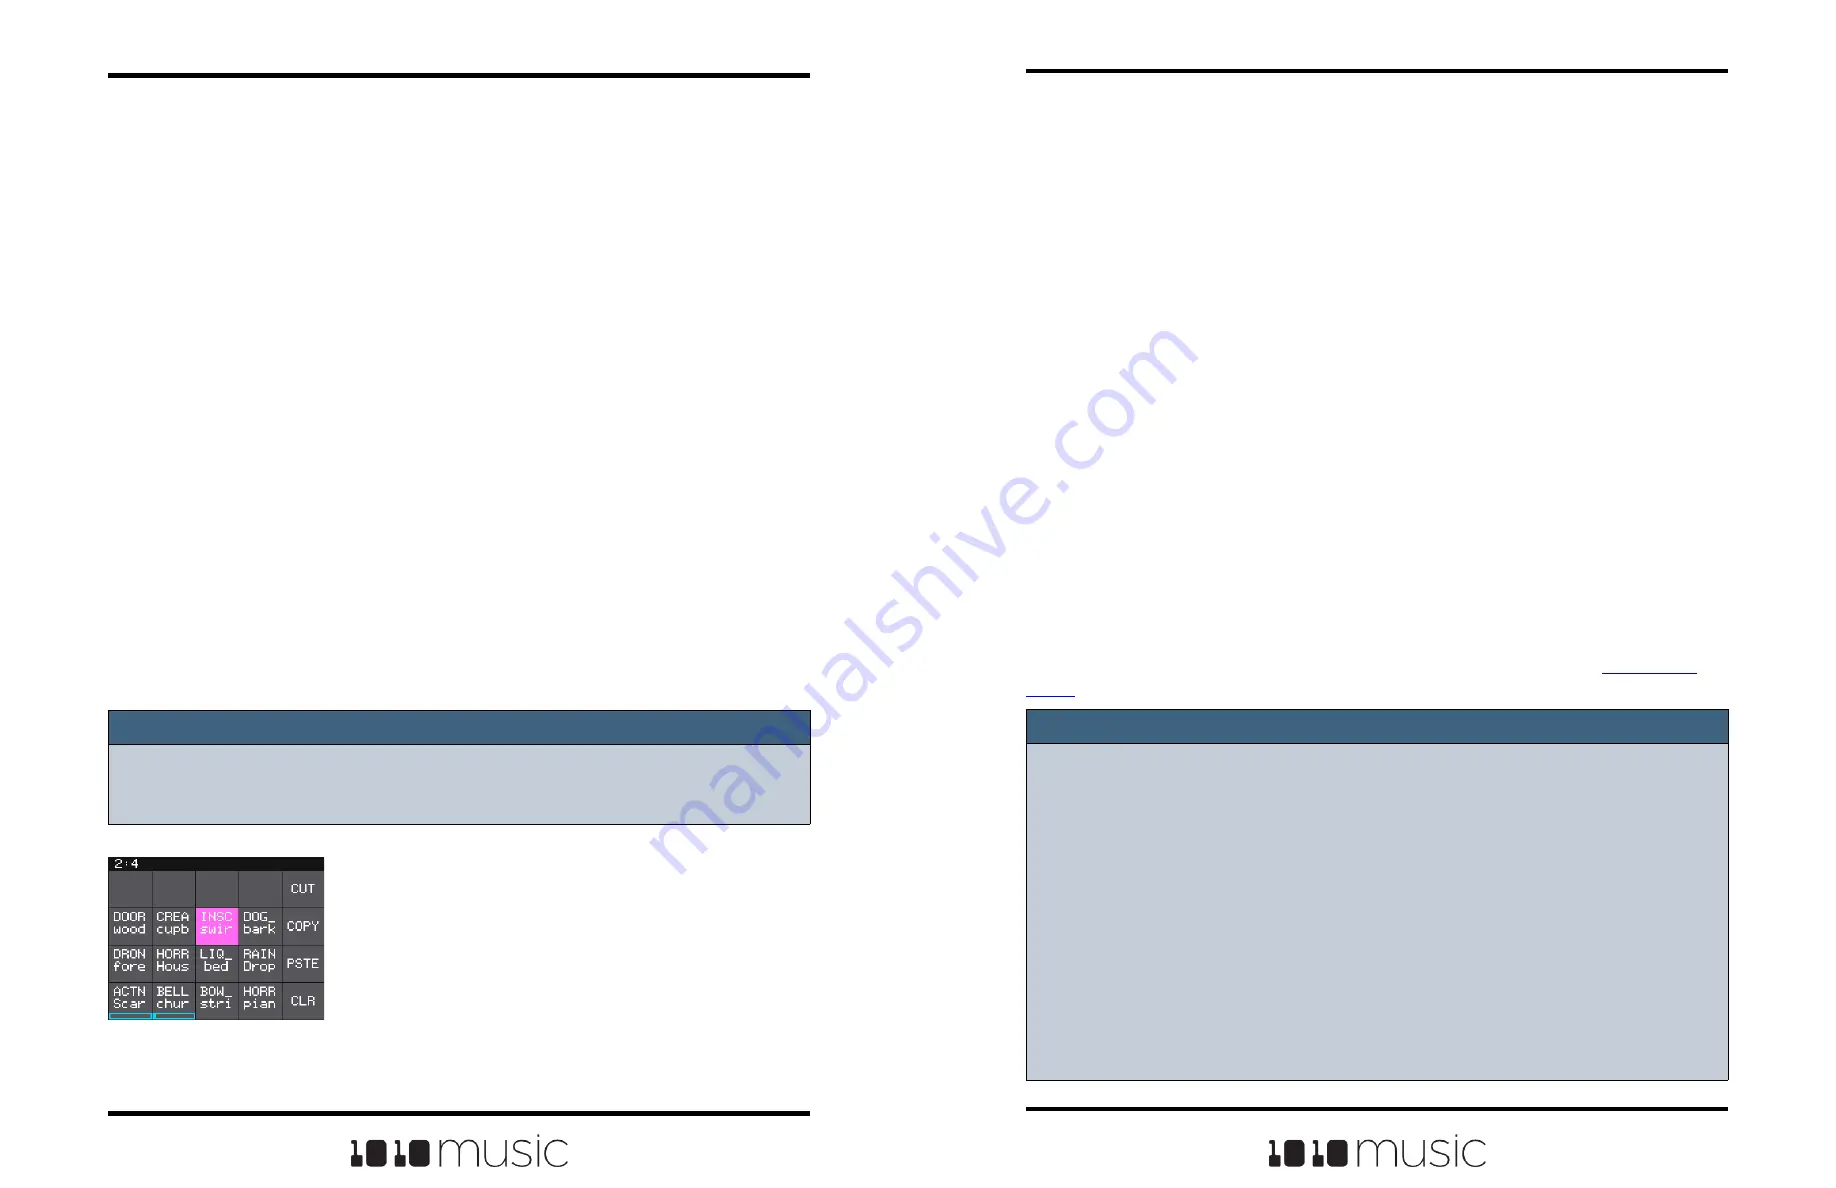
Bitbox mk2 has a slightly hidden set of clipboard buttons
on the Pads screen. You can use these buttons to Cut,
Copy and Paste between pads and to Clear a pad. To
access these functions, turn the lower right knob while on
the Pads screen. The column of EXT bar graphs on the
right edge of the screen will be replaced with several
clipboard buttons. Select the pad you want to act on, then
touch the button for the desired action. Turn the lower
right knob back the other way to go back to the EXT bar.
Clipboard Menu


