7 - 53
CHAS
HYDRAULIC CLUTCH
EAS00307
CAUTION:
@
Clutch components rarely require disas-
sembly.
Therefore, always follow these preventive
measures:
• Never disassemble clutch components
unless absolutely necessary.
• If any connection on the hydraulic clutch
system is disconnected, the entire clutch
system must be disassembled, drained,
cleaned, properly filled, and bled after
reassembly.
• Never use solvents on internal clutch
components.
• Use only clean or new clutch fluid for
cleaning clutch components.
• Clutch fluid may damage painted sur-
faces and plastic parts. Therefore, always
clean up any spilt clutch fluid immedi-
ately.
• Avoid clutch fluid coming into contact
with the eyes as it can cause serious
injury.
FIRST AID FOR CLUTCH FLUID ENTERING
THE EYES:
• Flush with water for 15 minutes and get
immediate medical attention.
@
DISASSEMBLING THE CLUTCH MASTER
CYLINDER
NOTE:
Before disassembling the clutch master cylin-
der, drain the clutch fluid from the entire clutch
system.
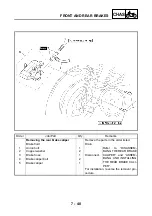
1. Remove:
• union bolt
1
• copper washers
2
• clutch hose
3
NOTE:
To collect any remaining clutch fluid, place a
container under the master cylinder and the
end of the clutch hose.
Summary of Contents for VMX12 2001
Page 1: ...VMX12 2001 3LRD AE1 SERVICEMANUAL ...
Page 2: ......
Page 8: ......
Page 9: ...GEN INFO 1 ...
Page 11: ...GEN INFO ...
Page 21: ......
Page 22: ...SPEC 2 ...
Page 24: ...SPEC ...
Page 52: ...2 28 SPEC OIL FLOW DIAGRAMS 1 Camshaft 2 Main gallery 3 Crankshaft 4 Oil level switch ...
Page 54: ...2 30 SPEC OIL FLOW DIAGRAMS 1 Crankshaft 2 Oil pipe 3 Oil filter ...
Page 65: ...CHK ADJ 3 ...
Page 125: ......
Page 126: ...ENG 4 ...
Page 130: ...ENG ...
Page 236: ......
Page 237: ...COOL 5 ...
Page 239: ...COOL ...
Page 258: ...CARB 6 ...
Page 260: ...CARB ...
Page 272: ......
Page 273: ...CHAS 7 ...
Page 389: ......
Page 390: ...ELEC 8 ...
Page 396: ...8 4 ELEC SWITCHES ...
Page 417: ...8 25 ELEC STARTER MOTOR 3 Install O rings 1 bolts 2 New T R 5 Nm 0 5 m kg ...
Page 445: ...TRBL SHTG 9 ...


