background image

This manual should be considered a permanent part of the vehicle

and should remain with the vehicle when it is resold.

This publication includes the latest production information available

before printing. Honda Motor Co., Ltd. reserves the right to make

changes at any time without notice and without incurring any

obligation.

No part of this publication may be reproduced without written

permission.

The vehicle pictured in this owner’s manual may not match your

actual vehicle.

© 2020 Honda Motor Co., Ltd.

20201028145327_32K2CA000_eng_BOOK Page 1 Wednesday, October 28 2020 15:00:25 JST

Summary of Contents for NSC110 2020

Page 1: ...before printing Honda Motor Co Ltd reserves the right to make changes at any time without notice and without incurring any obligation No part of this publication may be reproduced without written perm...

Page 2: ...s manual carefully Follow all recommendations and procedures contained in this manual Pay close attention to safety messages contained in this manual and on the vehicle The following codes in this man...

Page 3: ...wn good judgement You will find important safety information in a variety of forms including Safety labels on the vehicle Safety Messages preceded by a safety alert symbol and one of three signal word...

Page 4: ...tents Vehicle Safety P 2 Operation Guide P 18 Maintenance P 57 Troubleshooting P 90 Information P 116 Specifications P 130 20201028145327_32K2CA000_eng_BOOK Page 4 Wednesday October 28 2020 15 00 25 J...

Page 5: ...g Precautions P 11 Accessories Modifications P 15 Loading P 16 20201028145327_32K2CA000_eng_BOOK Page 5 Wednesday October 28 2020 15 00 25 JST This section contains important information for safe ridi...

Page 6: ...rel Instruct your passenger on holding onto the rear carrier or your waist leaning with you in turns and keeping their feet on the footpegs even when the vehicle is stopped Take Time to Learn Practice...

Page 7: ...or install accessories that would make your vehicle unsafe 2 P 15 If You are Involved in a Crash Personal safety is your first priority If you or anyone else has been injured take time to assess the...

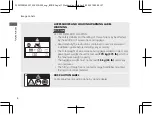
Page 8: ...de Never run your vehicle inside a garage or other enclosure 3WARNING Running the engine of your vehicle while in an enclosed or even partially enclosed area can cause a rapid build up of toxic carbon...

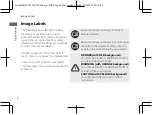
Page 9: ...label are as follows Read instructions contained in Owner s Manual carefully Read instructions contained in Shop Manual carefully In the interest of safety take the vehicle to be serviced only by your...

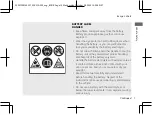
Page 10: ...the battery very well Handle the battery electrolyte with extreme care as it contains dilute sulfuric acid Contact with your skin or eyes can burn you or cause loss of your eyesight Read this manual...

Page 11: ...cessory The total weight of accessories and luggage added to rider s and passenger s weight should not exceed 170 kg 375 lb which is the maximum weight capacity The luggage weight must not exceed 15 k...

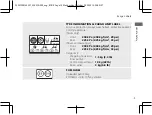
Page 12: ...m2 33 psi Driver and passenger Front 200 kPa 2 00 kgf cm2 29 psi Rear 225 kPa 2 25 kgf cm2 33 psi Cargo limit Shopping hook and inner pocket 1 5 kg 3 3 lb Centre compartment 10 kg 22 lb Rear carrier 3...

Page 13: ...afety standard certified high visibility correct size for your head Must fit comfortably but securely with the chin strap fastened Face shield with unobstructed field of vision or other approved eye p...

Page 14: ...istances are longer Avoid continuous braking u Repeated braking such as when descending long steep slopes can seriously overheat the brakes reducing their effectiveness For full braking effectiveness...

Page 15: ...o not touch the engine muffler brakes and other high temperature parts until they cool down TU type To reduce the likelihood of theft always lock the handlebar and remove the key and close the shutter...

Page 16: ...e centre stand To lower the centre stand stand on the left side of the vehicle Hold the left handle grip and the rear carrier Press down on the tip of the centre stand with your right foot and simulta...

Page 17: ...Refuelling and Fuel Guidelines Follow these guidelines to protect the engine fuel system and catalytic converter Use only unleaded petrol Use recommended octane number Using lower octane petrol will r...

Page 18: ...accessories on your vehicle be certain the modification is safe and legal 3WARNING Improper accessories or modifications can cause a crash in which you can be seriously hurt or killed Follow all instr...

Page 19: ...Maximum luggage weight 2 P 130 Tie all luggage securely evenly balanced and close to the centre of the vehicle Do not place objects near the lights or the muffler 3WARNING Overloading or improper loa...

Page 20: ...20201028145327_32K2CA000_eng_BOOK Page 20 Wednesday October 28 2020 15 00 25 JST Vehicle Safety 17...

Page 21: ...gradually Obey the speed limit How to use basic features Instruments P 22 Indicators P 24 Switches P 26 Steering Lock P 28 Starting the Engine P 45 Start and warm the engine Avoid revving the engine...

Page 22: ...light will indicate that you have applied the brakes Parking P 12 Stopping If pulling off the road signal early enough to show traffic that you are pulling over and pull over smoothly Turning Corners...

Page 23: ...age 23 Wednesday October 28 2020 15 00 25 JST Operation Guide 20 Throttle grip P 86 Document bag P 54 Front brake fluid reservoir P 79 Engine oil fill cap dipstick P 77 Centre compartment P 54 Helmet...

Page 24: ...dnesday October 28 2020 15 00 25 JST Operation Guide 21 Side stand P 85 Rear brake lock lever P 41 Rear brake lever P 81 Fuel fill cap P 50 Helmet holder P 53 Centre stand P 13 Seat P 52 Tools P 72 In...

Page 25: ...ilometer per hour km h and or miles per hour mph depend on type Speedometer Display Check When the ignition switch is turned to the On position the speedometer needle swings to the maximum scale on th...

Page 26: ...in a repeat pattern or turns off P 94 Remaining fuel when only 1st E segment starts flashing approximately 0 9 L 0 24 US gal 0 20 Imp gal Fuel gauge NOTICE You should refuel when the reading approache...

Page 27: ...ition If it comes on while engine is running P 92 If one of these indicators does not come on when it should have your dealer check for problems Turn signal indicator High beam indicator Honda SMART K...

Page 28: ...age 28 Wednesday October 28 2020 15 00 25 JST Operation Guide 25 Comes on briefly when the Idling Stop switch in the Idling stop position with the ignition switch turned to the On position Idling Stop...

Page 29: ...eration Guide 26 Idling Stop switch Headlight dimmer switch High beam Low beam Start button Turn signal switch u Pressing the switch turns the turn signal off Horn button Idling Stop system P 42 Switc...

Page 30: ...e seat opener switch On Turns electrical system on for starting riding SEAT Operates the seat opener switch Lock Locks steering Off Turns engine off u Key can be removed when in the Off or Lock positi...

Page 31: ...ition u Jiggle the handlebar if the lock is difficult to engage ED E type Push the ignition switch down and turn it to the Lock position u Jiggle the handlebar if the lock is difficult to engage u To...

Page 32: ...he ignition switch to the Off position ED E type Push the ignition switch in and turn it to the Off position u To unlock the ignition switch P 36 20201028145327_32K2CA000_eng_BOOK Page 32 Wednesday Oc...

Page 33: ...of the shutter and turn the shutter key counterclockwise u You can also close the shutter by moving the knob upward without the shutter key c Remove the ignition key Open Align the projection of the...

Page 34: ...ns a two way authentication between the vehicle and the Honda SMART Key to verify if it is the registered Honda SMART Key The Honda SMART Key system uses low intensity radio waves It may affect medica...

Page 35: ...us Lightly press the ON OFF button The Honda SMART Key LED will show the status When the Honda SMART Key LED is Green active Honda SMART Key system authentication can be performed Red inactive Honda S...

Page 36: ...re facilities nearby that generate strong radio waves or noise such as TV towers power stations radio stations or airports When you carry the Honda SMART Key with a laptop or wireless communication de...

Page 37: ...erating range of your vehicle even if you are on the other side of a wall or window If you are away from your vehicle but your Honda SMART Key is still within operating range deactivate the Honda SMAR...

Page 38: ...person after you get on and off the vehicle or while riding Do not place the Honda SMART Key in any compartment If the ignition switch is in the On position the vehicle can be operated even by a perso...

Page 39: ...on within 20 seconds after pushing the ignition switch the Honda SMART Key indicator will go off the turn signals flash once and then the ignition switch will be locked When the Honda SMART Key system...

Page 40: ...ds after turning the ignition switch from On to SEAT Off or Lock position Switch the Honda SMART Key system to inactive P 32 c Make sure that the Honda SMART Key indicator goes off the turn signals fl...

Page 41: ...e SEAT position the ignition switch can be turned to the Off position only once When the ignition switch is locked in the Off position the steering cannot be locked To lock the steering unlock the ign...

Page 42: ...Honda SMART Key with the ignition switch in the Off or Lock position the turn signals light informing you of your vehicle s location The answer back system uses low intensity radio waves It may affect...

Page 43: ...nger operate When the system is active and the vehicle receives a signal from pressing answer back button system activation will be extended for 10 days To reset the system turn the ignition switch to...

Page 44: ...will not function if the rear brake is not adjusted properly P 82 Unlocking Squeeze the rear brake lever u Before riding make sure that the rear brake lock is fully released so there is no drag on the...

Page 45: ...topped by the Idling Stop system OFF Idling u Idling Stop indicator does not come on when the Idling Stop system is off Activation of the Idling Stop System The Idling Stop system becomes ready to sto...

Page 46: ...ngine will not restart even when you open the throttle Safety Precaution for the Idling Stop System Do not go away from the vehicle while the Idling Stop indicator is flashing When you go away from th...

Page 47: ...en you open the throttle Engine Does Not Start Even If the Throttle is Opened P 97 NOTICE Headlight stays on after the engine is stopped by the Idling Stop system The battery may discharge and you may...

Page 48: ...disabled after a certain amount of time or if you leave the authentication range Restart the engine by performing step b c under the starting procedure u If the engine of this vehicle is stopped by th...

Page 49: ...ver is squeezed and the side stand is up c Turn the ignition switch to the On position ED E type u To unlock the ignition switch P 36 Confirm the following The PGM FI malfunction indicator lamp MIL is...

Page 50: ...ot start a Open the throttle fully and press the start button for 5 seconds b Follow the normal starting procedure c If the engine starts with unstable idle open the throttle slightly d If the engine...

Page 51: ...up b Get on the vehicle u Mount the vehicle from the left side keeping at least one foot on the ground c Release the rear brake lock d Acceleration and deceleration To accelerate Open the throttle sl...

Page 52: ...ake levers together Do not apply the brake lock while riding It may cause the wheel to lock reducing control of the vehicle 20201028145327_32K2CA000_eng_BOOK Page 52 Wednesday October 28 2020 15 00 25...

Page 53: ...fuelling and Fuel Guidelines P 14 Opening the Fuel Fill Cap a Open the seat P 52 b Turn the fuel fill cap counterclockwise until it stops and remove the fuel fill cap Do not fill with fuel above the l...

Page 54: ...d fuel tank are aligned b Close the seat 3WARNING Petrol is highly flammable and explosive You can be burned or seriously injured when handling fuel Stop the engine and keep heat sparks and flame away...

Page 55: ...side of the seat opener switch d Open the seat Seat Close Close and push down on the rear of the seat until locks Make sure that the seat is locked securely to pull it up lightly Take care not to lock...

Page 56: ...can interfere with your ability to safely operate the vehicle and could lead to a crash in which you can be seriously hurt or killed Use the helmet holder only while parked Do not ride with a helmet...

Page 57: ...limit Maximum Weight 10 kg 22 lb u Do not store any items that are flammable or susceptible to heat damage u Do not store valuables or fragile articles Document Bag The document bag is in the documen...

Page 58: ...ttach large luggage to the hook that would hang out from the vehicle and or interfere with the movement of your feet 20201028145327_32K2CA000_eng_BOOK Page 58 Wednesday October 28 2020 15 00 25 JST Op...

Page 59: ...he shopping hook and the inner pocket shall be no more than 1 5 kg 3 3 lb Rear Carrier Never exceed the maximum weight limit Maximum Weight 3 kg 6 6 lb 20201028145327_32K2CA000_eng_BOOK Page 59 Wednes...

Page 60: ...75 Clip P 76 Engine Oil P 77 Brakes P 79 Side Stand P 85 Throttle P 86 Other Replacement P 87 Replacing the Honda SMART Key Battery P 87 20201028145327_32K2CA000_eng_BOOK Page 60 Wednesday October 28...

Page 61: ...Safety Always read the maintenance instructions before you begin each task and make sure that you have the tools parts and skills required We cannot warn you of every conceivable hazard that can arise...

Page 62: ...nance to help ensure that your vehicle is properly maintained Make sure that whomever performs the maintenance completes this record All scheduled maintenance is considered a normal owner operating co...

Page 63: ...ol System Drive Belt Final Drive Oil 4 2 Years Battery 64 Maintenance Level Maintenance Legend Intermediate We recommend service by your dealer unless you have the necessary tools and are mechanically...

Page 64: ...s Wear Side Stand 85 Suspension Nuts Bolts Fasteners Wheels Tyres 69 Steering Head Bearings Notes 1 At higher odometer reading repeat at the frequency interval established here 2 Service more frequent...

Page 65: ...rottle Check for smooth opening and full closing in all steering positions 2 P 86 Engine oil level Add engine oil if necessary Check for leaks 2 P 77 Brakes Check operation Front check brake fluid lev...

Page 66: ...is attached to the centre compartment under the seat 2 P 52 3WARNING Installing non Honda parts may make your vehicle unsafe and cause a crash in which you can be seriously hurt or killed Always use H...

Page 67: ...NOTICE Your battery is a maintenance free type and can be permanently damaged if the cap strip is removed This symbol on the battery means that this product must not be treated as household waste NOTI...

Page 68: ...roughly with water and do not swallow 3WARNING The battery gives off explosive hydrogen gas during normal operation A spark or flame can cause the battery to explode with enough force to kill or serio...

Page 69: ...nd possibly damaging the system Fuses Fuses protect the electrical circuits on your vehicle If something electrical on your vehicle stops working check for and replace any blown fuses 2 P 114 Inspecti...

Page 70: ...fies all of the following standards JASO T 903 standard 1 MB SAE standard 2 10W 30 API classification 3 SG or higher 1 The JASO T 903 standard is an index for engine oils for 4 stroke motorcycle engin...

Page 71: ...ommended brake fluid Honda DOT 3 or DOT 4 Brake Fluid or equivalent Crankcase Breather Service more frequently when riding in rain at full throttle or after the vehicle is washed or overturned Service...

Page 72: ...specting for Damage Inspect the tyres for cuts slits or cracks that exposes fabric or cords or nails or other foreign objects embedded in the side of the tyre or the tread Also inspect for any unusual...

Page 73: ...xcessively worn or improperly inflated can cause a crash in which you can be seriously hurt or killed Follow all instructions in this owner s manual regarding tyre inflation and maintenance 2020102814...

Page 74: ...o burst Use only tubeless tyres on this vehicle The rims are designed for tubeless tyres and during hard acceleration or braking a tube type tyre could slip on the rim and cause the tyre to rapidly de...

Page 75: ...rm some roadside repairs minor adjustments and parts replacement with the provided tools Standard Phillips screwdriver Screwdriver handle TU type only Spark plug wrench 20201028145327_32K2CA000_eng_BO...

Page 76: ...ation Install the parts in the reverse order of removal Always connect the positive terminal first Make sure that bolts and nuts are tight ED E type When the terminals are connected Honda SMART key sy...

Page 77: ...p and release the tabs from their slots 4 Remove the battery cover Installation Install the parts in the reverse order of removal 20201028145327_32K2CA000_eng_BOOK Page 77 Wednesday October 28 2020 15...

Page 78: ...screwdriver covered with a protective cloth Installation Install the parts in the reverse order of removal 20201028145327_32K2CA000_eng_BOOK Page 78 Wednesday October 28 2020 15 00 25 JST Removing Ins...

Page 79: ...the hole Installation 1 Push the bottom of the centre pin 2 Insert the clip into the hole 3 Press down on the centre pin to lock the clip 20201028145327_32K2CA000_eng_BOOK Page 79 Wednesday October 28...

Page 80: ...centre stand on a firm level surface 4 Remove the oil fill cap dipstick and wipe it clean 5 Insert the oil fill cap dipstick until it seats but don t screw it in 6 Check that the oil level is between...

Page 81: ...l above the upper level mark u Make sure no foreign objects enter the oil filler opening u Wipe up any spills immediately 2 Securely reinstall the oil fill cap dipstick NOTICE Overfilling with oil or...

Page 82: ...ove the LOWER level mark If the brake fluid level in the reservoir is below the LOWER level mark or the brake lever freeplay becomes excessive inspect the brake pads for wear If the brake pads are not...

Page 83: ...indicator Inspect the brake pads from below the brake caliper If necessary have the pads replaced by your dealer Always replace both left and right brake pads at the same time 20201028145327_32K2CA000...

Page 84: ...k the brake cable for kinks or signs of wear If necessary have it replaced by your dealer Lubricate the brake cable with a commercially available cable lubricant to prevent premature wear and corrosio...

Page 85: ...be obtained by this method see your dealer 1 Adjust by turning the rear brake adjusting nut a half turn at a time 2 Apply the brake several times and check for free wheel rotation after the brake lev...

Page 86: ...play of the brake lever Make sure the brake arm spring and fastener are in good condition NOTICE Do not turn the adjuster beyond its natural limits 20201028145327_32K2CA000_eng_BOOK Page 86 Wednesday...

Page 87: ...aligns with the reference mark on full application of the brake the brake shoes must be replaced See your dealer for this service When the brake service is necessary see your dealer Use only Honda Ge...

Page 88: ...the pivot bolt with clean grease 3 Check the spring for damage or loss of tension 4 Sit on the vehicle and raise the side stand 5 Start the engine 6 Lower the side stand all the way The engine should...

Page 89: ...positions and throttle freeplay is correct If the throttle does not move smoothly close automatically or if the cable is damaged have the vehicle inspected by your dealer Freeplay at the throttle gri...

Page 90: ...1 Remove the upper case by inserting a coin or a flat head screwdriver covered with a protective cloth into the slit u Wrap a coin or a screwdriver with a protective cloth to prevent scratching the Ho...

Page 91: ...e severe internal burns and even death Keep battery away from children and battery compartment securely closed If the battery compartment does not close securely stop using the product and keep it awa...

Page 92: ...torage or transportation CAUTION Do not dispose of a battery into fire or a hot oven or give mechanically crushing or cutting of a battery that can result in an explosion CAUTION Do not subjected to e...

Page 93: ...Stopped by the Idling Stop System While the Idling Stop Indicator is On P 96 Engine Does Not Start Even If the Throttle is Opened P 97 When the Honda SMART Key System Does Not Operate Properly P 98 Un...

Page 94: ...on contact your dealer as soon as possible Starter Motor Does Not Operate Check the following items Check the correct engine starting sequence 2 P 45 Check for a blown fuse 2 P 114 Check for a loose...

Page 95: ...ed at a dealer What to do when the indicator lamp blinks Park the vehicle in a safe place with no flammable items and wait at least 10 minutes with the engine stopped until it cools NOTICE If you driv...

Page 96: ...our vehicle until stop the engine except the idling stop If you turn the ignition switch to the SEAT Off or Lock position while the Honda SMART Key indicator is flashing the Honda SMART Key indicator...

Page 97: ...If the fuel system has an error the fuel gauge indicators will be displayed as shown in the illustration If this occurs see your dealer as soon as possible 20201028145327_32K2CA000_eng_BOOK Page 97 We...

Page 98: ...Idling Stop system does not operate until you ride once If PGM FI malfunction indicator lamp MIL lights When the PGM FI malfunction indicator lamp MIL lights the Idling Stop system does not operate f...

Page 99: ...stop completely Stop the vehicle completely The Idling Stop system operates if the speed is only at 0 km h 0 mph If the throttle is not closed completely Close the throttle completely 20201028145327_...

Page 100: ...ng by the Idling Stop system if you press the Idling Stop switch to Idling the Idling Stop system will be cancelled Restart the engine with the start button referring to the starting procedure 2 P 45...

Page 101: ...communication failure in the Honda SMART Key system The Honda SMART Key system uses low intensity radio waves The Honda SMART Key system may not work properly in the following conditions u When there...

Page 102: ...Key system cannot be activated Bring the emergency key and ID tag to your dealer Check the battery condition and battery lead in your vehicle Check the battery and battery terminals If the battery is...

Page 103: ...d 2 Align the projection of the emergency key with the slot of the emergency seat opener and turn the emergency key counterclockwise 3 Open the seat and turn the emergency key clockwise 20201028145327...

Page 104: ...it up lightly If the seat is not locked turn the emergency key clockwise to lock the seat catch 2 Install the front lid Make sure that all tabs are installed securely in position 20201028145327_32K2CA...

Page 105: ...y pressing the ignition switch when the ignition switch is in the Off Lock or SEAT position Input the ID number on the ID tag in order from the left in turn by pressing the ignition switch The ID numb...

Page 106: ...e ignition switch to the SEAT Off or Lock position and push and hold the ignition switch for about 2 seconds All turn signals flash once The ignition switch also locks automatically when the ignition...

Page 107: ...low the procedure again 2 P 102 ID number input cancel Push and hold the ignition switch for about 2 seconds Also if you make a mistake while inputting the ID number re input the ID number from the be...

Page 108: ...w the instructions provided with the emergency tyre repair kit Riding your vehicle with a temporary tyre repair is very risky Do not exceed 50 km h 30 mph Have the tyre replaced by your dealer as soon...

Page 109: ...rting using an automobile battery can damage your vehicle s electrical system and is not recommended Burned out Light Bulb Follow the procedure below to replace a burned out light bulb Turn the igniti...

Page 110: ...o longer turn 4 Loosen the mirror adapters and remove them 5 Remove the screws 6 Remove the headlight case then disconnect the connector 20201028145327_32K2CA000_eng_BOOK Page 110 Wednesday October 28...

Page 111: ...clockwise until they will no longer turn 12 Loosen the rearview mirrors approximately 2 turns 13 Adjust the rearview mirrors 14 Tighten the lock nuts and install the dust covers Do not touch the glass...

Page 112: ...andlebar all the way to the right 2 Turn the socket counterclockwise then pull it out 3 Pull out the bulb without turning 4 Install a new bulb and removed parts in the reverse order of removal 2020102...

Page 113: ...the bulb in and turn it counterclockwise 5 Install a new bulb and removed parts in the reverse order of removal u After putting back the lens packing in place install the taillight lens 2020102814532...

Page 114: ...e way to the right 2 Turn the socket counterclockwise then pull it out 3 Pull out the bulb without turning 4 Install a new bulb and removed parts in the reverse order of removal u Use only the amber b...

Page 115: ...Turn the socket counterclockwise then pull it out 3 Pull out the bulb without turning 4 Install a new bulb and removed parts in the reverse order of removal u Use only the amber bulb 20201028145327_32...

Page 116: ...tall a new bulb and removed parts in the reverse order of removal u After putting back the packing in place install the license plate light cover 20201028145327_32K2CA000_eng_BOOK Page 116 Wednesday O...

Page 117: ...replace a blown fuse with a spare fuse of the same rating u Spare fuses are provided in reverse side of the battery cover 3 Install the removed parts in the reverse order of removal NOTICE If a fuse f...

Page 118: ...ittently while riding Even if this symptom occurs you can continue to ride your vehicle If unstable engine operation occurs even if sufficient fuel is available have your vehicle inspected by your dea...

Page 119: ...Caring for Your Vehicle P 121 Storing Your Vehicle P 124 Transporting Your Vehicle P 125 You the Environment P 126 Serial Numbers P 127 Fuels Containing Alcohol P 128 Catalytic Converter P 129 202010...

Page 120: ...tors only for the purpose of the technical diagnosis research and development of the vehicle Keys Ignition Key TU type Be sure to record the key number provided with the key number plate Store the spa...

Page 121: ...ng the seat lock Locking or unlocking the steering The ID number of the Honda SMART Key is on the ID tag You can also unlock the ignition switch by inputting the ID number Always carry both the emerge...

Page 122: ...from liquids If it gets wet dry it immediately with a soft cloth Keep the Honda SMART Key away from the vehicle while washing the vehicle Do not burn Do not wash in an ultrasonic cleaner If fuel wax...

Page 123: ...vehicle to your dealer EU Directive This Honda SMART Key system complies with the RE Radio Equipment Directive 2014 53 EU The declaration of conformity to RE Directive is provided to the owner at the...

Page 124: ...er to spot potential problems In particular seawater and salts used to prevent ice on roads promote the formation of corrosion Always wash your vehicle thoroughly after riding on coastal or treated ro...

Page 125: ...t of wax to the mat painted surface Washing Precautions Follow these guidelines when washing Do not use high pressure washers u High pressure water cleaners can damage moving parts and electrical part...

Page 126: ...or sponge plenty of water and a mild detergent to clean mat painted surfaces Dry with a soft clean cloth Aluminium Components Aluminium will corrode from contact with dirt mud or road salt Clean alumi...

Page 127: ...and wax all painted surfaces except mat painted surfaces Coat chrome pieces with rust inhibiting oil Place your vehicle on its centre stand and position a block so that both tyres are off the ground A...

Page 128: ...g ramp or lifting platform and motorcycle tie down straps Never try to tow your vehicle with a wheel or wheels on the ground NOTICE Towing your vehicle with a wheel or wheels on the ground can cause s...

Page 129: ...roved containers and take them to a recycling centre Call your local or state office of public works or environmental services to find a recycling centre in your area and to get instructions on how to...

Page 130: ...ed in order to register your vehicle They may also be required when ordering replacement parts You should record these numbers and keep them in a safe place 20201028145327_32K2CA000_eng_BOOK Page 130...

Page 131: ...ay be marketed under the name Gasohol The use of petrol containing more than 10 ethanol may Damage the painting of the fuel tank Damage the rubber tubes of the fuel line Cause corrosion of the fuel ta...

Page 132: ...llution and can impair your engine s performance A replacement unit must be an original Honda part or equivalent Follow these guidelines to protect your vehicle s catalytic converter Always use unlead...

Page 133: ...2 Centre compartment 10 kg 22 lb Shopping hook and inner pocket 1 5 kg 3 3 lb Rear carrier 3 kg 6 6 lb Passenger capacity Rider and 1 passenger 1 Including rider passenger all luggage and accessories...

Page 134: ...gf cm2 33 psi Spark plug standard MR7C 9N NGK Spark plug gap 0 80 0 90 mm 0 031 0 035 in Idle speed 1 700 100 rpm Recommended engine oil Honda 4 stroke motorcycle oil API Service Classification SG or...

Page 135: ...2 V 10 W 2 Position light 12 V 5 W Rear turn signal 12 V 10 W 2 License plate light 12 V 5 W Fuses Main fuse 30 A Other fuse TU type 10 A 5 A ED E type 10 A 7 5 A 5 A 20201028145327_32K2CA000_eng_BOOK...

Page 136: ......

Page 137: ......

Reviews: