


3 - 41
CHK
ADJ
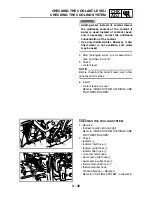
CHECKING AND ADJUSTING THE STEERING HEAD
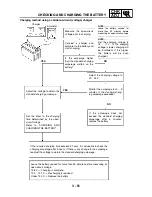
3. Remove:
• lower handlebar holder
Refer to “STEERING HEAD” in chapter 4.
4. Adjust:
• steering head
▼▼▼
▼
▼ ▼▼▼
▼
▼ ▼▼▼
▼
▼ ▼▼▼
▼
▼ ▼▼▼
▼
▼ ▼▼▼
▼
▼▼▼
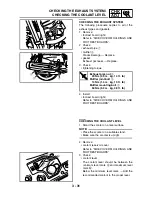
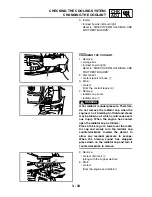
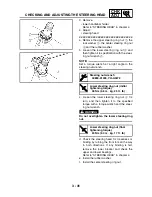
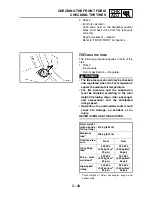
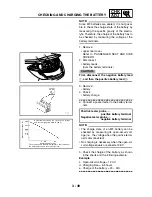
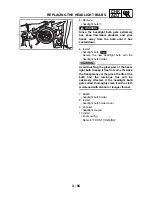
a. Remove the upper steering ring nut
1
, the
lock washer
2
, the center steering ring nut
3
and the rubber washer.
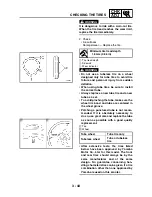
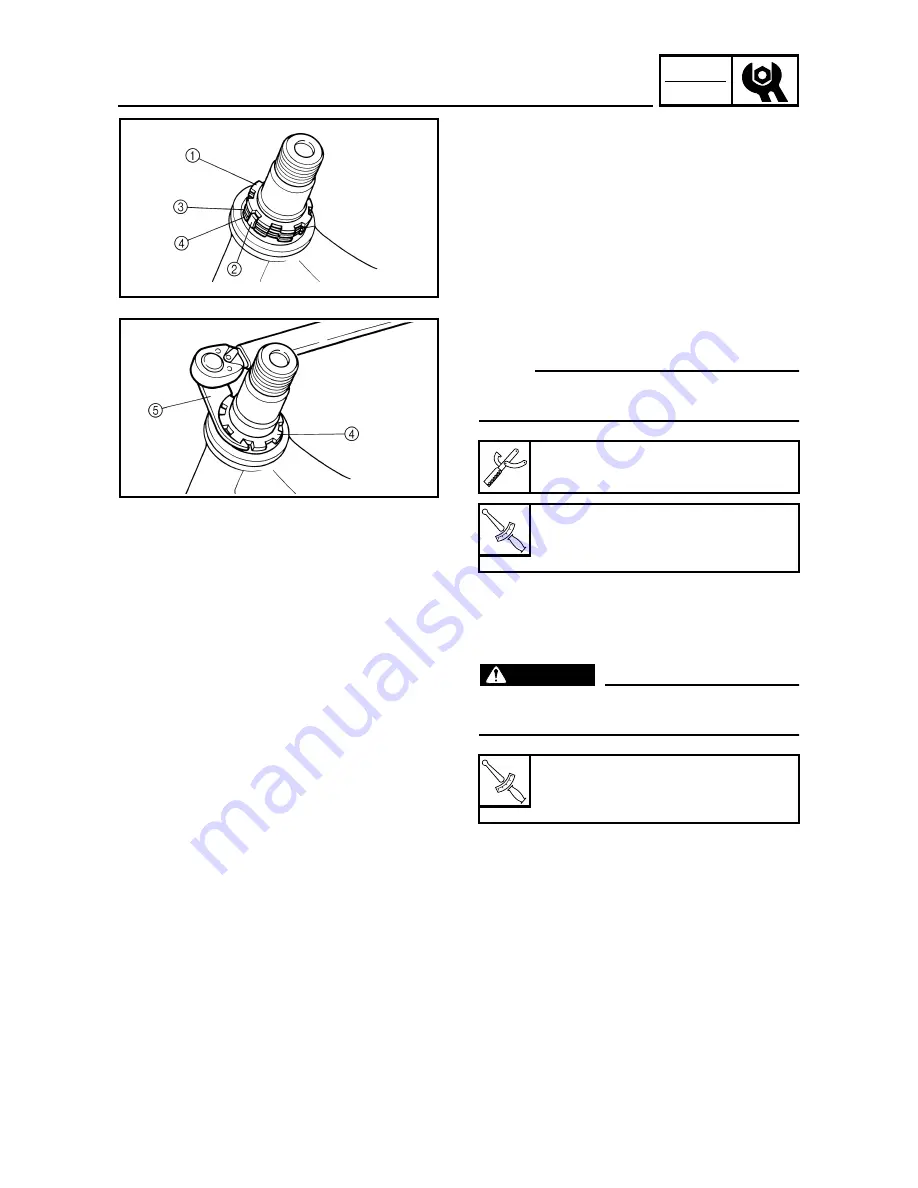
b. Loosen the lower steering ring nut
4
and
then tighten it to specification with the steer-
ing nut wrench
5
.
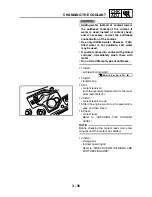
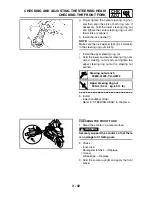
NOTE:
_
Set a torque wrench at a right angle to the
steering nut wrench.
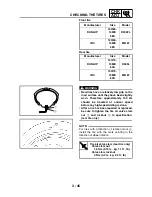
c. Loosen the lower steering ring nut
4
1/4
turn, and then tighten it to the specified
torque with a torque wrench and the steer-
ing nut wrench.
WARNING
_
Do not overtighten the lower steering ring
nut.
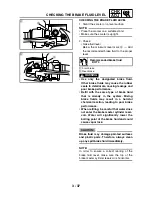
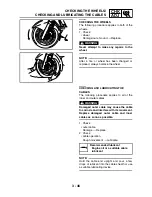
d. Check the steering head for looseness or
binding by turning the front fork all the way
in both directions. If any binding is felt,
remove the lower bracket and check the
upper and lower bearings.
Refer to “STEERING HEAD” in chapter 4.
e. Install the rubber washer.
f. Install the center steering ring nut.
Steering nut wrench
90890-01403, YU-A9472
T
R
.
.
Lower steering ring nut (initial
tightening torque)
36 Nm (3.6 m · kg, 25 ft · lb)
T
R
.
.
Lower steering ring nut (final
tightening torque)
24 Nm (2.4 m · kg, 17 ft · lb)
Summary of Contents for 2004 YP400
Page 1: ...2004 YP400 S 5RU1 AE1 SERVICE MANUAL ...
Page 2: ......
Page 8: ......
Page 9: ...GEN INFO 1 ...
Page 11: ...GEN INFO ...
Page 28: ...SPEC 2 ...
Page 30: ...SPEC ...
Page 77: ...CHK ADJ 3 ...
Page 137: ......
Page 138: ...CHAS 4 ...
Page 210: ......
Page 211: ...ENG 5 ...
Page 286: ...COOL 6 ...
Page 288: ...COOL ...
Page 299: ...FI 7 ...
Page 301: ...FI ...
Page 342: ...ELEC 8 ...
Page 378: ...8 34 ELEC LIGHTING SYSTEM ...
Page 404: ......
Page 405: ...TRBL SHTG 9 ...
Page 415: ......
Page 416: ...YAMAHA MOTOR CO LTD 2500 SHINGAI IWATA SHIZUOKA JAPAN ...