W H E A T N E T - I P
N A V I G A T O R G U I
page 4 – 27
WheatNet-IP
/ Apr 2009
because the external clock reference chews up an audio channel, and input 8 seems less
valuable than, say, input 1. Note that you can also specify another BLADE to be a
“Secondary External Reference” for back up. In this case if you provide the same AES
reference signal to the secondary clock master BLADE, the system will stay locked
to the external reference should the primary clock master BLADE loose power or
otherwise go down.
This window also has two buttons to set the system clock rate to be either 44.1K
or 48K. While this selection is not so significant for AES digital input signals because
all AES inputs in BLADEs are equipt with sample rate converters, it does set the
sample rate of all of the system’s AES digital outputs. Most modern digital devices can
accept various sample rates, but there are still some out there (primarily Automation
PCs) that require a specific sample rate.
Choose the settings you want in this window and click on the “Apply” button to
execute them.
How does this all work? The system will synchronize to the BLADE that is the
primary clock master. This will be indicated in the System Pane of the GUI by a
BLADE wave signal overdrawn on the appropriate BLADE icon. There is also a front
panel LED that will also be lit to show that the BLADE is the primary clock master.
That BLADE will use whatever AES signal that is connected to input 8 as the clock
reference; if there is nothing connected to input 8, or if the device connected to input 8
goes away, it will use its own internal reference. If the primary clock master BLADE
itself should power off, become disconnected, or otherwise cease to function, the
secondary clock master will take over so be sure to connect your external AES
reference signal to input 8 of the secondary clock master too if you need to keep the
system locked to the external reference.
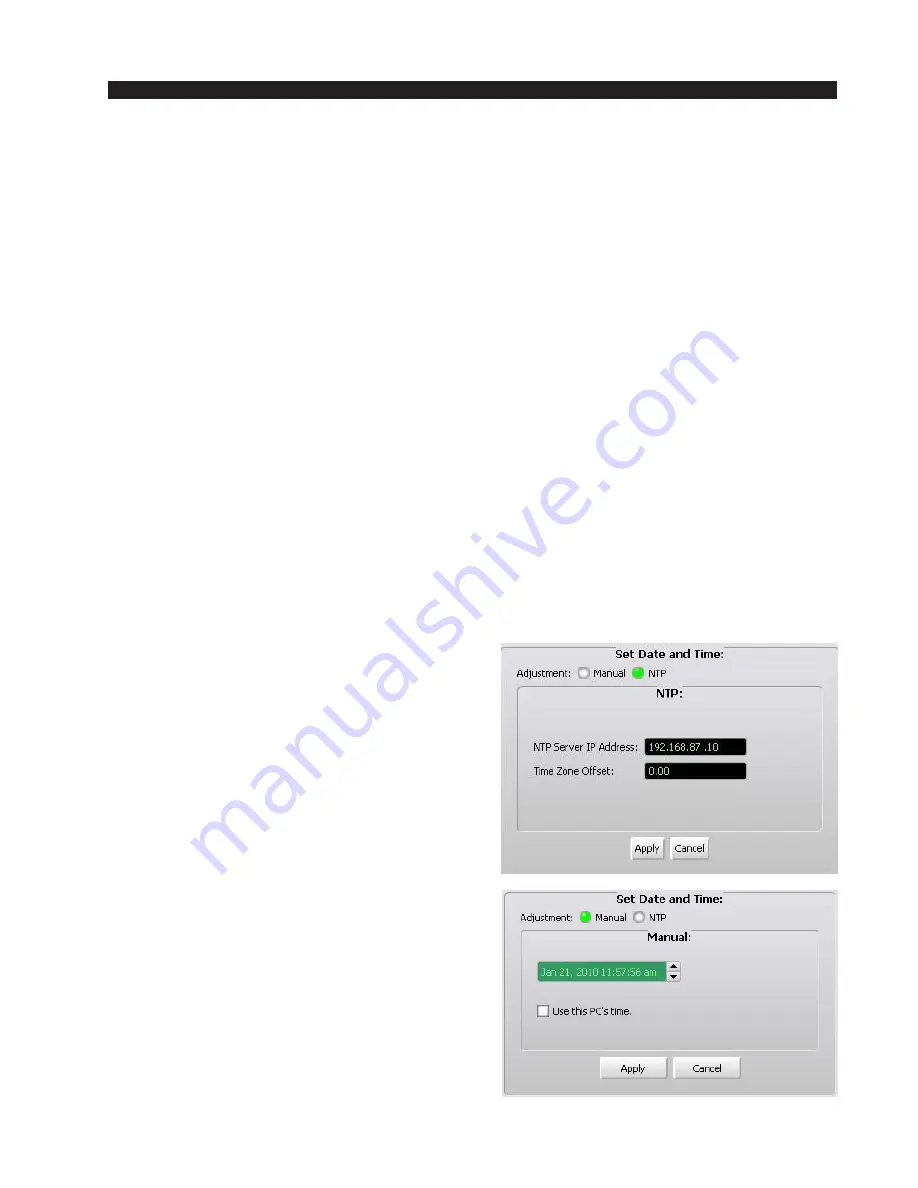
Set Date and Time
This window is used to set up the date and time
of day for the WheatNet-IP system. There are two
modes the system can operate under, manual and
NTP. The mode is chosen with the “Adjustment:”
buttons.
In NTP mode, each BLADE and surface will
subscribe to a network time server and main-
tain date/time synchronization with the net-
work server.
In Manual mode, you have two choices. You
can specify the date and time yourself by
clicking a section in the window and clicking
on the up/down arrows to advance or back-
track the section, or you can take a short cut
and simply click on “use this PC’s time.” In
that case the time settings on the GUI PC will
be distributed to the BLADEs and control
surfaces. It will take a little while after making
your selection for everything to get updated.
The system date and time settings aren’t vis-
ible in the system during normal operation but
WheatNet-IP
/ Jan 2010


