Page 59
VP-X Installation and Operating Manual
Rev. D (August 5, 2020)
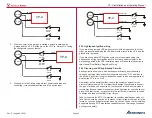
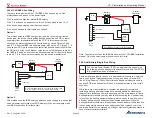
The following trim items can be configured:
Motor
polarity
Standard/Inverted. Press the Up or Down buttons on the
Configurator, and the trim should move in the appropriate
direction. If not, change the polarity until the trim runs in the
correct direction.
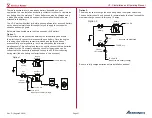
Down trim is usually the forward switch, and trim up is usually
the aft switch. The elevator trim tab should run down when
pressing the up trim button.
Once the motor direction is correct, verify that each trim switch
is wired correctly by moving the trim using the trim switch on
the stick (note: press
Update
button to save settings before
using trim switch)
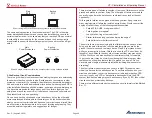
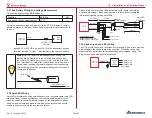
Up limit
Run the trim all the way up using the Up soft key. Note the
number that shows the trim position (should be on the screen,
between 0 and 255).
Neutral
position
Run the trim to the neutral position using the Up/Down soft
keys. Note the number that shows the trim position (should be
on the screen, between 0 and 255).
Down limit Run the trim all the way down using the Down soft key. Note
the number that shows the trim position (should be on the
screen, between 0 and 255).
Variable Trim Speed (Pitch only)
Reduce
Power
above
Set the indicated airspeed above which the pitch trim runs at a
slower speed. Set to 0 to disable this feature.
% Power
Set the percentage of full speed that the pitch trim motor
should run when the aircraft speed is above the ‘reduce power
above’ speed. 70% is a good starting point. Range is 40% to
90%.
•
Configure the pitch trim settings so they match your desired final
configuration.
•
Configure the roll trim settings so they match your desired final
configuration.
6.13
Flaps Configuration
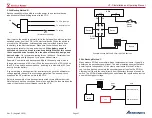
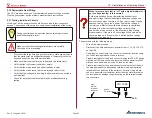
In the VP-X Configurator, go to Flaps Configuration. You can run the flaps
from both the flap switch as well as from the VP-X Configurator.
The flap switch runs the flaps either in either momentary or position mode
(see below). When you run the flaps from the
EFIS
, the flaps only run
while
the flap control button is pressed.
Verify that the flap switch(es) is in the neutral (middle) position,
and that the area around the flaps is clear before starting flap
configuration.
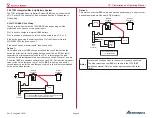
When moving flaps for the first time, carefully check that
airframe components don’t bind or bend under the motor load.
The following flap items can be configured:
General Configuration
Flap enable
Enable/Disable. Set to enable if the VP-X controls the flaps.
Set to disable if your flaps are not directly controlled by the
VP-X.
Flap control Position/Momentary.
Position: flaps can be set to stop at intermediate positions
(requires position sensor).
Momentary: flaps run only when flap switch is pressed.
Set
this to Momentary for now. You can set it to position once
the initial engine and airframe testing is complete. This is
because the position setting may operate differently in the
air than on the ground (due to air loads) and fault the flap
circuit due to motor run-on. We recommend deferring this
uncertainty until later in the flight test period.
Circuit
breaker
Set the circuit breaker value for the flap motor circuit.

