33
Laser Cartridge Installation – CO2 Only Platforms
1. Make sure that your laser system power cord is not plugged in at this time. Open the rear laser cover
using the latches on top of the laser cover. Some laser systems are shipped with keyed locks so make
sure the latches are unlocked.
Note:
Access latches for the laser cover are lockable. If you lose your keys, please contact our Customer
Service Team at 480-609-0297 (USA), +43 1 402 22 50 (Austria), +81 (45) 224-2270 (Japan) or e-mail us
at
for new keys.
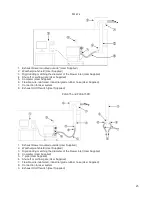
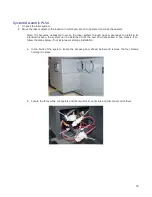
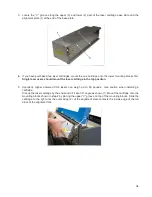
2. Locate the mounting blocks (1), the laser latches (2) and alignment forks (3). Notice that the alignment
fork has a groove (6) located between two blocks, one short (4) and one tall (5).
Summary of Contents for PLS4.75
Page 1: ...PLS User Guide PLS4 75 PLS6 75 PLS6 150D PLS6MW www ulsinc com Revision August 2012...
Page 5: ...Chapter 1 Specifications 5...
Page 8: ...Chapter 2 Safety 8...
Page 14: ...Tamper Proof Labels Safety Labels...
Page 15: ...ULS Fiber Laser Cartridge Labels 15...
Page 16: ......
Page 17: ...PLS4 Back View 17...
Page 18: ...PLS6 Front View 18...
Page 19: ......
Page 22: ...Chapter 3 Installation 22...
Page 40: ......
Page 48: ...Chapter 4 Operation 48...
Page 83: ...Chapter 5 Accessories 83...
Page 99: ...Example Connection for PNP mode Example Connection for NPN mode 99...
Page 111: ...Chapter 6 Maintenance 111...
Page 119: ...www ulsinc com...


