Chapter 4: Operating instructions
16
TruVision DVR 45HD User Manual
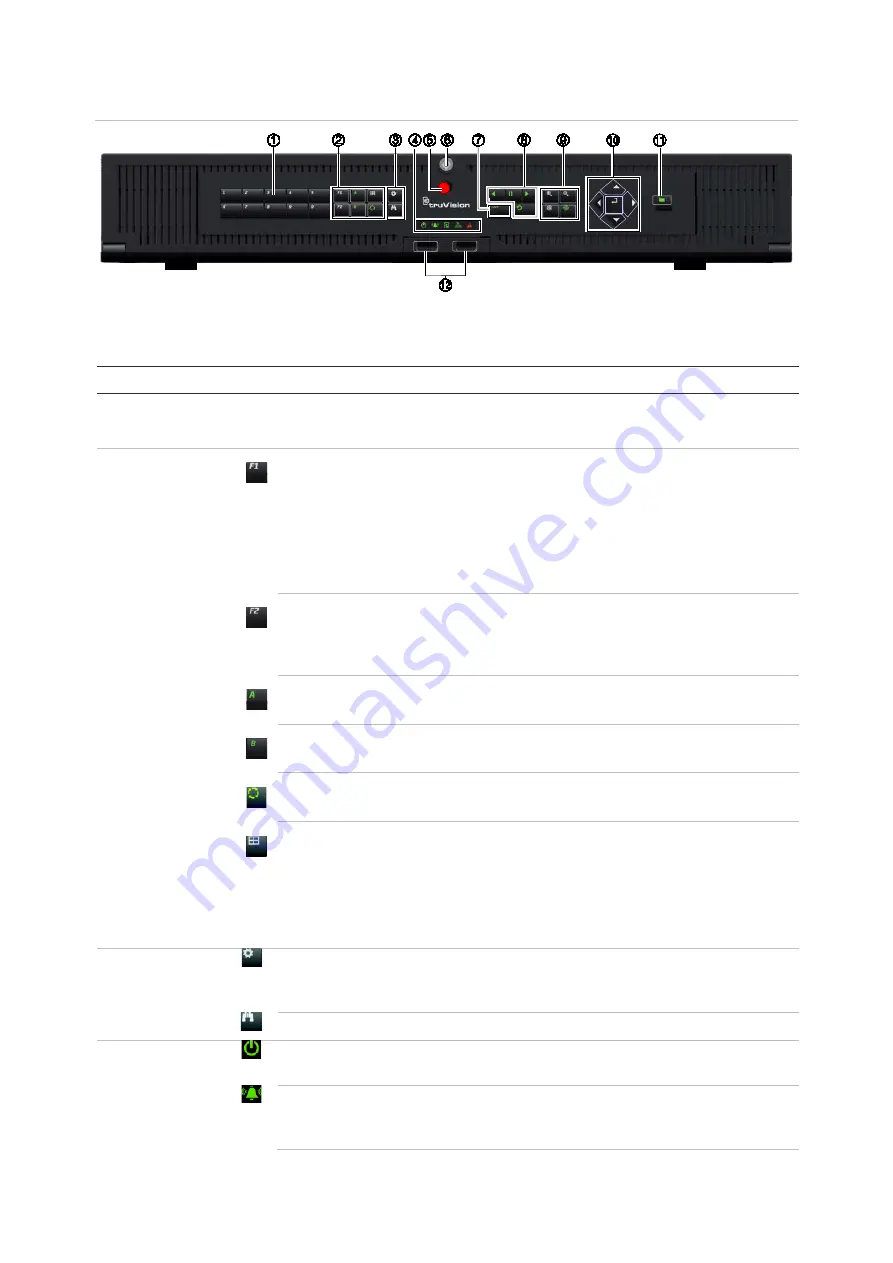
Figure 4: TVR 45HD front panel (8-channel model shown)
The controls on the front panel include:
Table 1: Front panel elements
Name
Description
1.
Channel buttons
Switch between different cameras in live, PTZ control or playback modes.
Use the buttons to enter numerals 0 to 9.
2.
Display
buttons
F1
: In playback mode, click to start and stop video clipping. For audio, press
F1 and a numerical button to play the audio of the specified camera in live
view.
In System Information mode, get the DDNS URL. In User Management
mode, pop up the Permission screen of a selected item in User Management
> User > User Management. Delete a selected item from USB flash drive.
Exit the virtual keypad.
F2
: In live view mode, all-day playback, and playback modes press to display
or hide the time or control bar. In PTZ mode, stop all ongoing operations.
Select or deselect an item. Enter a selected folder of the external storage
device, such as a USB flash drive used for archiving.
A
: In live view mode, select the main monitor.
B
: In live view mode, select the event monitor.
Seq
: In live view mode, start/stop sequencing cameras on the current
monitor.
Display
: In multiview mode, toggle through the various multiviews. For 8-ch
DVR: full, quad, 1+5, 1+7, and 3*3). For 16-ch DVR: full, quad, 1+5, 1+7, 3*3,
and 4*4.
In HDD information mode and user management mode delete a selected
item. In PTZ mode, delete a selected key point. In Log Search mode, display
the details of a log file in Log Search result.
3.
Menu and
Search
buttons
Menu
: Enter/exit the main menu.
Search
: In live view, enter the advanced search menu.
4.
Status LEDs
Power
: A steady green light indicates the recorder is working correctly. Red
indicates a fault.
Event Alarm
: A flashing red light indicates that there is a sensor Alarm In or
another alarm such as motion or tampering. No light indicates that there is no
alarm.


