background image

CHAPTER 1: GETTING STARTED 27

Tips: 

• You can add customized adjustments or effect settings to the 

EasyPalette 

for 

easy access in the future. Click 

Add this effect to EasyPalette 

in the dialog 

box to perform this function.

• To preview the effect on the image document in the workspace, click 

Preview 

the result

 in the dialog box.

• To apply the effect to a specific part of your image only, use one of the selection 

tools to highlight the area you want to enhance before you apply a command.

Using the EasyPalette

The 

EasyPalette

 is a panel that provides quick access to preset and customized 

effects and objects. It contains filters, styles, images, shapes, templates, and 
animation. 

Galleries

 contain various effects you can apply to your images while 

Object Libraries

 contain various objects, paths, Web templates and more. 

The easiest and most convenient method for applying effects or adding objects is 
by double-clicking their thumbnails in the EasyPalette. You can also drag these 
thumbnails directly onto the image, selection area, or object. 

By customizing effects and objects, you can create your own galleries and object 
libraries. These can then be saved and shared with other PhotoImpact users.

Summary of Contents for PHOTOIMPACT 11

Page 1: ...User Guide Ulead Systems Inc August 2005 ...

Page 2: ...and the QuickTime logo are trademarks used under license Adobe the Adobe logo Acrobat and the Acrobat logo are trademarks of Adobe Systems Incorporated Digimarc MarcCentre and MarcSpider are registered trademarks of Digimarc Corporation Java and all Java based marks are registered trademarks of Sun Microsystems Inc in the U S and other countries All other product names and any registered and unreg...

Page 3: ...r Panel 22 Quick Command Panel 23 Tool Settings 23 Histogram Panel 23 Toolbox 23 Personalizing My Workspace 23 Setting Preferences 23 Floating and docking toolbars and panels 24 Using the Customize dialog box 24 About PhotoImpact dialog boxes 25 Using quick samples 25 Split View and Dual View 26 Using the EasyPalette 27 About EasyPalette galleries and libraries 29 Creating and organizing your gall...

Page 4: ...46 Converting between data types 46 Resizing an image 47 Changing resolution 47 Changing dimensions by resampling 48 Using the clipboard 48 Performing cut and copy operations 48 Performing a paste operation 49 Pasting images as objects 49 Pasting images into a selection area 49 Pasting images to fit into a selection area 50 Pasting images as new images 50 Pasting images beneath the mouse pointer 5...

Page 5: ... Sharpen 80 Noise 80 Enhance 80 Beautify Skin 81 Diffuse Glow 81 Sunlight 82 Film Grain 83 Add Moon 84 Lens Filters 85 Diffraction Filter 85 Multivision Filter 86 Star Filter 87 Lens Distortion 88 Correcting Chromatic Aberration 89 Adding Vignette 90 High Dynamic Range 91 Enhancing the dynamic range of an image with SmartCurves 92 Creating and saving a camera curve profile 92 Composing an HDR imag...

Page 6: ... 3 of 4 Adjusting degree of extraction 118 Step 4 of 4 Refining the object 119 Mask Mode 119 Layer mask and object mask 121 Moving a selection area marquee 123 Preserving the base image 123 Creating smooth edged selection areas 123 Softening a selection edge 124 Creating a border around a selection 124 Select by Color Range 125 Adding to or subtracting from a selection 126 Expanding a selection ar...

Page 7: ...ines and grid 146 CHAPTER 4 USING THE PAINTING AND FILL TOOLS 147 Using the Painting Tools 148 Erasing 149 Customizing Paint Tools 150 Using Paint Tool presets 150 Using the Tool Settings panel 150 Special Paint Tools and Tricks 151 Using the Particle Brush 151 Using the Drop Water Tool 152 Painting with textures 152 Painting an outline or border 153 Using Paint as Object mode 154 Editing active o...

Page 8: ...ths with the Path Drawing Tool 177 Customizing 3D path objects 178 Saving custom paths and attributes 178 The Outline Drawing Tool 179 The Line and Arrow Tool 181 Drawing curves and custom paths 182 Spline Tool 182 Drawing curves and custom paths 182 Spline Tool 182 Bezier Tool 184 Freehand Tool 185 Drawing multiple paths 187 Importing Adobe Illustrator files 188 Tool Settings 189 Filling a path w...

Page 9: ...s 208 Wrap effects 209 Applying wrap effects from the EasyPalette 209 Creating your own wrap effects 210 Modifying wrap effects 210 Bending text objects 214 The Z Merge Tool 215 CHAPTER 6 SPECIAL EFFECTS 217 Applying preset effects from the EasyPalette 218 Applying special effects 218 Lights 219 Artistic 220 Brick Tiles 220 Cartoon 221 Contour Drawing 222 Engraving 223 Finger Paint 225 Impressioni...

Page 10: ...51 Using the History Tab 252 Applying commands to multiple files 253 Batch Manager 253 Batch Convert 254 Batch test in Image Optimizer 254 CHAPTER 8 ALL FOR THE WEB 255 Images for the Web 256 Opening an image UFO file from a Web page 256 Opening a Web page as a single image 257 Creating a Web background image 257 Using Background Designer 258 Shifting a Web background 259 Creating a seamlessly til...

Page 11: ...reating a new Web page 288 Using the Web Properties dialog box 288 General tab 288 Background tab 289 Image File tab 289 Slice tab 289 HTML tab 290 Adding Web images and objects to your Web page 290 Exporting a Web page 290 Previewing in a browser 291 Saving for the Web 291 Send using default e mail program 292 Tutorial Putting a Web page together 292 GIF Animator 294 CHAPTER 9 COMMANDS 295 Comman...

Page 12: ...SER GUIDE Toolbox 306 Panel Manager 307 Layer Manager and Selection Manager 307 Document Manager 309 Browse Manager 310 EasyPalette 311 Color Panel 311 Quick Command Panel 312 Tool Settings 312 Histogram Panel 312 Index 313 ...

Page 13: ...rface beginning with a walkthrough of the workspace and its various components followed by detailed descriptions of the various panels and toolbars and ways on customizing your PhotoImpact workspace You will also learn how to use the EasyPalette and some of the basic program functions ...

Page 14: ...O file format you can update and edit Web page content any time Powerful graphic imaging tools provide you with a host of features for Web and creative design Productivity functions Let you work with a number of image files simultaneously for maximum speed and ease Album Album is a powerful tool for multimedia file management Not only can you organize and catalog your files visually through thumbn...

Page 15: ...d cameras Extensive creative tools help you realize your vision Whether you re new to digital photography or want to take creative expression to the next level PhotoImpact makes professional image editing easy The PhotoImpact difference My Workspace The My Workspace interface system gives you layouts with the right tools for the project at hand SmartCurves New SmartCurves is automatic image adjust...

Page 16: ...reative suite Layer Manager Now you can link and unlink objects to selection masks allowing you to change the object s position and adjust the layer mask s size and properties Intuitive Selection tools Make selections based on what you can see without selecting unwanted hidden elements DVD Menu library The EasyPalette comes with DVD backgrounds buttons and frames for use with any DVD authoring app...

Page 17: ...ndard Photo Mode displays photo related functions on the workspace Graphics Mode displays graphic related functions on the workspace Web Mode gives you tools to create images for the Web Advanced Mode displays the entire PhotoImpact toolset allowing you to perform a range of simple to complex tasks Note To switch between different modes click My Workspace on the Menu bar then select a viewing mode...

Page 18: ...w User Interface This section provides a brief overview of the PhotoImpact workspace Familiarizing yourself with the components of the workspace is a great way to start learning the program Use the page references to locate a specific topic of interest Menu Bar Attribute Toolbar Standard Toolbar Toolbox Status Bar Panel Manager Document Manager Status Bar Program Status Helpful Hints Data Type Dis...

Page 19: ...ette Zoom Product Updates on the Web Help Standard Toolbar Advanced Mode New Image New Web page Open Save Undo Redo Scanner Digital Camera Scanned Image Fix Zoom Product Updates on the Web Help Print Print Preview Print Multiple Preview in Browser Cut Copy Paste ExpressFix Auto Levels SmartCurves Highlight Midtone Shadow Brightness and Contrast Start Stop Capture Photo Frame White Balance ...

Page 20: ...tings Histogram Panel EasyPalette Panel Manager Selection Tools Path Tools Crop Tools Slice Tool Retouch Tools Stamp Tool Eraser Tools Pick Tool Z Merge Tool Text Tool Transform Tool Zoom Tool Eyedropper and Measure Tools Paint Tools Clone Tools Fill Tools Toolbox Quick Color Control Panel Image Map Tool Foreground and Background Colors ...

Page 21: ...h the Layer Manager toolbar Thumbnail menu commands contain a number of practical tools used for manipulating objects The Global Viewer icon opens a separate area at the bottom of the Layer Manager where documents can be magnified by adjusting a slider or using the zoom tools When the document does not fit in the window the frame on the document enables you to select the area to display Selection ...

Page 22: ...set in the Preferences dialog box F6 Right click Recent Files to open a pop up menu where it displays the folders that you have recently accessed Tips Batch Convert Convert the file format or data type of all images in the selected folder Batch Task Apply a previously recorded task to all images in the selected folder EasyPalette The EasyPalette contains preset effects masks and objects that you c...

Page 23: ...Shadow or Color Balance in the Adjust or Photo menu to further enhance your image Toolbox For tools in the Toolbox some have a submenus with further tools To access these tools click the triangle icon on the lower right of the button When the submenu pops up you can drag it away from its original position to make it float anywhere on the screen or dock it to another part of the program window Pers...

Page 24: ...xpand or collapse a single panel or grouped panels Note The docking mechanism can be toggled on off in File Preferences Docking Using the Customize dialog box Selecting My Workspace Customize opens the Customize dialog box for options on your preferred PhotoImpact interface Profiles tab lets you to save import export and manage the user profiles for PhotoImpact Save your profiles for later use or ...

Page 25: ...Adjust Photo and Effect commands use dialog boxes that contain quick samples Quick samples are presets represented by visual thumbnails that you can directly apply to your image To apply a quick sample to your image click the thumbnail that shows the result you want The quick samples in some dialog boxes such as Brightness and Contrast and Color Balance apply cumulative changes to your image Each ...

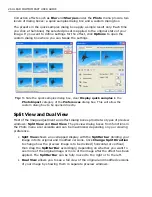
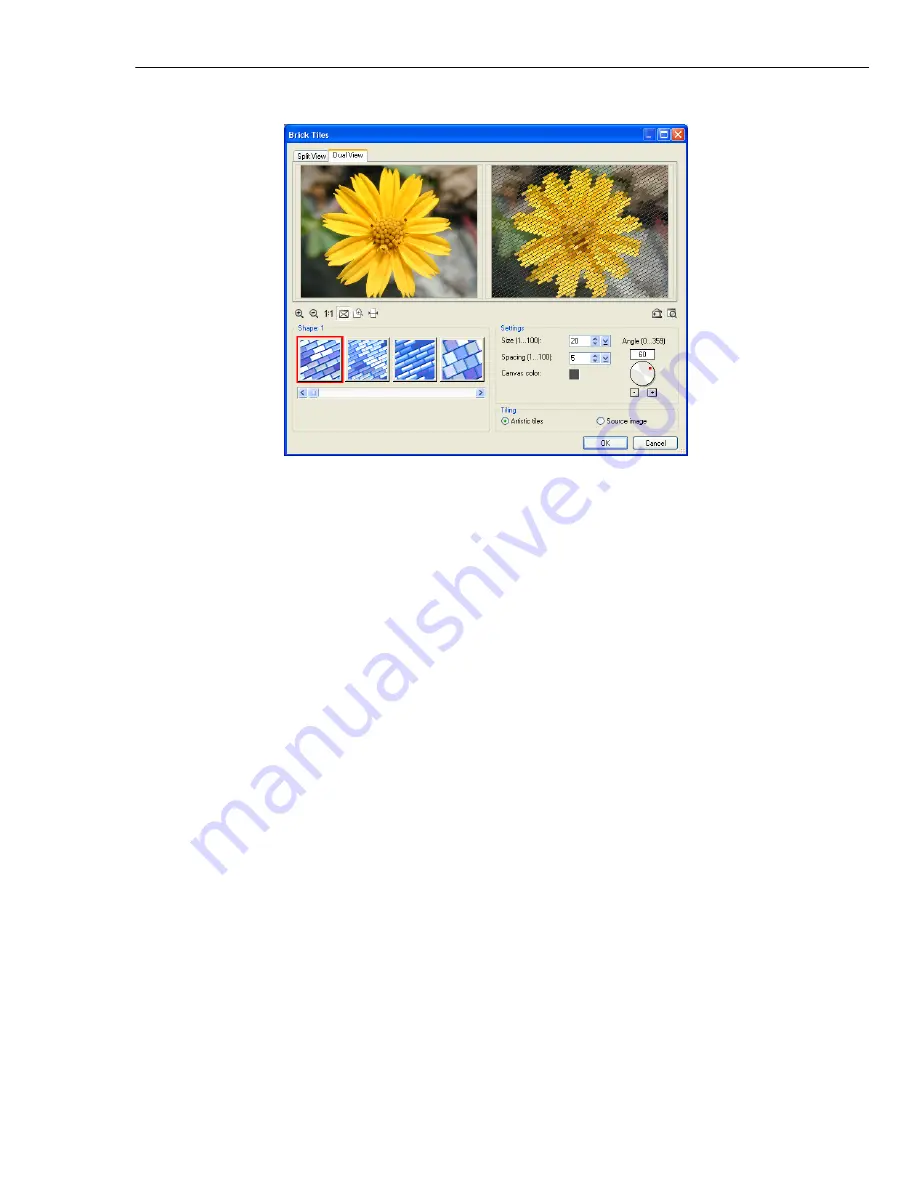
Page 26: ...irectly Split View and Dual View Most of the image adjustment and effect dialog boxes provide two types of preview windows Split View and Dual View The preview dialog boxes from functions in the Photo menu are resizable and can be maximized depending on your viewing preference Split View shows an overlapped display with the Splitter bar dividing your image into its original and modified versions C...

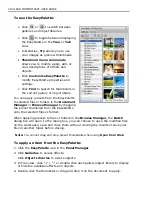
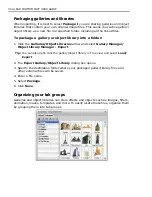
Page 27: ... EasyPalette The EasyPalette is a panel that provides quick access to preset and customized effects and objects It contains filters styles images shapes templates and animation Galleries contain various effects you can apply to your images while Object Libraries contain various objects paths Web templates and more The easiest and most convenient method for applying effects or adding objects is by ...

Page 28: ... Browse Manager by dragging the preset thumbnail from the EasyPalette onto the selected files or folders When applying presets to files or folders in the Browse Manager the Batch dialog box will open In the dialog box you can choose to open the modified files on the workspace save and close them without viewing the results or save your files in another folder before closing Note You cannot drag an...

Page 29: ...der enter or browse for a new destination in Folder 3 Tab groups lists the tabs in the new gallery object library Click Add Remove to manage your tab groups See Organizing your tab groups for details 4 Click OK The new gallery file SMP or object library file UOL is then created in the specified folder Loading and unloading galleries and libraries Use Load and Export to share your galleries and obj...

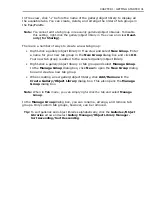
Page 30: ...braries arrow and select Gallery Manager Object Library Manager Export Tip You can also right click the gallery object library in Tree view and select Load Export 2 The Export Gallery Object Library dialog box opens 3 Specify the destination folder where your packaged gallery library files and other external files will be saved 4 Enter a file name 5 Select Package 6 Click Save Organizing your tab ...

Page 31: ...k OK Your new tab group is added to the selected gallery object library Right click a gallery object library or tab group and select Manage Group In the Manage Group dialog box click New to open the New Group dialog box and create a new tab group When creating a new gallery object library click Add Remove in the Create Gallery Object Library dialog box This also opens the Manage Group dialog box N...

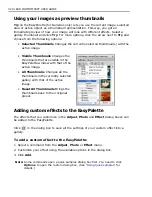
Page 32: ...te window with that of the active image All Thumbnails Changes all the thumbnails in the currently selected gallery with that of the active image Reset All Thumbnails Brings the thumbnails back to their original preset Adding custom effects to the EasyPalette The effects that you customize in the Adjust Photo and Effect dialog boxes can be added to the EasyPalette Click in the dialog box to save a...

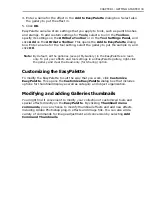
Page 33: ... are read only To put your effects and tool settings in an EasyPalette gallery right click the gallery and clear the Read only for Sharing option Customizing the EasyPalette To modify the EasyPalette to suit the way that you work click Customize EasyPalette This opens the Customize EasyPalette dialog box that includes options for thumbnail display as well as category and object organization Modify...

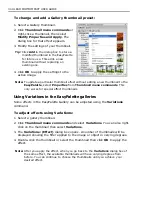
Page 34: ...This only works for special effect thumbnails Using Variations in the EasyPalette galleries Some effects in the EasyPalette Gallery can be adjusted using the Variations command To adjust effects using Variations 1 Select a gallery thumbnail 2 Click Thumbnail menu commands and select Variations You can also right click on the thumbnail then select Variations 3 The Variations Effect dialog box opens...

Page 35: ...defines the image format to use for the new image 3 Select one of the Canvas options White Sets the base image to plain color white Custom color Sets the base image to be a solid color of your choice Background color Sets the base image using the assigned background color in the Toolbox By default a document s background color is white Transparent Hides the base image and displays the default back...

Page 36: ... and then select Add User defined Size 3 In the following dialog box type in a name for your customized size Then click OK The next time you click again the new size created appears on the menu Note You can also change the name and size of customized dimensions by selecting Edit User defined Sizes from the menu Creating an image for DVD menus PhotoImpact allows you to create images with TV safe ar...

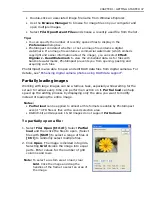
Page 37: ...hancing digital camera photos using RAW data support Partially loading images Working with large images can be a tedious task especially while waiting for the screen to redraw every time you perform an action on it Partial load can help speed up the editing process by displaying only the area you want to modify instead of loading the entire image Notes Partial load can be applied to almost all fil...

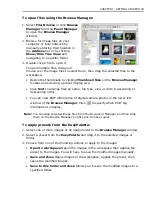
Page 38: ...cify the separation profile and the rendering intent method For a more convenient way of setting how to open CMYK images go to File Preferences General Under Open Save click CMYK Settings and specify whether color channels will be combined or separated Select Ask when opening if you want the dialog box to appear every time Using the Browse Manager The Browse Manager can help increase productivity ...

Page 39: ... descending order You can view EXIF information of digital camera photos in the lower left window of the Browse Manager Click to specify which EXIF tag information to display Note You can drag selected image files from the Document Manager and then drop them on the Browse Manager s right pane to make copies To apply presets from the EasyPalette 1 Select one or more images or an image folder in the...

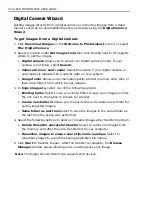
Page 40: ...al drive folder from which to copy images 3 In Copy images to select one of the following options Existing folder Select to use an existing folder to save your images in Click the link next to the option to browse for a folder Create new folder in Allows you to specify where to create a new folder for saving imported images Same folder as last time Select to save the images in the same folder as t...

Page 41: ...clicking the corresponding button on the Standard Toolbar To acquire an image from a scanner 1 Click the arrow next to the Scanner icon on the Standard Toolbar 2 In the menu that appears select Device Name TWAIN where Device Name is the name of your source device either with or without post processing Note Post processing offers additional controls when acquiring an image These include slicing cal...

Page 42: ...meras that support the plug and play technology found in newer versions of Windows operating systems To acquire images from WIA devices click Open and select the drive that corresponds to the scanner camera or any other imaging device that is plugged into your PC You can then select the file you want to open Note PhotoImpact supports EXIF image data contained in most WIA based images For more info...

Page 43: ...m ratio slider on the Attribute Toolbar Note Set the window to automatically fit the new zoom ratio by selecting Adjust window on the Attribute Toolbar for the Zoom Tool This becomes the default for any zoom action performed when using any other tools Adding a view Select View Add a View to open another copy of your image When you edit the original image or the duplicate copy changes will be refle...

Page 44: ...ions made by the program window Use shortcut keys to access tools and press Esc to return to normal screen mode Cropping an image Cropping trims the edges of an image and removes unwanted areas To crop an image select the area you wish to retain and select Edit Crop Ctrl R Crop references crop dimensions even if there are multiple objects in a document or if the crop area covers only part of a sel...

Page 45: ...lick Keep aspect ratio on the Attribute Toolbar 4 To determine where the crop will be applied click Options on the Attribute Toolbar You can choose between cropping Selection All Objects Active Selection Object s or Entire Image 5 Click Crop or press Enter Notes To reset the crop bounding box or cancel the crop action press Esc To reposition the bounding box move your mouse within the bounding box...

Page 46: ...the Attribute Toolbar Adjust the four points of the crop bounding box independently by dragging the handles along the corners to create your desired crop shape 3 To determine where the crop will be applied click Options on the Attribute Toolbar You can choose between cropping Selection All Objects Active Selection Object s or Entire Image 4 Click Crop or press Enter Converting between data types I...

Page 47: ...ge by defining the number of pixels that appear per unit area Increasing the resolution places more pixels closer together reducing the size of the image while decreasing the resolution places pixels farther apart making the image larger By resizing an image without actually changing the number of pixels it contains you can retain its original quality Since no pixels are added or removed image fil...

Page 48: ...mpling in New image or Document size You can also change Resolution usually for printing and use Preview to check the effect of the new settings with reference to size and target output 4 Select Resample and method of resampling 5 Click OK Tip PhotoImpact uses a resample method interpolation algorithm to add new pixels based on the existing pixels color squares in an image Bicubic makes a fine and...

Page 49: ... 16 Color image This may cause extreme change in color When pasting an image it is placed pixel on pixel If your source and target images are at different zoom levels the clipboard image may appear to be enlarged or reduced after pasting All Paste commands are disabled if the clipboard is empty or its contents are not supported in PhotoImpact Pasting images as objects Select Paste As Object Ctrl V...

Page 50: ...s own image window Alternatively you can drag an object from an existing image to the workspace This is useful when you want to save an object or selection area as its own image or when you have copied an image from another program and want to place it in its own window Pasting images beneath the mouse pointer Select Paste Under Pointer to place the clipboard image onto the base image wherever you...

Page 51: ... the entire image Make sure you have Selection Preserve Base Image F5 selected 2 Click and drag the image onto an empty space in the program window 3 Right click the image and select Merge from the resulting pop up menu Notes If Preserve Base Image is cleared you can still duplicate an image by pressing Ctrl as you drag the selected image to an empty workspace To copy part of an image use any Sele...

Page 52: ...he Ulead File for Objects format UFO which consists of the original base image and any additional objects created See Working with objects for details Saving your file in this format allows you to edit the objects and the base image independently from one another as opposed to saving an image in other formats ex BMP and JPG where all objects are merged onto the base image and cannot be edited the ...

Page 53: ...e part of the image you want to save Then click Next 4 Select a file format and click Save As AutoSave AutoSave automatically saves documents during set intervals where changes are tracked and saved in a temporary file The original file is only modified when it is actually saved by pressing Ctrl S or by clicking Save If you are working on a document and the program closes unexpectedly the next tim...

Page 54: ...ick OK Color Management Due to variations in monitor calibration the color gamut of your device and the type of paper you are printing on the color you see on your screen may not necessarily be the color you get on your final printed copy Therefore you may need to use Color Management System CMS to match the colors on your monitor with a printed version A CMS has 3 key functions Maps color gamuts ...

Page 55: ... name Change printer settings by clicking Printer Properties You can also specify color printer options by clicking Color printer options at the bottom of the panel 3 Select Paper size and Layout If you want to adjust print margins select File Page Setup 4 Adjust the image s location within the print preview window by dragging it To resize the image while maintaining aspect ratio drag the handles ...

Page 56: ...age open in the workspace select File More Print Options Print Multiple 2 Select a printer from Printer name Change printer settings by clicking Printer Properties 3 Click Paper layout to select a preset layout from the list Then select paper orientation Then click Next 4 Select whether to use the images found in the workspace or add more images using a different source folder Then click Next 5 If...

Page 57: ... have been placed in the preview window and resized Then click Next 9 Specify number of copies to print in Copies 10 Click Print if you want to print or click Close to return to the workspace Note Click the Back Arrow button in case you change your mind and want to return to a previous panel Print Poster Printing large scale copies of your projects is now easy to do The Print Poster feature prints...

Page 58: ... editing Export the results as a Web page a Web Album a Web Slide Show or images in SVG or RAW formats using a number of methods as outlined in this section Sending images Send a document by e mail as a single image or as a Web page Just select File Export Send and choose one of the following options Web page Creates a compressed EXE file including the HTML code as well as its associated images Ph...

Page 59: ...rytime you move your mouse over an image it will be highlighted by a black border Notes Always check for possible copyright issues when getting images from the Web Ask the owner s permission whenever acquiring copyrighted material Files saved to GIF format are of 256 Color or indexed color data type while those saved as JPEG files are True Color images If you selected an image from a Web page in y...

Page 60: ...s where to send the captured image s Activation Determines the control you choose to start the capturing process You can also set the Delay time between pressing the capture Hotkey and when the actual capturing begins Select Auto scroll for capturing the length of image text and HTML documents beyond what is shown in the window Pointer Lets you include your mouse pointer icon in the capture You ca...

Page 61: ...w exit screen capture by clicking Stop or pressing Esc 6 Click once to mark the starting point when you move the cursor a rectangle appears letting you specify the area to be captured After marking the desired area click again to signify the end point of the selection area Note If the small viewer window gets in the way of what you want to capture you can either move it around the four corners of ...

Page 62: ...ectory 2 From PhotoImpact select File Preferences General then select Plug ins 3 Locate the folder where you installed the plug in and look for the folder which contains the file with the extension 8bf Ex MyFilter 8bf 4 Click OK then select the checkbox beside the specified folder 5 Click OK to close the window then restart the program 6 To select the plug in open an image then select Effect You w...

Page 63: ...ing different exposure settings or even to remove moving objects in the images PhotoImpact provides you with a number of retouch tools to let you edit your photos such as Touch up Tool Dodge Tool Burn Tool and more Clone tools are also available to let you duplicate a part of your image and apply it to the same image or to another image PhotoImpact also gives you the ability to enhance digital cam...

Page 64: ...enhancement options are presented as steps Under Steps you can apply these enhancements to your image Overall Exposure Adjusts brightness and contrast of the whole image Subject Exposure Adjusts the brightness of subject or background separately Color Cast Adjusts the color temperature making it cooler or warmer Color Saturation Adjusts color hues Focus Adjusts from soft to sharp focus Beautify Sk...

Page 65: ...you have applied changes in a step a check mark will be displayed in that step Click Next or to skip steps just click a desired step 6 To go back to previous steps click Back or click a specific step Since ExpressFix applies enhancements in the order specified under Steps enhancements after the current step will be removed from the image when you go back to previous steps Before you exit the dialo...

Page 66: ...the lighting condition applied to the image Choose from default scenarios e g As Shot Daylight Tungsten etc or choose Custom to manually adjust the color temperature Color temperature Sets the degree of warmth or coolness of a lighting source while the photo was taken Lower value means warmer lighting e g indoor whereas higher value means cooler e g outdoor Tint Adjusts the color balance between g...

Page 67: ...diting in this mode also avoids major loss of color information during digital retouching and color correction processes You can acquire 48 bit images via scanners by opening a RAW file from a digital camera and by adjusting converting the data type of an existing image file The following are features that can be adjusted for 48 bit images Notes You can save 48 bit images in TIF or UFO format does...

Page 68: ...rightening or darkening each pixel in the image Color Balance Takes all the colors in an image and adjusts them based on two colors specified by the user to make them appear more balanced The Color Balance dialog box has two tabs for correcting the color balance Color Adjustment Fine tunes your image s colors by adjusting levels between Cyan Magenta and Yellow and Red Green and Blue color properti...

Page 69: ...he image more depth Noise Adds or removes very small patterns or random pixels that produce noise Lens Filters Contains effects that enhance images photographically This includes most popular camera filters available See Lens Filters for details Lens Distortion Transforms images by stretching image areas to produce contortions When you choose a command a dialog box opens displaying sample thumbnai...

Page 70: ...the histogram data to further adjust the image You can change the clipping range by clicking Options You can also use Equalize to redistribute the brightness values of the image This command automatically adjusts images that are too dark 5 Click OK to apply the changes Tip Click Reset to go back to the image s original settings To adjust an image using Curves 1 Select Photo Light Curves 2 Choose a...

Page 71: ...ntrast Ctrl B 2 Click a thumbnail The center thumbnail is replaced accordingly Use the sliders for finer control of the adjustments Tips To simultaneously apply the new settings to the image in the workspace select Real time preview Click Add to place the adjustments in the EasyPalette for later use 3 Click OK to apply the adjustments to your image To adjust the color balance of an image 1 Select ...

Page 72: ... 1 Select Photo Color Color Cast 2 Pick a color from the Before View that should be the neutral tone an area that should be pure white gray or black but is not because of the color cast The cursor changes to the color picker when it moves over the source image 3 After selecting a color a reference point represented by an X appears on the color wheel The color wheel has a maximum of 100 saturation ...

Page 73: ...ference for adjusting the image colors Master adjusts all the colors in the image based on those contained in the image Range blocks only the sections of the color bar where editing is applied Colorize makes the image appear in different tones of a single color making it appear like a monochrome image 4 Drag the sliders and watch the Preview window to see how the new settings are affecting the ima...

Page 74: ...74 ULEAD PHOTOIMPACT USER GUIDE Image with the hat selected The color of the hat was changed after adjusting hue and saturation ...

Page 75: ...all color channels 4 Select which colors in the image to adjust Highlight remaps the colors starting with the light colors Midtone remaps the colors concentrating with the in between colors Shadow remaps the colors starting with the dark colors 5 Drag the sliders and watch the Preview window to see how the new settings are affecting the image Tips Click Auto to let PhotoImpact automatically adjust...

Page 76: ...balance is reached other colors in the same image should also display properly To adjust white balance 1 Select Photo Color White Balance 2 Select from Auto Choose a preset for automatic correction Manual Pick a neutral color from the Before View for correction 3 Fine tune color temperature and tint as needed 4 Click OK Warmer lighting Cooler lighting ...

Page 77: ...y repairs pictures by correcting light and flash errors It adjusts specified pixels brightness and notes the play between highlights midtones and shadows To enhance an image s lighting 1 Select Photo Light Enhance Lighting 2 Drag the Fill Flash slider or enter a value to adjust the image brightness The higher the value the brighter the image becomes 3 Adjust Enhance Shadows to intensify the dark p...

Page 78: ...set the motion angle to give the movement its direction Note When applying Motion Blur to a selection area or object selecting Expand outside object enables Motion Blur to extend beyond the active selection 5 Click OK Edge Preserving Blur Edge Preserving Blur applies blur effects to an image or selection but retains the sharpness of the edges This filter works similarly like Blur except that neigh...

Page 79: ...the image will be made smooth 4 Click OK Zoom Blur The Zoom Blur effect focuses on a point in your image then creates a surrounding blur or whirlpool effect This effect can be used on the whole image a selection or an image object To apply Zoom Blur Effect 1 Select Photo Blur Zoom Blur 2 Select a zoom type from the Type pull down menu 3 Click and drag the red spot on the left preview image to move...

Page 80: ...s will be temporarily resampled in the Dual view dialog box During temporary resampling the image will be shown in proportion with the longer side shown as 500 pixels Sharpen This group of effects corrects blurred and out of focus photos These effects enhance the edges by making them more distinct resulting to a crisper image Noise This group of effects allows you to remove unwanted speckles withi...

Page 81: ...level of the effect The higher the setting the greater the variation Tip Click to save the effect in the EasyPalette Click Preview to view the effect at actual size Zoom in to a region to see the effect at closer range 5 Click OK Note Beautify Skin effect can only be applied to RGB 24 bit True Color documents Diffuse Glow Diffuse Glow brightens the entire image by applying luminosity to the highli...

Page 82: ...al View tab if image correction is needed apply a preprocessing filter before applying the Sunlight effect to the image Enhancement filters include Gradual luminance ND Corrects the light distribution of an image by adjusting the highlights Blue sky Adds a blue white gradient on the specified effect area to enhance its appearance Contrast Strengthens the color space in individual RGB channels Comb...

Page 83: ...al 3 Under Sunlight settings determine the Intensity of sunlight and increase Saturation for brighter colors You can also adjust Contrast and adjust the Cool Warm slider to create a warmer appearance Increase Soft focus for a misty effect 4 When you achieve the effect you like click OK Film Grain While sometimes considered a photographic nuisance Graining can also be used as an advantage to create...

Page 84: ...the texture by adjusting the Angle dial to make the moon s appearance more suited to the scene s location To choose a moon Color select a preset color or select the desired color in the PhotoImpact Color Picker 5 To increase moon size increase the Radius To give the moon a spherical shape and three dimensional look lower the Flatness value 6 To specify the intensity of light emanating from the moo...

Page 85: ...fraction Filter 3 In the Dual View tab the before and after views show the applied effects in real time Use the zoom buttons to adjust the viewing size of your image and see the effects more clearly 4 From the Filter type list select the type of formation for the diffraction effect If Starburst or Circular is the selected filter type specify the pairs of Streaks 5 Luminosity threshold determines t...

Page 86: ...nd after views show the applied effects in real time Use the zoom buttons to adjust the viewing size of your image and see the effects more clearly 3 You can either select a Preset multivision filter or create a Custom filter To create your own custom filter select a Filter type which determines the formation of reproductions and specify the number of Facets i e the number of reproductions If the ...

Page 87: ...ng the number of Spikes and values for Variance Determine the effect s generated density by setting the Luminosity Threshold 3 Choose between using a Standard Filter or PL polarized light Filter PL filters simulate the use of two lenses while Standard uses one Specify a value in Rotate if you chose PL to simulate the rotation of the lenses against each other 4 Set the star points spikes by adjusti...

Page 88: ...ause the document to increase in size and proportions 3 To turn the image around set the rotation angle to the desired degree You can set the direction as clockwise or counterclockwise 4 For Trapezoidal distortion set the center by dragging the X icon instead Again you can use the sliders to set the vertical and horizontal distortion 5 Adjust Spherical distortion set the distortion center by dragg...

Page 89: ...d in the Dual View dialog box During temporary resampling the image will be shown in proportion with the longer side shown as 500 pixels Correcting Chromatic Aberration This feature corrects chromatic aberration which is the colored usually purple fringing on image objects caused by different light wavelengths striking the camera s sensor at different angles To correct chromatic aberration 1 Selec...

Page 90: ...e view on an image subject To add vignette 1 Select Photo Enhance Add Vignette 2 Create the shape and focus of the vignette by using the Freehand or the Ellipse tool Note You can move resize and reshape the vignette by clicking and dragging on the control points of the vignette shape 3 Adjust the settings for the inner and outer areas of the vignette For example Dreaminess decides how dreamy the i...

Page 91: ... camera s limitations and tries to resolve exposure problems that photographers frequently encounter when shooting photos that contain dramatic differences between light and shades It produces an optimized image by combining different copies of the same scene and uses different exposure levels to extend its perceivable tonal range To produce such an image multiple shots with different exposures ar...

Page 92: ...or your camera A camera response curve indicates how the camera s light sensor responds to different light intensity levels A camera response curve must be saved as a camera curve profile if you want to optimize a single shot photo or a photo of a subject photographed in motion Tip If you only have one photo of a particular scene and you don t have a camera curve profile for your camera you can us...

Page 93: ... choices Note If your photos retained the EXIF data recorded by the digital camera the F stop interval can automatically be determined based on the exposure time stored in the data Whereas if your images are non EXIF images you need to manually specify the F stop interval between your images 4 Click Save as button to save the camera curve profile Note If you used your camera s Automatic Exposure B...

Page 94: ... Dynamic Range 3 In the Composition tab select the Camera curve profile of the camera you used to take the photos Tip If your photos are handheld shots select Auto crop after registration in Registration and click Apply to merge them and remove excess white space from the merged image 4 Select Remove artifacts to fix differences in your photos before they are combined to compose the HDR image Sele...

Page 95: ...that you want removed 5 Click Brush in then drag over the area where you do not want any changes to be made When specifying the area to retain or remove you don t have to be precise with the marked area The area you want to fix or retain only has to be more or less covered by the brush strokes Tips When the size of a zoomed in image exceeds that of the preview window you can right click to pan the...

Page 96: ...to be used in the HDR image while the pink area is the clipped histogram data not to be used in the HDR image The pink area are the colors that cannot be displayed on screen 3 The Histogram adjustments are separated into Coarse and Details Drag the Coarse Contrast slider to adjust the overall contrast of the image 4 Adjust the Highlight Midtone or Shadow both in Coarse and Details to bring out fin...

Page 97: ...oose a preset size from the drop down list Click Apply to crop the image Tips Click Resize lock to keep the aspect ratio when resizing or check Use aspect ratio when creating the crop selection Click Reset to revert the image back to its original state before any adjustments were applied 3 Click Save to save the image as an HDR file HDR This lets you open the HDR image in the future if you need to...

Page 98: ...t select an image with the minimum number of objects to be removed and then click Set as key image the lock button 4 Click Brush out and drag over the objects you want to remove 5 Click Brush in and drag over the objects you want retained Tips You don t need to be precise in marking the objects They only have to be more or less covered by the brush strokes Select at least two images in the Image L...

Page 99: ...the Attribute Toolbar to open the Tool Settings panel In the Shape group define your brush attributes You can also specify the strength of the effect for each brush stroke in the Options group Note Options on the Attribute Toolbar and or the Tool Settings panel are different for each Retouch Tool 4 Paint over the area to fix PhotoImpact regenerates pixels to cover the damaged area based on neighbo...

Page 100: ...iated with photos taken using the camera flash with the Remove Red Eye Tool or command To remove red eye using the Remove Red Eye Tool 1 Click the Remove Red Eye Tool in the Toolbox 2 Click Show or hide Tool Settings on the Attribute Toolbar to open the Tool Settings panel 3 In the Tool Settings panel click the Shape group then set the brush size 4 Click the Options group then select the color of ...

Page 101: ...ors of an image There are two very useful Retouch Tools for colorizing or changing the color of images these are Color Transform Pen Alters the appearance of an image by changing the original color to another color You can adjust the Hue and Saturation values but the luminance lightness of a color is retained The result is vivid and more realistic than the Color Replacement Pen Colorize Pen Applie...

Page 102: ...mage which you want to colorize 4 Next click the Retouch Tool in the Toolbox and select Colorize Pen 5 Customize the brush settings on the Attribute Toolbar 6 Drag your mouse over the selected area until you get the desired results Tip To make the color look even smoother e g facial color select the Blur Tool in the Retouch Toolbox and drag your mouse over the area where the color was applied 7 Re...

Page 103: ... only clone on Grayscale and True Color images To use the Clone Tool 1 Click a Clone Tool in the Toolbox and adjust the settings on the Attribute Toolbar 2 Press Shift and click the mouse over the area you want to clone a crosshair appears 3 Drag over the area where you want the cloned area to appear Note The size and shape of the area painted are determined by the current tool s size and shape se...

Page 104: ... a realistic touch up job To use the Touch up Tool 1 Click the Touch up Tool in the Toolbox 2 On the Attribute Toolbar Set the options for the Touch up Tool Source color and Source texture determine how much texture and color are copied from the source area 3 Set the Texture mode Replicate and Smoothen determine how the texture from the source area will be applied to the target area 4 Press Shift ...

Page 105: ...th sharp and blurred images Straighten Automatically rotates the image and straightens it to an absolute horizontal or vertical position Crop Removes white space from the edges of the image Enhance Automatically adjusts and smoothens tone to improve overall image quality To apply an Auto process command other than Batch to your image simply select an item under the Auto process submenu Auto proces...

Page 106: ...Stitch provides multiple options and controls for both manual and automatic stitching giving you pixel level control for seamless joining of images You can Set auto stitching parameters to make automatic matches and align a floating image over an active image Drag a floating image until it matches up with an active image Define the reference point in each image to align the two images Select Auto ...

Page 107: ...u cannot see all the images in the Preview window use the zoom options below the Preview window Use Switch direction to swap the positions of the images 4 Select Auto stitch and enter the values in Overlap range percentage of overlap and Vertical Horizontal tolerance misalignment of two images 5 Click Test to preview the auto stitched image 6 Click OK Manual stitching Manual stitching gives you mo...

Page 108: ...oto Photo Frame 2 In the Frame tab select Frame 3 Select 2D Frame from the Style drop down menu Tip Select Do not merge frame to keep the frame as an object in your image This allows you to resize and reposition the frame 4 Set the frame Options Tip Select Shadow or Canvas to add a shadow or to enlarge the size of the document canvas Click Options to customize the settings 5 Click OK There are dif...

Page 109: ...the list To add custom text just type the text in the Text box 3 In the dialog box select the EXIF tags that you want to include in the caption in the Available Tags List then click Add 4 After adding the tags that you want included click OK Tip You can see a preview of the text in the Preview window 5 Set the text options such as Font Orientation and Position Tips Select Shadow then click Options...

Page 110: ...t You can then use the same logo in the future by selecting it from the list 3 In the dialog box select the image you want to insert then click OK Tip You can see a preview of the logo in the Preview window 4 Set the alignment of the logo in Orientation and Position Tips Select Shadow then click Options to add a shadow to your logo Select Do not merge text logo to keep the logo as an object in you...

Page 111: ...riety of selection tools to let you select parts of images that you only want to edit Selected areas in your image are indicated by a selection marquee Besides selections you will also be introduced to objects You will learn how to create edit and manage objects using tools such as the Transform Measure and Object Eraser Tools ...

Page 112: ... active Select multiple objects by dragging the Pick Tool from an empty area across the edges of a group of objects or enclose them within the selection area Select a set of objects by pressing Ctrl or Shift as you click them Merge all the objects together as a single object first select all the objects and then select Object Merge as Single Object or right click any object in the group then selec...

Page 113: ...useful when you want to separate a foreground object from the background This works best when the foreground subject and background have high contrasting colors To use the Lasso Tool Smart lasso 1 Click the Lasso Tool in the Toolbox 2 Select Smart lasso on the Attribute Toolbar to let you trace the edges of the subject you want to select 3 Set the Detection scope The Detection scope determines the...

Page 114: ... that is in between two anchor points To delete a selection path that is between two anchor points press Backspace 6 Click on the starting anchor point to close the selection The selection path instead of the usual dotted path becomes a line path Tip You can also double click to close the selection To use the Lasso Tool no Smart lasso 1 Drag the mouse to select the subject Tip If you are selecting...

Page 115: ... select all colors similar to the area selected based on the similarity value on the Attribute Toolbar Tip Select Connected pixels on the Attribute Toolbar to only select the similar pixels adjacent to your original selection If this option is cleared all pixels of a similar color within the image will be selected 4 Click the subject in the image to select the reference colors Note If there are ot...

Page 116: ...RGB or Compare by HSB color values to convert the similarity value In the RGB model Similarity ranges from 0 to 255 In the HSB model Similarity ranges from 0 to 100 Below is a guideline on what to expect when choosing particular color ranges A value of 0 selects neighboring pixels with exactly the same color value A value of 255 selects pixels of all colors thereby selecting the entire image A val...

Page 117: ...ng the boundary Trace the edge of the subject you want to extract To draw the boundary 1 Select Object Extract Object 2 In the Extract Object dialog box set the Color and Size of the brush 3 Drag to trace the edges of the subject that you want to extract Make sure that the subject you want to extract is enclosed by the brush strokes Tip If you want to remove parts of the selection click Eraser the...

Page 118: ... to the original state Step 3 of 4 Adjusting degree of extraction Set the detailed level of extraction To adjust the extraction degree 1 Adjust the Extraction Detail slider The higher the value the more details are selected when the object is extracted Note It is recommended to set the Extraction Detail to a high value if the boundary you created contains details that are subtle but you want selec...

Page 119: ... is set to 100 the original image will show through 3 After you remove or recover parts you want from the extracted object click OK The extracted object in the image is automatically selected after the dialog box closes You can save it in the UFO file format to retain the object as needed Mask Mode Masking is a process where changes are applied to a selected area of an image while the rest of the ...

Page 120: ...re s no selection A gray value represents partial selection or a selection with partial transparency Keep in mind that when you paint on the mask itself areas that you paint with black will become the default white mask while areas that you paint on with white will completely penetrate the mask to reveal the image underneath To use Mask Mode 1 Open an image in the workspace 2 Select Edit Mask Mode...

Page 121: ...6 You can either convert the selection to an object and paste it into another image or you can edit the marquee further by returning to Mask Mode or using a Selection Tool Note After you have created a selection using Mask Mode you can save the selection as a mask and use it in the future for other images See Saving selections to the object libraries for details Layer mask and object mask Layer ma...

Page 122: ... layer mask To edit the layer mask click Enter Mask Mode and modify the layer mask with the Transform Tool You can also click to change the relative position between the object and the layer mask for more varieties When you re done click Exit Mask Mode Notes Right click the object mask or layer mask for more options such as copy An object can have one layer mask only So if you want to create more ...

Page 123: ...etained or cut out On the Attribute Toolbar Preserve Base Image F5 determines whether the selection area is duplicated or cut out Select this option when you want to duplicate the selection area Deselect this option to create a cutout of the selection and fill it with the current background color when you move the selection Note Press Ctrl as you move a selection to preserve the base image even if...

Page 124: ...before Creating a border around a selection There are various instances when you might want to create a border around a selection area By applying a fill to this area you can easily create a frame around the main subject of an image for rectangular and oval selections If you have an irregular selection you can create a custom outline shape or simply emphasize the subject of an image by outlining i...

Page 125: ...e automatically To make a selection using Color Range 1 With an image open click Selection Select by Color Range 2 Select the method of selecting the color range that you want to use 3 Select Sampled Colors then click a color from the image on the left that you want selected Drag the Similarity slider to adjust the level of related colors that will be selected Tips A higher Similarity value will s...

Page 126: ...tial selection is not big enough to include all parts of the image that you want you have different ways of enlarging it Click Selection Similar or right click and select Similar Based on the existing selection area it expands the selection to include similar pixels from the entire image or from neighboring areas Click Selection Expand Shrink or right click and select Expand Shrink All sides are e...

Page 127: ...t are not part of the objects will not be included in the selection Using the Selection Manager The Selection Manager is a storage place where you can save frequently used selections For more details see Selection Manager Using a selection To use a selection in your active document double click the selection from the Selection Manager or drag it into the active window Once placed you can modify an...

Page 128: ...ransform Tool Select Selection Convert to Object Select Object Insert Image Object Via Cut Via Copy Managing object layers The Layer Manager helps you keep track of objects within an image To open the Layer Manager click in the Panel Manager Tip You can also open the Layer Manager by selecting My Workspace Panels Layer Selection Manager or press F3 If the panel opens and it does not display the La...

Page 129: ...r Manager 2 With the object selected select Object Properties 3 To hide an object in the image clear Show To make it visible select Show Using the Layer Manager 1 Select the object you want to hide or show 2 Click Eye beside the object thumbnail An opened eye means the object is showing an empty square means the object is hidden Sorting objects You can use Sort to arrange the objects thumbnails in...

Page 130: ...bjects up to 16 times and increase the group level each time by 1 To ungroup objects select Ungroup from Thumbnail menu commands or right click a thumbnail and select Ungroup Ungrouping decreases the group level by one Changing an object s layer in an image When an object is created it is automatically placed on the top layer of an image Converting a selection to an object places the object on the...

Page 131: ... also remove parts of the object so that images and objects that lie beneath it are visible thus creating a transparent object effect You can do this with the Object Paint Eraser and the Object Magic Eraser both of which are located in the Toolbox To use the Object Paint Eraser simply make adjustments to the brush on the Attribute Toolbar then begin painting on the area of the object that you want...

Page 132: ...und 5 Click OK Match Background Color Match Background Color blends a selected object or image with the base image by softening the edges and matching its colors This is useful when superimposing an object on another image To use click an object and select Object Match Background Color The adjustment will be automatically made Note This command only works for selections whose colors are similar wi...

Page 133: ...color of the shadow Separating a shadow from its object Separating a shadow and making it as a separate object from its original image is easy To do this select Object Split Shadow or right click an object and select Split Shadow The shadow now becomes a new object whose attributes you can modify such as changing the color or applying a painting texture Note Split Shadow is disabled when multiple ...

Page 134: ... source image Duplicating an object You can duplicate any object or group of objects that you have created You can duplicate objects by Selecting the object or group of objects and selecting Object Duplicate or right click and select Duplicate Dragging the object or group of objects while pressing Ctrl Note By default a duplicated object will be copied and superimposed on top of the source object ...

Page 135: ...ultiple objects 3 Select Object Align then from the submenu choose how you want to align the objects Tip You can also use the buttons on the Attribute Toolbar to align the objects To space objects evenly 1 Click the Pick Tool in the Toolbox and select the objects 2 Select Object Align Space Evenly 3 Select which Direction you want to space the objects Horizontally or Vertically 4 In Space select h...

Page 136: ...ry To store an object 1 Click Thumbnail menu commands or right click a thumbnail and select Store Image 2 Drag an object from an image to the Object Library window of the EasyPalette Tip You can also select Object Copy To Object Library 3 Enter a name for the object then select which Gallery Library and Tab group you want to store the object into 4 Click OK To store a selection 1 Click Thumbnail m...

Page 137: ...ibrary To use an object or selection drag them from the Object Library into an open document Remember the following when using an image from the Object Library When you drag an object to an open document the object is placed when you release the mouse When you double click a thumbnail in the Object Library or when you click Thumbnail menu commands and choose Copy Object to Image the object appears...

Page 138: ...s a selection area click Selection Import Selection Making a lower third PhotoImpact lets you create and add various objects for your video and DVD menu Use a video lower third to add animations or text at the bottom third portion of the video Add navigation buttons frames and bullets for your DVD menus as needed Note These objects can be used in other Ulead video and DVD applications as overlays ...

Page 139: ...nent It is best used when applying Rotation and Transform effects that require precision placement X and Y coordinate positioning in image mapping and encoding exact locations when designing web pages To use the Measure Tool 1 In the Toolbox click the arrow on the Eyedropper and select the Measure Tool 2 Define the Measure Handle by clicking a starting point anywhere in the image then dragging the...

Page 140: ...a specified angle and direction clockwise or counterclockwise Click Copy rotate to rotate an image while leaving a copy of the image in its previous position Tip To transform a selection instead of an object or image click Selection on the Attribute Toolbar Notes If you rotate or distort an entire image by anything other than 90 180 or 270 degrees extra space appears around the image filled with t...

Page 141: ... space To freely rotate an object 1 Select Rotate Freely under Rotate method on the Attribute Toolbar Tip You will notice that the object will have a rotation center in the middle Reposition the rotation center if necessary 2 Drag one of the corner handles to rotate the object You can also click Rotate by degree to apply a more precise angle of rotation Tip Click Rotate center Center on the Attrib...

Page 142: ...control line along the feature 4 Double click the image or any of the control points to rotate Note You can also use Adjust Auto process Straighten to quickly straighten an image 3D transformation PhotoImpact makes it easy to transform your images in three dimensional space via Rotate in Virtual 3D This tool will be most useful when you want your images to appear in a different plane or perspectiv...

Page 143: ...hange it back to Object Center Notes Moving the Object Center relocates its object handle thus moving the entire image but retaining the Projection Center in its original position When you see a round path with a focal point at the center that is the Object Center and dragging anywhere within it transforms your object in a three dimensional effect When you see two rectangular paths around your ima...

Page 144: ...ects To use the Object Eraser Tools on a path and text object base image or selection area it needs to be converted into an image object first Only 24 bit RGB 8 bit Grayscale Indexed color and Black White images can be edited with the Object Eraser Tools To erase parts of an object 1 In the EasyPalette Image Library select Rose 2 then drag it to the workspace 2 Click Object Eraser Tool in the Tool...

Page 145: ...e select Angular This means that the object type will only change when you switch direction as you drag the mouse 5 Specify how to insert the stamp objects in Placement and specify if the stamp objects will be treated as a single object or multiple objects in Object 6 Drag within the document to insert the stamp objects Notes You can create your own stamps by saving your work as a UFO file To add ...

Page 146: ... drag from the top to create a vertical one Tips Select Snap to Guidelines from View Guidelines and Grid to make objects snap to the nearest guideline when being repositioned To change the line style and color of the guideline select File Preferences General F6 and select the Guidelines and Grid category To remove a guideline drag it to the edge of the workspace To display the grid 1 Select View G...

Page 147: ...objects discussed in the previous chapter you will be able take advantage of the full power that these tools have to offer This chapter introduces you to just some of the things that you can do with the Paint and Fill Tools With this knowledge as a basis the best way for you to learn how to use these tools is simply to experiment and have fun with them you will be amazed at the stunning results th...

Page 148: ...d other drawing tools to create stunning artwork PhotoImpact gives you an amazing level of control over painting tools right down to the coarseness of the bristles When you select a Paint Tool the Attribute Toolbar displays the basic characteristics of the tool that you can customize directly such as its shape and size as well as the color and transparency of the paint or the material that you wan...

Page 149: ... mode Freehand allows you to paint freely by dragging the cursor on the canvas Straight Lines lets you paint in straight lines by clicking the start and end points of the line Connected Lines lets you paint multiple lines that are connected to one another 6 Start painting by dragging on the canvas Erasing PhotoImpact provides you with a variety of tools to remove colors from your document To erase...

Page 150: ...tool you can use it as is or you can further specify its characteristics on the Attribute Toolbar or in the Tool Settings panel Note When you modify any attributes of a preset the Preset menu automatically switches to show None Using the Tool Settings panel The Tool Settings panel conveniently puts all paint and editing tool attributes in one place and gives you more advanced options for customizi...

Page 151: ...sh The Particle Brush creates a dappled paint effect that can be useful for adding glitter and shimmers to your image or for creating an impressionistic painting among others To use the Particle Brush 1 Select the Particle Brush from the Paint Tool menu 2 On the Tool Settings panel select the Color group Select Single color or Multiple color mode then click the color square to select the base colo...

Page 152: ...fferent stroke techniques to get the paint effect that you want Painting with textures For almost all of the Paint Tools you can apply color as if you were painting on a textured surface To paint with texture 1 Select a Paint Tool in the Toolbox 2 Click Painting Texture menu on the Attribute Toolbar 3 On the Painting Texture pop up menu select Select Texture then choose a texture pattern you want ...

Page 153: ...ing the Paint Tool that you have selected To paint a border on a selection 1 Create a selection area using one of the Selection Tools or select an object or objects 2 Select the Paint Tool that you want to use for the effect and define its color as well as other attributes 3 Select Effect Creative Paint on Edges or press Shift P The edges of the selection or object will be painted with the Paint T...

Page 154: ...int as Object Mode lets you do the same but on an independent layer on top of the base image This is convenient if you want to use a particular image as a basis for artwork or if you want to apply paint on individual layers for example To use the Paint as Object Mode 1 Click Paint as Object on the Attribute Toolbar 2 Paint clone or retouch the image as desired 3 When you are done click Paint as Ob...

Page 155: ...em first to an image object by selecting Object Convert Object Type 2 Click Edit Active Objects Only on the Attribute Toolbar for selected editing tools only The other objects become temporarily transparent 3 Edit the selected objects using one of the editing tools 4 After you finish editing the objects click Edit Active Objects Only again to leave the Edit Active Objects Only mode Tip You can als...

Page 156: ...ent Fill Tools only work with Grayscale and True Color images To fill a selection or object 1 Make a selection on the area of the image that you want to fill or select an image object to fill Note If you don t select an object or make a selection on the image the fill is applied to the entire base image 2 Click the Bucket Fill Tool 3 Click Fill color on the Attribute Toolbar to select the color yo...

Page 157: ... any two colors specified in the Fill colors color squares To change the color either click the color square for the PhotoImpact Color Picker dialog box or right click to display the Color Picker pop up menu The gradient applied will be a smooth transition from the first start to the second end color The Multiple color method uses a palette ramp to apply a Gradient Fill to an image The colors used...

Page 158: ...y a Multiple color gradient fill 1 Click Fill in the Toolbox and select any of the three gradient fill tools Change the Fill method to Multiple color gradient fill 2 Click the Fill colors color square The Palette Ramp Editor dialog box opens with the palette library displaying thumbnails of color rings 3 Select a color ring on the thumbnail displayed Right click a specific control point to adjust ...

Page 159: ...uter generated Natural Texture fills include real world textures such as wood grain stone and fabric and Photo fills are photographic images that you can use as a fill To use the Texture Fill Tool 1 Click the Texture Fill Tool in the Toolbox 2 On the Attribute Toolbar choose a Texture fill preset category from the drop down menu Photo Natural or Magic Alternatively you can use your own image file ...

Page 160: ...ill an image object or selection area with tiled copies of another image that is currently open in the workspace To tile copies of another image drag one image to another image while pressing the L key Performing drag and drop texture and gradient fills PhotoImpact makes it easy to apply a full range of predefined textures and color gradients to any image object or selection area through the Fill ...

Page 161: ...ct Color Picker pop up menu where it gives you several options on how you can select a color Use the Color Panel a centralized color manager which also lets you easily apply predefined colors for your project Access the Color Panel by selecting My Workspace Panels Color Panel or click Color Panel see Using the Color Panel in the Panel Manager Note You can set your own default color picker in File ...

Page 162: ...Web Safe colors Select the Web Safe option at the bottom right of the dialog box while viewing colors in any tab Click the Web Palette tab third from the left to display the 216 color Web Safe Palette Enter a six digit Hex value combination of 00 33 66 99 CC and FF directly in Hex while viewing colors in any tab Hue Tab Brightness Tab PhotoImpact Color Picker for Grayscale image Hue Tab Brightness...

Page 163: ...s The Foreground color refers to the color currently being used for a specific tool such as the Paint Tools Bucket Fill Tools and the Path Drawing Tool among others The Background color is the base color of the canvas when you remove a portion of the image and Preserve Base Image is not selected It is also the background color used when you drag an object out of a current document onto an empty ar...

Page 164: ...use a solid color for the various tools you work with There are several ways to set the color when in Single color mode PhotoImpact Color Picker Click the color square to open the PhotoImpact Color Picker dialog box and select a color Color Picker pop up menu Right click the color square to open a pop up menu where there are several methods available for choosing a color RGB HSB Enter the RGB and ...

Page 165: ...ectrum Bar and select a color from the PhotoImpact Color Picker dialog box Set hue values of your gradient by adjusting Hue Shift and using Ring to rotate the color spectrum To remove or edit an existing color on the spectrum right click the control point of the color for editing removal You can also delete a color by dragging its control point off the tab Click beside the color box to add the def...

Page 166: ... Swatch on the pop up menu or click Add Swatch 2 In the Add New Swatch dialog box click the color box to open the PhotoImpact Color Picker dialog box and select the color you want to add Alternatively you can enter the color s RGB and HSB in the respective boxes 3 Type in a Name for the new swatch color then click OK Tip You can also add a new swatch from the Color tab For details see The Color ta...

Page 167: ...g in Indexed color mode maximum 256 colors The Color Table tab allows you to instantly set a tool color similar to the Swatch Palette by simply clicking a color Click the arrow to access the pop up menu where you can open the Color Table same as selecting Adjust Color Table or sort the Index color Palette by different criteria Understanding Indexed color images Indexed color images are unique in t...

Page 168: ...of cells available depends on the data type of your image 3 Click OK Loading and saving color tables In PhotoImpact you can save color tables and then load them into another compatible Indexed color image This ensures that two or more images share the same composition which is particularly important if you are preparing images to be displayed in a 256 color display mode such as CD titles or for th...

Page 169: ...s chapter shows you how to add text to your images and how to use the different Path Tools to create basic geometric shapes as well as complex polygon shapes Advanced techniques such as creating wrapping text adding 3D properties to paths and text and fusing objects using the Z Merge Tool are also described in this chapter ...

Page 170: ...tly on a specific area in your workspace To add text 1 Click Text Tool win the Toolbox Click a point on the image where you want to place the text A blinking cursor will automatically appear where you can enter your text 2 Highlight a section or the entire text then apply formatting options by accessing the Text Panel For more on the Text Tool s Tool Settings panel see the next section 3 Click OK ...

Page 171: ...whole text block Rotate This can be applied to individual characters words or the whole text block Line spacing and Character spacing Apply to the entire text block Automatic line spacing Applies to the entire text block When Line spacing is set to zero default value this calculates the ideal spacing between lines based on the largest character in each line When Line spacing is set to a negative v...

Page 172: ...hness or sharpness of your text Choose from three anti aliasing levels Notes Select Keep original text in the Split Text tab to preserve a copy of the original text block Applying the 3D Pipe effect to a multicolored text block will change the color attributes of the whole block Applying text effects Once you ve added and positioned the text on your image the next step is to give it that extra spa...

Page 173: ...path object 1 Click the Text Tool Enter your text and select options for formatting your text 2 Select Object Convert Object Type From Text Image To Path Notice that the text attributes are grayed out in the Attribute toolbar after your text has been converted into a path object 3 Click the Path Tool then select the Path Edit Tool 4 Click Toggle to switch from path object mode to wireframe mode or...

Page 174: ...ransformed in any way with no loss of quality To store editable path objects you must save them in the native UFO Ulead File For Objects file format PhotoImpact also makes it possible for you to convert image objects and selection area marquees into paths See Tracing and converting images into paths for details Creating paths When creating path objects you can either start with a True Color image ...

Page 175: ...l You can start with the basics by using PhotoImpact s wide range of preset shapes then move onto more advanced techniques making your own creations from scratch or even combining preset elements with your own unique shapes All the options for creating customizing and tweaking a shape are available on the Attribute Toolbar and the Tool Settings panel of the Path Drawing Tool You Examples of closed...

Page 176: ...ry The Freeform Shape menu showcases three important tools for creating custom hand drawn shapes The first is the Spline Tool which by default draws geometric curves but can also draw straight sections The second is the Bezier Tool which draws straight sections by default but can also create curves The final tool is the Freehand Tool which can be used to create entirely freeform shapes but can nev...

Page 177: ...hape from one of the three drop down shape menus Note You can also import Adobe Illustrator AI files 3 To draw the shape click at a starting point hold the button and drag your mouse to form the shape then release the button 4 If you created a polygon shape you can change the number of sides or pointed tips of the shape on the Attribute Toolbar 5 To add a surrounding border around the path object ...

Page 178: ...m paths and attributes To save the entire path object including its attributes and 3D properties simply drag it to the EasyPalette The Add to EasyPalette dialog box opens letting you save the object to the desired Object Library Later on you can simply drag the thumbnail of the path object to the workspace to add it to another document When you click Add on the Attribute Toolbar the Add to EasyPal...

Page 179: ...e menus The Attribute Toolbar options of the Outline Drawing Tool are the same as that of the Path Drawing Tool but also has additional settings for defining outline width and style in the Tool Settings panel Examples of path objects created using the Path Outline Tool Shape options Sides or points Object mode Color Gallery options Shadow options Material options Show hide Tool Settings Add tool a...

Page 180: ... on the Attribute Toolbar 5 Click Mode Select 2D Object or select a 3D Mode to give the object a three dimensional appearance 6 Click the Color box on the Attribute Toolbar to modify the color apply Gradient or Texture fills or add a Fade out effect 7 You can set the Width and Style or modify the thickness of the outline and the type of line on the Attribute Toolbar Notes To ensure smooth edges se...

Page 181: ...nts 3 Draw the path Straight path Click at a starting point and drag your mouse in the intended direction of the path Click again to end the path Curve or irregularly shaped path Click at several points to gradually form the shape of the path Double click to complete the path Note For more information on drawing curves and irregularly shaped paths see next section 4 Set the line Width and Style on...

Page 182: ...inear paths as well When you use this tool to draw paths each line segment that you create automatically curves itself while you draw the path Drawing curves and custom paths Select the Spline Tool or Bezier Tool from the Freeform Shape menu on the Attribute Toolbar to draw curves and irregularly shaped path objects With the Freehand Tool you can use your mouse or pen tablet just like you would us...

Page 183: ... 6 Continue clicking and moving your mouse until you have created the desired shape The path automatically curves based on the position of the nodes 7 Double click to complete the path Note Right click at any time to cancel drawing To draw a line segment To draw a straight line segment within a path hold down Ctrl while you click the start and end positions of the line segment This prevents the Sp...

Page 184: ...he cursor to the point at which you want your line to end and click again to complete the segment 4 To draw a curve segment click at the point where you want the curve to start and then drag in one direction Then click at the endpoint of the curve segment and drag in the opposite direction See illustration below To draw an S curve segment click and drag your mouse in the same directions at the sta...

Page 185: ...available to all path tools except for the Path Edit Tool After you have created the shape you can apply any of the effects and editing options available to path objects To create a path using the Freehand Drawing Tool 1 Click the Path Tools then select one of the three drawing tools 2 Select the Freehand Tool from Freeform Shape menu on the Attribute Toolbar 3 In your document click at the point ...

Page 186: ...anged for a shape after it has been created and should be considered prior to drawing the shape To make the shape approximate as closely as possible to your original tracing maximize the Accuracy setting in the Freehand drawing group of the Tool Settings panel This setting can only be adjusted for the most recently created Freehand path object To cancel drawing click the right mouse button while y...

Page 187: ... the Path Drawing Tool you can create a single object with multiple path shapes After drawing the first shape click Mode on the Attribute Toolbar and select Continue Draw Mode then draw the next shape 1 Drawing the 1st path 2 Drawing the 2nd path 3 Drawing the final path ...

Page 188: ... Adobe Illustrator To import Adobe Illustrator files AI 1 Click the Path Tools then select the Path Drawing Tool or Outline Drawing Tool 2 From the Preset Shape menu on the Attribute Toolbar select Custom Shape The Custom Shape dialog box opens displaying preset objects 3 Click Import The Input AI File dialog box opens 4 Select an AI file to import and click Open The selected AI file is added to t...

Page 189: ...shapes Freehand drawing Gives options for adjusting accuracy and closing points smoothly Filling a path with the Even Odd Fill option Whenever you render a path object the object is always filled with the color specified in the Color square on the Attribute Toolbar When Even Odd Fill is selected in the Options group of the Tool Settings panel the fill only occupies alternate areas created by overl...

Page 190: ... and tweak path objects with great versatility When you edit path objects they will be displayed as a wireframe structure This structure essentially consists of the line and curve segments that comprise the path Each segment contains nodes and up to two control handles at each end all of which you can adjust by dragging Nodes let you control the start or end position of a line segment whereas cont...

Page 191: ...tort the path horizontally or vertically by changing the Mode in the Attribute Toolbar to Horizontal Deform or Vertical Deform When you select Horizontal Deform or Vertical Deform a bounding box with four nodes then appears When a node is clicked the horizontal or vertical segment adjoining it will display control handles at each end Furthermore all four Horizontal Deform Vertical Deform ...

Page 192: ...o easily change between the Path Edit Tool and the drawing tool which you used to create the object Click Editing on the Attribute Toolbar Right click the object From the pop up menu select Edit Path to switch to the Path Edit Tool or select Edit Attributes to return to the drawing tool Editing basic shapes or line and arrow paths After drawing a preset path shape or a line and arrow path you can ...

Page 193: ...le selecting other nodes Alternatively you can hold down Shift or Ctrl and then drag your mouse across the areas of the path that contain the nodes that you want to select To deselect multiple nodes press Ctrl then drag the mouse across the nodes 3 To move the selected node s click and drag the selected node s to the desired position 4 To move the selected node s click and drag the selected node s...

Page 194: ... click on the segment 7 If you want to create a path with more detail and nuances add more nodes and further adjust the path To add a node select the target segment click Add point on the Attribute Toolbar then click on the part of the segment on which to add the node 8 Alternatively if you want to create a smoother simpler path remove some nodes and adjust the remaining nodes To remove a node cli...

Page 195: ...elect a node in a polygon all the other nodes in its set are automatically selected Consequently when you adjust the position of a node or its control handles all nodes and adjacent segments in the set are adjusted simultaneously relative to the center of the polygon The original node set of a polygon that you create is the base node set The number of nodes in the base node set can be specified on...

Page 196: ...me way 3 To add a new set of single nodes click Add single node set on the Attribute Toolbar then click on the part of the segment to add it A new set of nodes will appear on the corresponding segments on each side of the polygon using your click point as a reference 4 To add a set of paired mirror nodes click Add paired node set on the Attribute Toolbar then click on the part of the segment on wh...

Page 197: ... Grouping Groups or ungroups selected paths Note These commands can only be applied to multiple paths created using the Path Drawing Tool s Continue Draw Mode See Drawing multiple paths for details Grouping and ungrouping paths If you have created a path object using Continue Draw Mode containing multiple paths it is advisable that you group them into one or more groups of paths Group related path...

Page 198: ...irregularly shaped paths It draws paths exactly the same way as the Bezier Tool Follow the same procedure in Bezier Tool to draw a free path 3 To edit the path s you have just drawn select Edit existing path on the Attribute Toolbar 4 Click a path segment then right click and select Convert to Curve or Convert to Line to change a line segment into a curve or vice versa 5 Click a node to show contr...

Page 199: ...Tool To make the path into a selection Click Toggle in the Bezier Curve Tool s Attribute toolbar This button lets you switch between path and selection modes Note The Bezier Curve Tool can be used to edit paths created with Path Tools While a path tool is selected set the path s Mode to Selection Then select the Bezier Curve Tool and click Toggle to switch to wireframe mode and edit the path Witho...

Page 200: ... the area is easily distinguished from the background image such as with text on an image To convert a raster image into a path 1 Select Edit Trace Edges Selection Marquee to trace a selected area Or select Edit Trace Edges Image to automatically trace dark areas on the image 2 In the right hand side of the Trace dialog box you will see a preview of the traced path Adjust the following settings to...

Page 201: ...f you create a text or path object on top of a base image you can also change how the object appears against its background image Right click the object and click Properties to open the Object Properties dialog box Different settings are available for resizing the object repositioning merging with background color and more The Image Map tab in the dialog box even lets you add hyperlink properties ...

Page 202: ...D properties Rounded Rectangle 3D Round with transparency Ellipse Rounded Rectangle Rectangle Circle Final edited shape 3D Chisel with thin border With bump map 3D Pipe with transparency 3D Round with thin border Continue Draw Duplicated shapes Final shape Final edited shape Final 3D path object ...

Page 203: ...colors or either a Natural or Magic Texture fill Texture fills are applied to the area within an object s border whether the object is 3D or not Click the Color and Texture Boxes to invoke their respective dialog boxes Bevel Lets you define the 3D edge of an object with a variety of preset styles The size of the bevel edge is determined by the Border Depth settings None 2D object 3D Round 3D Chise...

Page 204: ...objects and smoothen the object surface Reflection Projects an image reflection onto the object s surface This differs from the Color Texture which simply fills an object with an image Transparency Lets you set whether or not you can see through the object and if so to what degree 3D Chisel with maximum border 3D Chisel with smaller border 3D Pipe with maximum depth 3D Pipe with smaller depth With...

Page 205: ...t Click and drag your mouse over the object surface to adjust the position of each light source Alternatively you can select individual lights in 3D on the Tool Settings panel Select which light source to adjust then click Adjust light and move the mouse over the document to view the effect Click to lock down a light position Press Esc to abort Click More to add lights using the Material dialog bo...

Page 206: ...ar draw a 3D object and simply make the transparency setting higher The following procedure shows you how To create a transparent object 1 Click the Path Drawing Tool then select a Shape and draw the path 2 Click Editing on the Attribute Toolbar to edit the path shape Click Editing again to return to the Path Drawing Tool 3 Change the Mode of the path object to 3D Round on the Attribute Toolbar 4 ...

Page 207: ...to give the object a more realistic appearance Change the X and Y values to adjust the texture s displacement over the bump map 6 Clear the Use bump as reflection option if the object has a flat surface However if your object has a round or curved surface select this option to map the image across the entire surface 7 Select Invert bump map to make the image appear raised instead of carved out of ...

Page 208: ...e Gallery provides a wide selection of preset colors and gradients as well as glass metallic and other outstanding textures that you can directly apply to text objects Other visually striking effects such as fire snow neon glows and more are also available Each of these effects can be applied to path objects as well To apply a preset Type effect 1 Click the Text Tool on the Toolbox Enter your text...

Page 209: ...ows you to create your own wrap effects Applying wrap effects from the EasyPalette Preset wrap effects are found in the Wrap gallery of the EasyPalette To apply a wrap effect from the EasyPalette 1 Create a text or path object 2 Open Text Path Effects in the EasyPalette select Type gallery then choose a preset effect The Wrap Gallery allows you to apply Bend Text Text Wrap and Path Wrap effects to...

Page 210: ... path PhotoImpact automatically makes many duplicates of the object and lines them up over the path Outline path objects as well as line and arrow path objects cannot be wrapped over a path Objects can be wrapped on any type of path including solid filled path outline path or line and arrow path Modifying wrap effects PhotoImpact allows you to change the way an object wraps You can wrap a single o...

Page 211: ...f the object s is the same length as the path 2 Set Start height larger than End height or vice versa to give perspective to the objects Entering negative values for both options will turn the objects upside down Enter 100 in both fields to reset 3 By default the objects start to wrap at the tip or the first point of a path Enter a higher value in the Start position entry box to shift the objects ...

Page 212: ...ive and use even odd fill methods on overlapping adjacent characters Mitre joint Only available if the above two options are selected This will cause greater variability in character height and perspective to make characters fit legibly Vertical Places the left side of text string adjacent and perpendicular to the path Notes When wrapping text objects if Automatic is selected the last string may b...

Page 213: ...th mode and Object mode or click the path object 3 In Path mode set the Edit mode to Free edit or Non free edit mode Click the nodes and drag the handles to adjust the path shape see Editing paths 4 Click Toggle again to return to path object mode Notes If you want to copy the path of a wrapped object and use it to wrap other objects select Object Wrap Get Wrap Path to make a duplicate of the path...

Page 214: ...unt At 50 default text bends downwards in a semicircle 100 bends the text in a full circle To bend text upwards choose a negative setting 5 Give the Start height a different value from End height for a perspective effect Entering negative values for both options will turn the text upside down Type in 100 for both the start and end heights to reset the text back to its original orientation and size...

Page 215: ...uding text objects Notes Z Merge cannot be applied to Web objects Z Merge can be applied to objects in RGB 24 bit True Color documents only The Z Merge Tool is located in the Toolbox The Attribute Toolbar of the Z Merge Tool is only activated when an object or group of objects that can be assigned Z Merge values z values is selected By default all Z Merged objects have a z value of zero Assigning ...

Page 216: ... have been assigned z values they can interact with each other instead of sliding independently over and under one another Notes When multiple Z Merged objects are selected the Z Elevation slider box will display the z value of the object with the lowest z value If the value in the Z Elevation slider box is changed the new value will be applied to only the lowest z value object All other selected ...

Page 217: ... so you can easily locate and apply them to your images Preset effects are grouped into galleries in the EasyPalette that you can just drag and drop to apply to your images Customizable lighting artistic distort and other special effects are grouped under the Effect menu ...

Page 218: ...ight click the new object then select Merge to integrate it with the base image For more information on how to use and manage the EasyPalette see Using the EasyPalette Applying special effects Choose from the special effects in the Effect menu to customize and apply to your images Various effects ranging from lighting artistic distort to animated effects and custom filters are available The follow...

Page 219: ...ount of light on the image Exposure settings range from 0 and 200 The higher the value the more light on the image Ambience brightness The general light over the whole image Click or right click the color box to specify its color Light color and brightness The color of the light focus can be selected from the color box Use the sliders to set the intensity Light angle Drag the light angle nodes or ...

Page 220: ...image To apply the Brick Tiles effect 1 Select Effect Artistic Brick Tiles 2 Select a preset brick Shape 3 Under Settings adjust the characteristics of the brick pattern Set the Brick size Spacing between bricks and the Canvas color that is the color of the gaps between bricks You can also adjust the Angle of the brick pattern by dragging the red grip on the dial or manually entering an angle 4 Un...

Page 221: ...or select Smooth to have a closer resemblance to the original image 3 Adjust the amount of Detail A lower value includes lesser detail from the original image and gives a more cartoon like look while a higher value includes more detail and gives a less pronounced effect Note To detect edges around the prominent shapes in the original image and draw the outlines in the resulting image select Trace ...

Page 222: ...Contour Drawing 2 For an image showing a lot of detail especially on the subject s background set Edge sensitivity to Low to avoid picking up too much unwanted detail If the subject from which contours will be drawn has a plain background you can choose a Moderate or High sensitivity level 3 Set the amount of detail to be traced and drawn with contours by adjusting the Threshold range slider First...

Page 223: ...nique where an image is scratched into a metal surface The surface is coated with ink and then paper is applied to it When the paper is pulled away it bears an impression of the original image PhotoImpact s Engraving effect replicates this technique providing three detailed layers of filters and settings to enable maximum fine tuning To apply the Engraving effect 1 Select Effect Artistic Engraving...

Page 224: ... effect Middle Layer All the shadows and a substantial part of the highlights and midtones are covered Top Layer Only the shadows are covered Adjust the threshold range to fine tune the depth of the effect 5 For each layer you can also adjust the Brightness and Contrast of the areas that are applied with the engraving effect 6 For the resulting image choose a color for the engraving You can use a ...

Page 225: ... and overlapping strokes 4 Change the Density value to adjust the spacing between the strokes A higher setting results in more tightly packed strokes 5 Adjust the Variations The higher the setting the more random the strokes will appear to be 6 Select a Canvas color underlying the brush strokes 7 Adjust the angle of the brush strokes by dragging the red grip on the dial or manually entering an ang...

Page 226: ...ct applies this dynamic appearance to your images To use Impressionist 1 Select Effect Artistic Impressionist 2 Select a texture for the brush To choose from available presets click the box next to the Texture option then select a texture Note To import and use a custom texture click the down arrow then select Add Texture 3 Set the Density Stroke length Stroke width and Stroke opacity The higher t...

Page 227: ...e to use for the effect To choose from preset shapes select Texture then click the box next to this option and choose a shape Note To import and use a custom shape click the down arrow then select Add Texture 3 Set the Density The higher the setting the less mortar spaces will be shown between the tiles 4 Set the dimensions of the tiles in Length and Width The greater the tile size the more abstra...

Page 228: ...4 Select a Custom stroke color for a two toned effect Alternatively select Source image to render pen strokes in the underlying colors from the original image 5 Set the canvas color 6 If you converted your image to an object or made a selection in step 1 you can adjust the canvas Transparency to blend the resulting image well with the background that you will be compositing the object or selection...

Page 229: ...ng effect first convert the image to an object or make a selection Otherwise skip this step 2 Select Effect Artistic Screening 3 Select a Texture This texture will be replicated to form the screen elements in the resulting image To choose from available presets click the box next to the Texture option then select a texture Note To import use a custom shape click the down arrow select Add Texture 4...

Page 230: ...e a storm or ripples on a pond Custom Effect This custom effect distorts the pixel positions in an image by changing their x and y coordinates In this effect distortion of pixels applies to the entire image To create a custom effect 1 Select Effect Distort Custom Effect The graph displayed in this dialog box represents the physical placement of pixels in an image In general a steeper curve moves p...

Page 231: ...Glass Magic Gradient Magic Gradient generates sophisticated gradient patterns that cannot be made with the Gradient Tool or a Gradient fill Magic Gradient can be applied to the whole image a selection or to an object To apply a Magic Gradient effect 1 Create a selection area using a Selection Tool or make an object active in the workspace 2 Select Effect Fills and Textures Magic Gradient 3 Click E...

Page 232: ... edges 1 Create a selection area using one of the Selection Tools or select an object or objects To apply the effect on the entire image right click the image and select All 2 Select the Paint Tool and open the Tool Settings panel on the Attribute Toolbar 3 Define brush settings in the Shape and Color in the Tool Settings panel see Using the Tool Settings panel 4 Select Effect Creative Paint on Ed...

Page 233: ...r conical Corner The corner of the image where the curling action starts and the direction of the pointed end if it is a cylindrical curl Mode The reverse side of the image which is visible during the curl Choose from Opaque non transparent curled edge Reverse reflection of the original image on transparent film or Transparent transparent film with no image Angle The tightness of the curled edge a...

Page 234: ...tion copies the retained field to the eliminated field while Interpolation regenerates the eliminated field 4 Click OK Animation effects Creating animations to place on your Web pages doesn t have to be difficult Some of the more popular effects in PhotoImpact have integrated animation dialog boxes to assist you in creating them There are two types of animation creation sections available in Effec...

Page 235: ...tions The selection or image to be animated appears above the panel to the left where you can move the object or the focus of effect from key frame to key frame Above the panel are the parameters of the object or effect s behavior Under the preview window is the effects gallery with presets to apply to your animation By default animations have 10 frames of which the first and last frames are key f...

Page 236: ... of the animation Removing key frames To remove a key frame so that it becomes a regular frame select its marker on the slider bar then click the button Playing a frame based animation Animations can be repeated continuously in two modes Selecting Auto Reverse will play the animation forward to the last frame then backward to the first frame Selecting Loop will continuously repeat the animation fr...

Page 237: ...ve for Web As HTML then view the file through a browser see Previewing in a browser More dialog box options Save Creates an animation file as an animated GIF After saving the dialog box remains open so you can continue to modify the animation Add Saves a frame as an image or the complete animation to the EasyPalette Preview Displays a preview of the effect of the current animation frame at full si...

Page 238: ...s in the animation 4 Modify a storyboard entry by clicking the corresponding thumbnail image and then selecting another template effect Click Delete to remove an entry or Delete All to start over 5 Click Save to create an animation file After saving the Effect dialog box remains open so you can continue modifying the effects settings See Saving Animations below for details 6 Click OK to close the ...

Page 239: ...ade the quality Infinite loop Creates a continuous animation Clear it and enter a number in the adjacent box to define a limited duration Frame delay time How long a frame will be displayed in hundredths of a second before switching to the next one Transparent background Creates empty transparent spaces between images when the animation is played in a Web browser Dither Allows GIF Animator to comp...

Page 240: ...ist Texture dialog box adjust the Hue shift Ring and Repeat options 3 Select a style from the Pattern samples or create a new set of 6 by selecting a base image from the Pattern templates The Pattern templates define the basic warp that is applied to the Palette ramp 4 Click OK To create an animation 1 In the Fills and Textures Artist Texture dialog box click Advanced to continue 2 Drag a sample f...

Page 241: ...You can also choose other coarse surfaced materials such as snakeskin Animal Hide Embosses your image on rough animal skin Smooth Leather Impresses your image on treated animal hide Metal Converts your image s surface into metal Plastic Converts your image s surface into plastic Stone Converts your image s surface into stone Contour Lines Creates radial lines of different hues within your image To...

Page 242: ...Click Advanced to expand the dialog box and display the storyboard at the bottom Drag the warped image from the right hand preview pane down to the storyboard or click Insert to add it to the sequence To remove an image from the sequence first click the icon in the Storyboard then click Delete To clear out the storyboard click Delete All 4 Click Save to create an animation file first After saving ...

Page 243: ...el Note By default Keep aspect ratio will be selected This constrains the crystal s maximum size to the shorter dimension of the image or selection 3 Adjust the dimensions and proportions of the crystal with the Width and Height variables in the Model tab Note Attributes vary from template to template 4 Adjust the position of the crystal in the image by clicking and dragging it across the preview ...

Page 244: ...me in the animation sequence This will automatically assign this frame as a key frame 4 Click the Basic or Advanced tab on the right of the preview window to define attributes such as color size and angle attributes vary depending on the preset 5 Move the slider or enter a value to modify the overall brightness in Ambient light To change the image s color tone click the color box 6 Add or delete l...

Page 245: ... means you can simulate falling rain thunderstorms cloud formations brush fires and other special effects and save your images as animated GIFs or sequenced BMPs Choose the motion type for your particles Manual where all particles are manually placed Directional where all particles follow one motion or Emitter where the particles seem to emanate from one source then radiate away from the center Al...

Page 246: ... 1 Select Effect Creative Particle Effect 2 Select a Particle effect from the Effect gallery 3 Define the number of elements by specifying a value in Density 4 On the Advanced tab select a motion type Manual Directional or Emitter Note For Rain and Snow only the Directional method is available 5 Define other attributes in the Particle parameters panel The available attributes vary depending on the...

Page 247: ...he image click Insert to save the image to the Storyboard Click Reset to restore image to its original state between creating storyboard thumbnails Note Once the image is inserted in the Storyboard you may use it as a frame for animation You can edit the frame sequence by using the Frame controls 4 Click OK to apply transformation to your image Click Save to save the transformation as an GIF anima...

Page 248: ...ul To add a special Type Effect 1 Select Effect Creative Type Effect 2 Select an Effect template from the Effect gallery 3 Modify the effect s parameters in the Parameters panel 4 Click OK then choose whether to apply the current frame settings to the image or save to an animation file first then create as a new linked object Note When you apply a Type Effect to text objects you will lose the text...

Page 249: ...7 BATCH PROCESSING Batch processing provides quick solutions to operating a series of commands This is particularly useful when you are processing a large number of commands or images ...

Page 250: ... the Quick Command Panel Select My Workspace Panels Quick Command Panel Click Quick Command Panel in the Panel Manager Drag and drop or double click a task saved in the EasyPalette or Press Ctrl F2 The Quick Command Panel contains two tabs History Displays a history list of commands applied to the currently selected image Undo or redo commands to any stage in the image development by using the sli...

Page 251: ...After recording a series of actions you can apply them all or just a select few to another image To apply an entire series of actions to an image simply click Play in the Task Tab All recorded actions will be applied To apply a single command to an image use the Task Tab and click the desired command Notes Click Task menu commands and select Task Manager on the pop up menu to organize and edit tas...

Page 252: ...duplicate an earlier image state 1 In the History Tab drag the slider or select the state in the history list 2 Click Duplicate on the toolbar 3 Select the original image in the workspace then drag the slider or select the last command in the history list to reapply all commands Notes Click Clear Undo Redo History to purge the history list for the selected image This can be beneficial for program ...

Page 253: ...be applied To process images with Batch Manager 1 Select Window Batch Manager You ll find all open images displayed as thumbnails 2 From the list of open images select the ones where you want the operation applied You can select multiple images by holding Ctrl or Shift while clicking or click Select All to choose all files 3 Select the command you to run from the Category and Operation lists 4 Cli...

Page 254: ...xperiment more quickly with the variables that affect these image file formats the most To perform a batch test 1 Click the Batch button in the Image Optimizer dialog box 2 For GIF and PNG enter the lowest number of colors to test in the Fewest colors box For JPEG enter a number for Lowest quality 3 For GIF and PNG enter the highest number of colors to test in the Most colors box For JPEG enter th...

Page 255: ...al and novice Web developers This chapter explores the Web capabilities of the program covering everything from creating basic Web pages enhancing images designing components applying script effects to assembling the entire site from scratch Other export options are also discussed in this chapter including creating Web Albums and managing Web slide shows ...

Page 256: ...nal file of a Web page 1 Select File Open from Web Image 2 Type the URL of the Web page or the file path on your local computer in Address then press Enter 3 Select an image then select one of the following options To download the selected image from the Web page and open it as a new image in PhotoImpact click Open To open the original working file of the image on your computer click Locate or Bro...

Page 257: ...ture the entire height of the Web page as an image but not the width This may not be a problem for Web pages that can automatically resize otherwise if you want to convert the whole Web page you will have to specify a width that will accommodate the page Hyperlinks in Web pages are disabled in the Open Web Page as Image browser therefore you must specify the exact Web page location Creating a Web ...

Page 258: ...ly This appears as a new image in the workspace Optimize and save it as an image file then insert it as a Web background to your Web page document by selecting Web Web Properties To create a tiled background 1 Select Web Background Designer Or select Web Web Properties On the Background tab select Background Designer texture 2 Enter the dimensions of the background tile in the cell size boxes 80 x...

Page 259: ...kground 1 With the base image hidden select Web Shift Image 2 Click and drag your mouse over the Preview window and move it around until you get the desired result You can also use the horizontal and vertical offsets for precise positioning 3 Click OK Notes If the base image is displayed the Shift command repositions the base image instead The Shift image offset boxes on the Background tab of the ...

Page 260: ...to change how strongly the image selection area overlaps upon itself and how strongly it blends the overlap with the native image pixels 4 Click Preview to see how the image selection area appears when tiled Clicking anywhere on the preview image or pressing Esc returns you to the previous dialog box Note A smaller image selection provides more tiles A very large image selection may not tile Photo...

Page 261: ...nstrains the button size to the dimensions of the current selection or image Outward Expands the dimensions of the current selection object or image 5 Select a width setting under Options The first option makes the value of the left side equal to the top and the right side equal to the bottom The second option makes values for all sides equal The third option allows a different width value for eac...

Page 262: ...othness setting for greater distortion Notes Irregularly shaped image selections do not render very well Instead of using the selection to make a button consider making a button from a path object and then pasting the image selection on top To make buttons for Rollovers duplicate the object you want to use for the button before opening the Button Designer Then select Pressed to create one button a...

Page 263: ...ork of slices then add erase or tweak lines as required To manually slice an image 1 Select Slice Tool in the Toolbox Note On selecting the Slice Tool by default Protect Web Objects will be selected This option will not work however if Erase All or Slice Evenly are used Provides the options of adding a horizontal or vertical slice line or to drag out a rectangular cell Automatically slices your do...

Page 264: ...ne to remove it Note To move a section of a slice line click Pick Mode then press Ctrl while moving it To delete a section of a slice line click Erase then press Ctrl when selecting the line to delete 5 Click Pick Mode then select a cell to assign a name and hyperlink information to it in Cell properties of the Slice Panel 6 In Pick Mode select a cell then select an image file format and optimizat...

Page 265: ...ened Alt text Alternative text to appear in place of the hyperlinked image to describe the function of that image This function is for browsers that do not display images and for those where image loading has been switched off Status bar The message to be displayed in the status bar of the browser on mouseover of the hyperlink 3 Click OK Note To save your image as a Web page select File More Save ...

Page 266: ...ith options to duplicate or to select other image maps To reposition an image map in the stack click it then click an Arrange button Note By default more recently created image maps are stacked higher than older ones If image maps are overlapping the hyperlink of the highest image map is active Object based image maps see Creating object based image maps for details are displayed with a similar se...

Page 267: ... Image Optimizer represented as an icon in Slicer or Rollover Select Web Image Optimizer Note When opening Image Optimizer in various ways the dialog box and available features can be slightly different to meet appropriate situations Basic controls in Image Optimizer Image Optimizer provides the following control buttons Zoom in Increases the image magnification in the preview windows Zoom out Dec...

Page 268: ...ge Optimizer If objects have been selected decide how to save these objects for optimization Entire image Combines all objects and the Web background or the base image depending on which one is displayed on screen Selected objects Saves selected objects as one whole image Selected objects individually Saves selected objects one by one Image Optimizer prompts a confirmation message before displayin...

Page 269: ...ou can also assign a mask or matte to it Because GIFs support maximum 256 8 bit colors it is more suitable for line art or text than for photorealistic images To optimize an image as a GIF 1 Select Web Image Optimizer If objects have been selected decide how to save these objects for optimization 2 Click GIF Image Optimizer 3 Select a color palette from Preset in the GIF Options tab Customize it f...

Page 270: ...y An advantage to PNG over JPEG and a lesser extent GIF is that it uses a lossless compression method while supporting True Color images To optimize an image as a PNG 1 Select Web Image Optimizer If objects have been selected select an optimization method See Basic controls in Image Optimizer for details 2 Click PNG Image Optimizer 3 Select a color palette from Preset in the PNG Options tab Custom...

Page 271: ...e lowest number of colors to test in Fewest colors For JPEG enter a percentage 0 to 100 of compression in Lowest quality 3 Similarly for GIF and PNG enter the highest number of colors to test in Most colors For JPEG enter a percentage of compression in Highest quality 4 Select either Number of tests to perform a specific number of tests or Increment to perform a single test for every increment of ...

Page 272: ...PEG PNG or GIF format Linking multimedia objects Multimedia objects that can be linked in Web pages created in PhotoImpact range from files stored locally objects on the Web audio files Java applets Flash animations to Shockwave interactive objects and video files Note Linked Objects should not overlap other objects or the base image in order to avoid unexpected file size increases and file format...

Page 273: ...ill always be opened in PhotoImpact while animated GIF objects will be always be opened in Ulead GIF Animator which is included with PhotoImpact To associate applications with multimedia files 1 Select Web Object Editor Manager then click Add 2 Browse for the executable file of the application to associate with your multimedia files 3 Click OK Notes With the exception of files linked from the Web ...

Page 274: ...Text Tool HTML text appears on a Web page as plain text while text created with Text Tool appears as a bitmapped graphic You can use both forms to create text for a Web page However there are advantages and disadvantages to both HTML text You can easily enter or modify text Plain text speeds up downloading and is more useful for text rich content such as itemized lists articles and essays However ...

Page 275: ...ns the text wraps within the bounding box By default this box adopts the smallest possible dimensions depending on the text object s original size To edit the HTML text object later right click it then select Edit HTML Text Object It is advisable to avoid overlapping HTML text objects with other objects or the base image in order to avoid unexpected file size increases and or file format and HTML ...

Page 276: ...ts own attributes The layers may have different names but share similar attributes This means that all components can be created using basically the same method The following sections show you an example of how to create components using a Component Designer template Once a component is created you can always edit it again in Component Designer Just right click the object then select Edit Componen...

Page 277: ...signer as this format loses all Component Designer attributes allowing editing as normal images only As Component Object in PhotoImpact Keeps objects intact for further editing in Component Designer 7 Click Back to create more Web components or click Close Rollover button This is a special button whose appearance such as color graphic or shape changes using up to three separate images The transiti...

Page 278: ...g on the selected rollover button available layers and their names may vary You can always view and test your rollover button in the Preview tab by using the mouse throughout the whole creation procedure 7 Click Export to select where to send the rollover button To HTML saves it to a Web page HTM or HTML with JavaScript code and associated image files Notes Once the HTML is exported open its sourc...

Page 279: ... one text by glowing it one at a time Highlighting can be from left to right or vice versa This effect is available in HTML Text Cells Pop up Menu Inserts a selection menu during a mouse event You can assign each item in the pop up menu with a hyperlink This option is available in image cells only Rainbow Text Displays your HTML text in a spectrum of rainbow colors or gradient fill colors Rollover...

Page 280: ...ect Click Delete Script Effect to remove it To create a pop up menu Script Effect 1 Select the cell or image map that will trigger the Slice Effect then open the Pop up menu dialog box 2 Fill the following fields as required Text The text string of the menu item Target The name of the frame where the target object will be opened URL The target object of the hyperlink Alt text Alternative text to a...

Page 281: ... Effect 1 Select the cell or image map that will trigger the Script Effect then open the Status Bar dialog box 2 Select an event which will start the Status Bar effect 3 Select Display effect on event event type It is possible to select more than one event type that will start the effect Clicking the down arrow beside Event will display a check beside all events that will start the effect 4 Select...

Page 282: ...ffect will be displayed in Cell to display swap effect 5 Click Browse for file to select an image to swap into the cell 6 Click OK To create a Vertical Scroll Effect 1 Select the cell that will trigger the Script Effect then open the Vertical Scroll dialog box 2 Select whether an image or HTML text will be scrolling up through the cell 3 For a text scroller enter information in Text and select a f...

Page 283: ...ce style size and color for the effect and a color for the background for each event Select whether to restore the original text on mouseoff For Highlight Text effect Select font face style size color and background color for the effect Select the direction of the effect and whether it should bounce Specify the delay time between repeats For Rainbow Text effect Select Standard spectrum Reverse sta...

Page 284: ...e Color PhotoImpact document 2 Select Web Rollover 3 The object furthest to the left is used when there is no mouse action on the rollover You can change the object from the object list by clicking the arrow below it 4 Select the Mouseover and Mousedown options to use different images for the rollover 5 Use the X Y axis offset boxes or click one of the Align buttons below the offset boxes to furth...

Page 285: ...de Show 4 In the Images tab select image files that you want to use as slides in your slide show Click Add for every image you want included Repeat this step until you get all images you want You can also drag images in the Preview window images to rearrange the order Note Set a hyperlink for each of your images by specifying a remote or local file in the URL You can also add some image informatio...

Page 286: ...nize and display a Web page properly on the World Wide Web Notes To create a complete Web page see Tutorial Putting a Web page together PhotoImpact currently does not support the making of multi frame Web pages However you can make a Web page with frames and define linked Web pages in an HTML editor first Then create these pages in PhotoImpact Banner Image Hyperlinked text Button Sample Web page H...

Page 287: ...s to the original image files so if the browser is going to display the images properly the linked images need to be there along with the HTML document itself The HTML code tells the browser to load the linked image files like this IMG SRC imagename gif IMG tags are inserted between the BODY BODY tags So when you are creating an entire Web page in PhotoImpact it looks like you are simply working w...

Page 288: ...dialog box to enter more detail about the page s properties 3 Click OK Notes To change the Web background later or set other HTML attributes select Web Web Properties See Tutorial Putting a Web page together for details Using the Web Properties dialog box This feature sets detailed properties for your Web page at any time Select Web Web Properties or start a new Web page then click Details to open...

Page 289: ...tab Optimizer setting Specifies default file formats for images in your Web pages Files will be optimized then saved in the specified format File naming pattern Customizes the system for assigning default names to image files Also provides the option of making file names comply with Macintosh and Unix standards Put image files in image subfolder Copy background image to image subfolder Copy linked...

Page 290: ... to your Web page For more information on placing Web images and objects and linking multimedia files on your Web page see Linking multimedia objects Exporting a Web page How does the Web page look on the Net How do people view my Web page Who can help me fix problems These are often the questions in mind when creating a Web page PhotoImpact provides these solutions along with a diagnostic mechani...

Page 291: ...at This retains all Web attributes you previously set All individual components also remain independent objects After editing a UFO file you can always export it as a Web page Saving for the Web When you are done working with your images or Web pages there are five ways to save them specifically for the Web These commands are located in the File More Save Options Save for Web submenu As HTML Saves...

Page 292: ... you want to form a Web page PhotoImpact gives you these options To create a complete Web page 1 Select File New New Web Page Enter a title for the page and select a background type Click Detail to set the attributes of a page in the Web Properties dialog box see Using the Web Properties dialog box for details Note A fast way to create a Web page is dragging a preset from the Template Library in t...

Page 293: ... default browser will open to display the page Notes Do not use the base image as the Web page background because the base image is for image editing rather than Web page creating Thus the base image should be hidden while the document is used for creating a Web page To edit a Web page created in PhotoImpact later open its UFO file or use the Open Original button in the Open Image from Web Page di...

Page 294: ...user guide on GIF Animator refer to GA 5 MANUAL PDF on the included PhotoImpact CD For further information and tutorials visit Ulead s Web site at http www ulead com To prepare images for animation Before switching to Ulead GIF Animator to create your animated GIF follow these steps to streamline the process Resize all your images to a similar size GIF images are limited to a 256 color palette eit...

Page 295: ...9 Appendix COMMANDS ...

Page 296: ...its previously saved state Close Closes the active image without ending the program Update Updates changes made to an image opened in the PhotoImpact workspace from another program such as Microsoft Word This is only available when the image is a PhotoImpact OLE object Save Save As Saves your work as a new or existing image or Ulead UFO file More Save Options Include advanced save options You can ...

Page 297: ...rinting functions You can use these options to print multiple images on a single sheet of paper or print large scale posters on multiple sheets of paper Image Properties Displays the statistical information about the image such as data type file format size and EXIF data if any Preferences Provides a number of options to set your preferred settings of PhotoImpact Open Recent Files Shows up to the ...

Page 298: ...d area or a mask with a color gradient color texture or image Fade out For an active object or a selection this command opens the Fade out dialog box to make colors to disappear gradually Stitch Scanned Images Creates a new image by connecting two images together Trace Edges Creates a path object by tracing the high contrast edges in an image or a selection marquee Edit Active Objects Only Paint o...

Page 299: ...by step through the process of refining your image by straightening cropping and adjusting the color balance brightness and contrast Resize Resizes an image by changing the total number of pixels Resolution Changes the physical size of an image Expand Canvas Expands the canvas area of the current window by a selected number of pixels Convert Data Type Changes the data type of the current image Col...

Page 300: ...with assorted photographic effects Lens Filters In traditional photography filters are placed over the camera lens for the purpose of modifying the appearance of a photo Different filters are used to achieve different effects such as eliminating reflections on shiny surfaces saturate colors or deepen blue skies The same output can be achieved in digital imaging using PhotoImpact s lens filters Hig...

Page 301: ...on Manager Store Selection lets you keep your selections in the Selection Manager and makes them available for future use Load Selection Applies a previously stored selection onto the document Import Selection Use a grayscale image as the basis for creating a selected area Export Selection Saves a selection as a grayscale image for use as a mask Copy Selection to Object Library Creates a grayscale...

Page 302: ...es together all selected objects so you can move them or apply a command to all of them simultaneously Ungroup Separates a previously grouped set of objects back into individual objects Align Aligns the top bottom left or right sides or the horizontal or vertical centers of the selected objects Arrange Order Arranges the layer order of your object in the workspace Shadow Opens the Shadow dialog bo...

Page 303: ...nal buttons Web Properties Modify or assign HTML attributes Check HTML Rendering Errors Indicates the reasons why your HTML file failed to load properly in the browser Web Attributes Opens a submenu of options for changing a Web object such as link component or rollover attributes Grid and Partition Segments your image into a grid of objects Shift Image Shifts the image so that its top left corner...

Page 304: ...n Hides the Windows interface filling the screen with the current image To return to Windows press Esc Show Base Image Shows or hides the base image Show Marquee Shows or hides the selection marquee dotted lines or outline boundary of your selected objects Show Box Around Objects Shows or hides the colored bounding box surrounding the objects in the image red for Web objects and green for other ty...

Page 305: ... Displays web related PhotoImpact functions on the workspace Customize Modifies and saves your current workspace configurations Window Menu Cascade Arranges all open windows diagonally in the workspace from left to right and top to bottom Tile Horizontally Evenly distributes all open windows horizontally in the workspace Tile Vertically Evenly distributes all open windows vertically in the workspa...

Page 306: ... log and plug in information pertaining to Ulead programs About PhotoImpact Provides copyright and other information about PhotoImpact Toolbox Pick Tool Use the Pick Tool to move selections and objects around the image Selection Tools When no area has been selected in an image any command that you apply affects the entire image To restrict the command to a certain area of an image you need to crea...

Page 307: ...ck an area on your image then type in your text Path Tools The Path Tools provide four tools for you to create path objects and edit their shapes Z Merge Tool The Z Merge Tool introduces the third axis enabling you to not only control the width and height of objects in your document but also the elevation or depth Zoom Tool The Zoom Tool allows you to change the magnification for the active image ...

Page 308: ... object s Removes the selected object s from the document Merge Method Determines which composite characteristics of the object you want to apply to the base image Transparency Allows other images below the object to show through more clearly Show Hide base image Toggles between showing and hiding the base image Object layers Lists the base image and the objects used in the current document Displa...

Page 309: ...n Deletes the active item on the Selection Manager Delete all stored selections Deletes all stored selections in the Selection Manager Selection list Lists the selections used in the current image and properties such as size position and description name Document Manager Quick Command Manager Opens a menu where you can select to apply the current task set up in the Quick Command Panel or apply a p...

Page 310: ...folder in the sequence of previously selected folders Up one level Opens the parent folder of the currently viewed folder Refresh Updates the contents to reflect the changes made to your files Search Opens a dialog box that allows you to search for specific image files within a folder Digital Camera Opens the Digital Camera Wizard dialog box that allows you to import images from a digital camera t...

Page 311: ...b Contains various objects paths Web templates and more Color Panel Color tab Sets solid or gradient colors for the various PhotoImpact tools you work with The colors specified here will become the default colors whenever you use a tool Swatches tab Displays a palette for choosing a color to use in editing images Click a cell to select a swatch color which becomes the default color when you switch...

Page 312: ...r redo these actions Drag the slider or click an item on the list to retrace backward or redo a series of actions Task tab The Task tab lets you record sequenced menu commands and toolbar actions that you can later apply to your images All you need to do is create a new task record the sequence of commands and then apply the task to your images You can also add the tasks that you have created in t...

Page 313: ...objects to your Web page 290 Adjust 105 Adjust a captured image using DeInterlace 234 Adjust an image using Curves 70 Adjust an image using Levels 70 adjust effects using Variations 34 Adjust Highlight Midtone and Shadow in an image 75 Adjust hue and saturation in an image 73 Adjust the brightness and contrast in an image 71 Adjust the color balance of an image 71 adjust white balance 76 Adjusting...

Page 314: ... 94 Automatic 95 Automatic stitching 107 Auto process Batch 105 AutoSave 53 Auto stitch 107 B Background Designer 258 Baseline 139 Basic controls in Image Optimizer 267 Basic Photo Mode 17 Batch Convert 22 254 Batch convert files 254 Batch Manager 21 253 Batch processing 249 Batch Task 22 251 Batch test in Image Optimizer 254 Beautify Skin 81 Bending text objects 214 Bevel Tab 203 Bezier Curve Too...

Page 315: ...aw Mode 187 Contour Drawing 222 Contrast 105 Converting between data types 46 Converting HTML Text objects to image objects 275 Copy rotate 140 Copying and moving an object between images 134 correct chromatic aberration 89 Correcting Chromatic Aberration 89 Create a complete Web page 292 Create a component object 276 Create a Creative Warp effect 242 Create a custom effect 230 create a DVD menu i...

Page 316: ...182 Custom Effect 230 Customize 24 Customize EasyPalette 28 Customize the dimensions of a new image 36 Customizing 3D path objects 178 Customizing Paint Tools 150 Customizing the EasyPalette 33 D Deforming paths 191 Defringe 131 DeInterlace 234 Deleting an object 134 Detection scope 113 Dialog boxes 25 Different viewing modes 44 Diffraction Filter 85 Diffuse Glow 81 Digital Camera Wizard 17 40 Dis...

Page 317: ...port 29 Exporting a Web page 290 Exposure compensation 66 ExpressFix 18 64 Extracting objects 117 Extracting the object 118 Extraction Detail 118 F Fill a selection or object 156 Fill Tools 156 Filling an area with a texture 159 Film Grain 83 Find 28 Finger Paint 225 Fit Mask 137 Fix Photos 18 fixing differences in the photo 95 Flatten Uneven Area 79 Floating 24 Focus 68 105 Frame based animations...

Page 318: ...r mask 121 122 Lens Distortion 69 88 Lens Filters 69 85 Level 105 Levels 68 Lights 219 Line and Arrow Tool 181 Linking multimedia objects 272 Load 29 Loading and saving color tables 168 Loading and unloading galleries 29 logo 110 lower third 138 M Magic Gradient 231 Magic Texture fills 159 Magic Wand Tool 115 Make a selection using Color Range 125 Make a Two color gradient fill 158 Making a screen...

Page 319: ...PEG 268 Optimizing an image as a PNG 270 Optimizing file sizes and quality for the Web 267 Optimizing the HDR image 96 Options 24 Organizing your tab groups 30 Outline Drawing Tool 179 P Package 30 Package a gallery or object library into a folder 30 Paint a border on a selection 153 Paint as Object mode 154 Paint on Edges 153 232 Paint Tool presets 150 Paint your own image 149 Painting an outline...

Page 320: ...2 Polygon shapes editing 195 196 Polygon shapes node sets 195 Posterize 69 Post processing 41 Preferences 23 Preserve Base Image 124 Preserving the base image 123 Preview 36 Previewing in a browser 291 Print Multiple 56 Print Poster 57 Print Preview 55 Printing 53 Process images with Batch Manager 253 Profiles 24 Q Quick Command Panel 23 250 Quick samples 25 R Recent Files 22 Record a quick comman...

Page 321: ...ection Manager 21 127 Send using default e mail program 292 Sending images 58 Separating a shadow from its object 133 Set up a Color Management Profile 55 Setting a Gradient color 165 Setting a Single color 164 Setting an object s properties 131 Shadow 133 Shadow Tab 205 Sharpen 69 80 Shifting a Web background 259 Show HDR color 96 Similarity 116 Single color mode 164 Slice Tool 262 Smart Lasso 16...

Page 322: ...hold 69 Thumbnail menu commands 21 28 Tint 66 Tool Panel 20 23 Tool Settings 23 Tool Settings Panel 189 Tool Settings panel 150 Toolbars Panels 24 Touch up Tool 104 Tracing images and converting to paths 200 transform an image 247 Transform Tool 140 Transparency Tab 204 Transparent paths 206 Try 28 Turnpage 233 Tutorial Putting a Web page together 292 TV safe 36 TWAIN 41 Two color 157 165 Type Eff...

Page 323: ...Thumbnails 32 W Web Mode 17 Web pages 286 Web Properties dialog box 288 Web Slide Show 285 Welcome Screen 17 What s new 15 White Balance 68 76 White balance 66 WIA 42 Working with Colors 161 Working with Object Eraser Tools 144 Working with selections 112 Workspace 17 23 Wrap effects 209 Z Z merge 129 Z merge Tool 215 Zoom Blur 79 Zooming on an image 43 ...

Reviews: