Installing and Removing Hardware
Hard Disk Drive (HDD) –IDE HDD–
98
Hard Disk Drive (HDD) –IDE HDD–
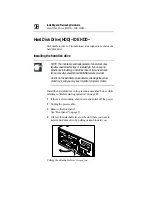
Slot numbers (of 1 to 2 from bottom) are assigned to each slot of a
hard disk drive.
Installing the hard disk drive
NOTE: The installation and replacement of a hard disk drive
requires special technology or knowledge. If you have no
experience in installing a hard disk drive or if you need assis-
tance, consult your authorized MAGNIA service provider.
An error in the installation procedure may damage the server
or destroy it, and you may lose important programs or data.
Install the hard disk drive in the procedure described below, while
referring to “Before starting operation” on page 48
1 If the server is running, shut it down and switch off the power.
2 Unplug the power cable.
3 Remove the front panel.
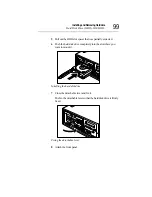
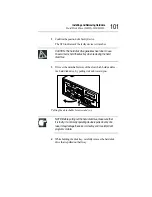
4 Tilt over the detachable lever of the slot where you want to
install a hard disk drive, by pulling its knob toward you.
Pulling the detachable lever toward you
Summary of Contents for Magnia Z300
Page 1: ...MAGNIA Z300 User sGuide ...
Page 4: ...1 2 ...
Page 8: ......
Page 14: ......
Page 22: ...xxii ...
Page 102: ...InstallingandRemovingHardware CPU module 80 Removing the PCI bracket ...
Page 130: ...InstallingandRemovingHardware Expansion cards 108 ...
Page 236: ...Troubleshooting Remedy When Windows NT 2000 is Unusable 214 ...
Page 237: ...Appendix A System Unit 216 External Hard Drive Unit Z1 218 External Device Bay Unit Z1 219 ...
Page 242: ...220 ...
Page 253: ...Appendix C Hardware setup information 232 Recovery Boot 233 ...
Page 257: ...235 Default Jumper Switch Settings PJ47 CMOS Clear PJ723 Recovery Boot ...
Page 258: ...236 ...
Page 259: ...Appendix D ...
Page 270: ...248 ...


