background image

5

11) Precautions for installing on outdoor aerial

An outside aerial system should not be located 
in the vicinity of overhead power lines, or other 
electric light or power circuits.
If the aerial falls down or drops, it may cause an 
injury or an electric shock.

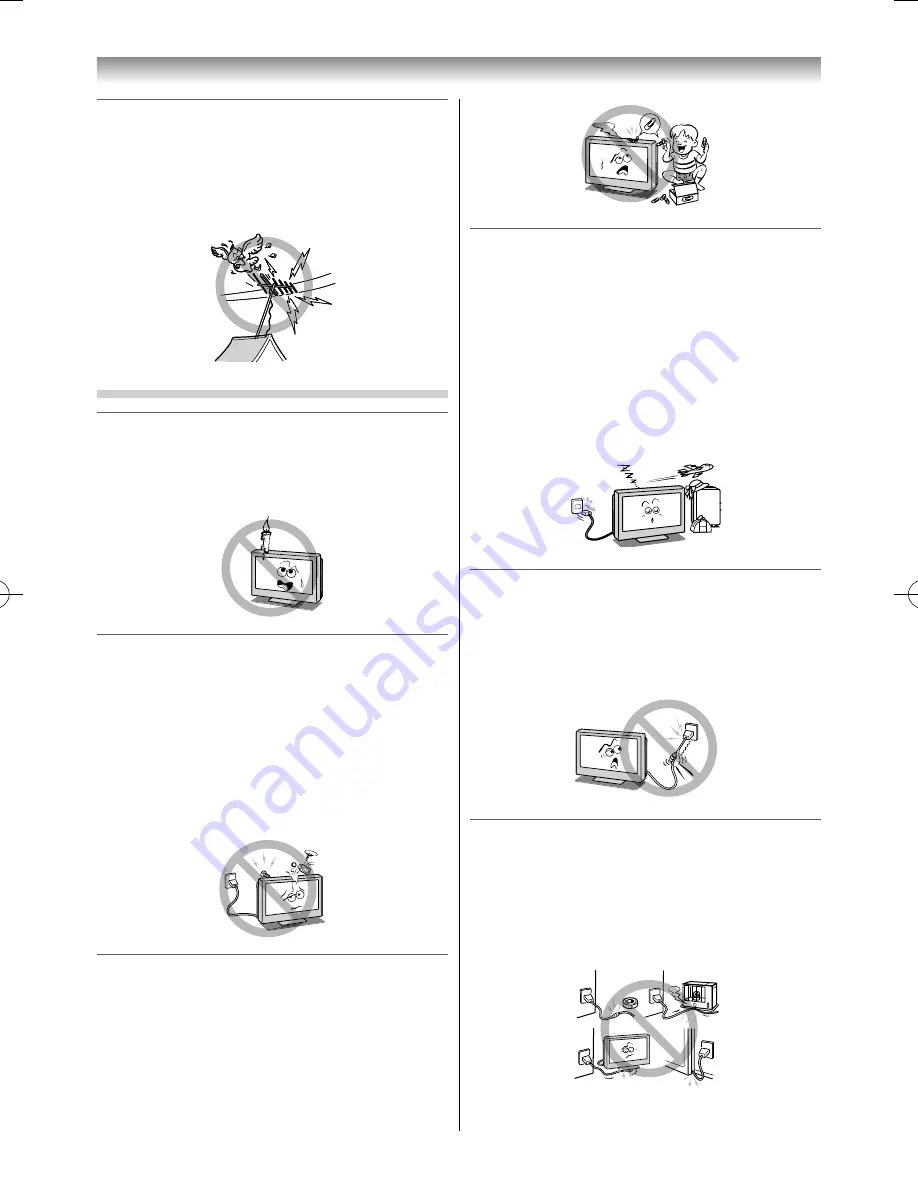
Use

1)  Never place hot objects or open fl ame sources, 

such as lighted candles or nightlights, on or 
close to the TV.

High temperatures can melt plastic and lead to 
fi res.

2)  The apparatus shall not be exposed to 

dripping or splashing and that no objects 
fi lled with liquids, such as vases, shall be 
placed on the apparatus.

When liquids are spilled or small items are 
dropped inside the TV, this may cause a fi re or an 
electric shock.
If small objects drop inside the TV, turn off  the 
TV and remove the power plug from the outlet 
immediately and contact a service technician.

3)  Never insert objects (metal or paper) or pour 

water inside the TV through ventilation holes 
and other openings.

These items may cause a fi re or an electric shock. 
If these objects are inserted inside the TV, turn 
off  the TV and remove the power plug from 
the outlet immediately and contact a service 
technician. Be especially careful that children do 
not insert objects in the TV.

Clip

4)  When the TV will not be used for a long period 

of time, such as during vacation or travel, 
remove the power plug from the wall outlet 
for safety.
• 

 The TV is not completely disconnected from 
the power supply line, as minute current is 
consumed even when the 

1

 Power switch is 

turned off .

• 

 The mains plug or an appliance coupler is 
used as the disconnect device, therefore 
the disconnect device shall remain readily 
operable.

5)  Never pull on the power cord when removing 

the plug from the wall outlet.

Always hold the plug fi rmly when removing it. If 
the power cord is yanked, the cord may become 
damaged and a fi re or an electric shock may 
occur.

6)  Never cut, break, modify, twist, bunch up 

or bent the cord or apply excessive force or 
tension to it.

Never place heavy objects on the cord or allow 
it to overheat as this may cause damage, a fi re or 
an electric shock. Contact a service technician if 
the power cord is damaged.

Introduction

55RZ1Series1̲EN.indb   5

55RZ1Series1̲EN.indb   5

2012/04/26   17:57:56

2012/04/26   17:57:56

Summary of Contents for 55RZ1 Series

Page 1: ...nd serial number on the back of the TV Record these numbers in the spaces provided below Refer to them whenever you call upon your TOSHIBA dealer regarding this product Model number Serial number 55RZ1 Series 2012 TOSHIBA CORPORATION All Rights Reserved VX1A00244000 TD J ...

Page 2: ...nput source to view 36 Setting the Colour System 36 Setting the external input skip 36 Labeling video input sources 37 Channel List 37 Using REGZA LINK 37 Teletext 39 Connecting yourTV Back connections 41 Connecting HDMI or DVI devices 42 Selecting the PC HDMI 2 Audio mode 43 Setting the HDMI 2 Audio mode 44 Connecting a computer 44 Using the PC Settings 45 REGZA LINK connection 46 Connecting a ho...

Page 3: ...curely it may lean or fall over and cause an injury To prevent injury use the exclusive optional stand or wall hanging bracket to install this TV on the floor or wall securely in accordance with a qualified technician Sturdy tie as short as possible Stand clips Fixing strap Screw supplied Fixing strap Clip supplied 2 Never place the TV in an unstabilized location such as on a shaky table incline o...

Page 4: ...om the wall Never place the TV on a soft unstable surface such as a carpet or a cushion The inside of this TV will overheat if the ventilation holes are covered blocked or sealed which may result in a fire Introduction 7 Never place the TV near a heater or in direct sunlight The surface of the cabinet or power cord may melt and result in a fire or an electric shock 8 Never place the TV in an area ...

Page 5: ... or an electric shock If these objects are inserted inside the TV turn off the TV and remove the power plug from the outlet immediately and contact a service technician Be especially careful that children do not insert objects in the TV Clip 4 When the TV will not be used for a long period of time such as during vacation or travel remove the power plug from the wall outlet for safety The TV is not...

Page 6: ... TV reaches the end of its useful life ask a qualified service technician to properly dispose of the TV Cleaning CAUTION Avoid using chemicals such as air refreshers cleaning agents etc on or near the TV pedestal Studies indicate that plastics may weaken and crack over time from the combination effects of chemical agents and mechanical stress such as weight of TV Failure to follow these instructio...

Page 7: ...n could lead to copyright infringement of authors rights Toshiba asks you to respect the intellectual property rights of third parties Anyone who has had a seizure loss of awareness or other symptoms linked to an epileptic condition or has a family history of epilepsy should contact a health care provider before using the 3D function If you are ill or feel ill you should refrain from viewing 3D im...

Page 8: ...r malfunction through simultaneous use of this product and the connected equipment Trademark Information Manufactured under license from Dolby Laboratories Dolby and the double D symbol are trademarks of Dolby Laboratories Audyssey EQ is based on the same core technology as Audyssey MultEQ that is used for automatic correction of room acoustics Audyssey EQ uses time domain filters to correct probl...

Page 9: ...started Exploring your newTV Installing the remote control batteries Remove the battery cover Insert two R6 AA batteries matching the polarities of the battery to the marks inside the battery compartment Cautions Dispose of batteries in a designated disposal area Batteries must not be exposed to excessive heat such as sunshine fire or the like Attention should be drawn to the environmental aspects...

Page 10: ...n these buttons can switch the channel pages 16 17 U u MENU up down When a menu is on screen these buttons function as up down menu navigation buttons except for the input source selection page 15 3 2 Volume When no menu is on screen these buttons adjust the volume level I i MENU left right When a menu is on screen these buttons function as left right menu navigation buttons or adjust settings pag...

Page 11: ...en blue and red Audio terminal sharing o 2 12 o 2 Video 2 Input Terminals Standard video and standard stereo audio input terminals page 41 Note Please use A V adapter cable Accessory 1 pin yellow 3 pin yellow white and red 13 o HDMI 1 ARC 4 Input Terminal High Definition Multimedia Interface input receives digital audio and uncompressed digital video from an HDMI device pages 42 44 o HDMI 1 ARC In...

Page 12: ...utton turns the sound off on 12 Volume These buttons adjust the volume level 13 Programme position U u 14 To perform Face Tracking while watching 3D 15 To select 3D 2D 16 To access Media Player Menu 17 Teletext on Superimpose Teletext off 18 Sleep Timer 19 To access the Menu 20 To access the Quick Menu 21 Menu OK To page up down left or right 22 EXIT 23 To return to the previous menu 24 When using...

Page 13: ...to STOP Press c to PLAY Press W w to PAUSE Press Z to SKIP BACK Press CC to REWIND Press z to SKIP FORWARD Press cc to FAST FORWARD 10 Press 1 to turn the devide on off Press SETUP to enter the screen setting menu to adjust settings Press AUDIO to switch between different audio modes Press MENU to operate each menu Press V to EJECT Note These functions depend on the device connected Not all the re...

Page 14: ... 1 Press 1 The Menu Language screen will appear This screen will appear the first time that the TV is switched on 2 Press or to select the Menu Language English Chinese CS Malay Thai Vietnamese Russian Arabic Persian or French 3 Press OK to display the Location menu page 18 Press or to select Store or Home For normal home use select Home Location Home To use the TV for displaying in a store showro...

Page 15: ...ade Manual Tuning Home Menu Language English PICTURE menu SOUND menu APPLICATIONS menu SETUP menu PREFERENCES menu 70 100 0 0 0 0 70 100 0 0 0 0 0 0 Picture Mode Standard Reset Backlight Contrast Brightness Tint Colour Sharpness Picture Mode Reset Backlight Contrast Brightness Tint Colour Sharpness MTS Dual Dual 1 Off Balance Advanced Sound Settings Stable Sound Auto MTS Auto Off Stable Sound On D...

Page 16: ... You can switch two positions without entering actual position number each time 1 Select the first position you want to view 2 Select the second position with the Number buttons 0 9 3 Press The previous channel will be displayed 2 EFGH 3 IJKL Dual Each time you press the TV will switch back and forth between the two positions Displaying the on screen information 1 Press to display the following on...

Page 17: ... search is completed the TV will automatically return to 1 position ManualTuning 1 From the SETUP menu press or to select Manual Tuning 2 Press OK to display the Manual Tuning menu Press or to select the programme position you want to arrange Pos Label Manual Tuning 1 2 3 4 6 7 8 5 Channel C 02 C 04 C 05 C 07 C 12 S 17 S 19 C 09 3 Press OK to display the breakdown menu Press or to select an item t...

Page 18: ...ep 1 to enter the rest of the characters If you would like a blank space in the label name you must choose a blank space from the list of characters Press OK to store your settings Gettingstarted Sorting positions TV channels may be moved and stored to the position of your choice 1 From the SETUP menu press or to select Manual Tuning 2 With the list of channels now showing press or to select the c...

Page 19: ...p and bottom of the screen 4 3 Use this setting to view a true 4 3 broadcast Super Live This setting will enlarge a 4 3 image to fit the screen by stretching the image horizontally and vertically holding better proportions at the centre of the image Some distortion may occur Cinema When watching all sides panel format films video tapes this setting will eliminate or reduce the black bars on all th...

Page 20: ...the picture still Press to freeze the picture Even if an image is frozen on the TV screen the pictures are running on the input source Audio continues to be output as well To return to a moving picture press again Moving Still Note If you use this function except for the purpose of your private viewing and listening it may infringe the copyright protected by the copyright laws Adjusting the Pictur...

Page 21: ...desired For example while selecting Dynamic if you change the following items such as Backlight Contrast Brightness Colour Tint Sharpness and the Advanced Picture Settings items your new setting are saved for Dynamic Picture Mode 1 From the PICTURE menu press or to select either Backlight Contrast Brightness Colour Tint or Sharpness 2 Press or to adjust the settings as desired Setting the Black Wh...

Page 22: ... a point and press or to adjust the level 48 100 0 Backlight Adjustment Pro Backlight Control Level Control Level Ambient Light Cancel Reset Activating the Noise Reduction NR If the receiving signal of MPEG is a mosquito grained noise depending on the compression and conversion the picture is weak and the picture is blurry the picture may be improved when using this function 1 From the Advanced Pi...

Page 23: ...r to select On 3 Press or to select Colour or Tint and press or to adjust the settings as desired Note It is not possible to turn off all of these colours simultaneously 6 To cancel the adjustment when selecting a point select Cancel and press OK To return the settings of all points to the factory defaults select Reset and press OK Adjusting the Static Gamma The static gamma feature allows you to ...

Page 24: ... or Blue 3 Press or to adjust the settings as desired White Balance Copy to All Inputs This feature copies White Balance on the current input to all other inputs Individual settings that are not allowed for a specific input will not be copied 1 From the Expert Picture Settings menu press or to select White Balance and press OK 2 Press or to select Copy to All Inputs and press OK A confirmation scr...

Page 25: ...the reception of stereo bilingual broadcasts may not be possible after switching on the e Mono 2 mode Sound adjustment Setting the MTS Multi channelTV Sound Auto mode The MTS Auto mode automatically recognize stereo bilingual programmes depending on the broadcast signal 1 Press MENU and then press or to display the SOUND menu 0 MTS Dual Dual 1 Off Balance Advanced Sound Settings Stable Sound Auto ...

Page 26: ...ass from stereo sound sources Your TV s audio will sound fuller richer and wider Voice Enhancement helps to emphasize dialogue It will be easier to hear voices over other background audio 1 From the SOUND menu press or to select Advanced Sound Settings and press OK 2 Press or to select Surround and press or to select Off Spatial or Cinema Voice Enhancement On or Off Dynamic Bass Boost Low High or ...

Page 27: ...olume Time Until Power On Position 30 00 10 TV 1 On Done UsingtheTV sfeatures 3 Press or to go through the list adding the details of the on timer by using the Number buttons and or to make selections and press OK Input Select a video input source TV EXT 1 EXT 2 EXT 3 HDMI 1 HDMI 2 HDMI 3 HDMI 4 or PC Position Set the position that will be tuned when the TV turns on Note When an external input is ...

Page 28: ...using the remote control UsingtheTV sfeatures Setting the Automatic Power Down The TV will automatically turn itself off standby after approximately 4 hours if you do not operate the control buttons on the remote control or on the TV control panel 1 From the PREFERENCES menu press or until Energy Saving Settings is selected and then press OK 2 Press or to select Automatic Power Down press or to se...

Page 29: ...rights of third parties Anyone who has had a seizure loss of awareness or other symptoms linked to an epileptic condition or has a family history of epilepsy should contact a health care provider before using the 3D function If you are ill or feel ill you should refrain from viewing 3D images and consult your health care provider as may be appropriate If you experience any of the following symptom...

Page 30: ...corresponding 3D glasses Glasses Free 3D images may differ from traditional 3D televisions Moreover 3D images may also differ by individual and content UsingtheTV sfeatures Basic operation When 3D Auto Start in 3D Setup menu is in Off mode if the TV detects 3D contents the 3D menu will appear 1 Press or to select 3D and press OK 2 Please read 3D Important Information on screen carefully 3 Press or...

Page 31: ... can view 3D images correctly 6 Press EXIT Viewing 3D images Incoming video signals can either be in 2D or 3D format A 2D signal can be viewed in either 2D or 3D and 3D can be viewed in either 2D or 3D If the TV can detect the fact that a signal is 3D it can change to 3D mode automatically see Setting the Auto Start mode page 33 Otherwise you can change the viewing mode using the 3D button Finally...

Page 32: ...to 3D If you can see the left and right images on the screen in Native mode select SBS If you can see top and bottom images on the screen in Native mode select TAB To switch to 3D mode Set 3D Auto Start to 3D Press 3D while viewing 2D mode or Native mode TriggerofSwitching DisplayMode Input Signal Press 3D button Type Additional Information Format Source Signal Select3D Select2D to3D 3D Format Sig...

Page 33: ...ing 3D mode Press 3D while viewing 2D to 3D mode From the Quick Menu in 2D mode 1 Press QUICK Select 3D Settings and press OK 2 Press or to select 2D Format Select Press OK 3 Press or to select Native Notes When 3D format signal with 3D Auto Detect Information is received it is not possible to switch to Native When Frame Packing format is received 3D Settings will be greyed out To switch to 2D to ...

Page 34: ...elect 3D Scene 3 Press or to select one of the following scenes Standard For normal viewing with a sense of presence Nature For viewing content that includes slow moving dynamic scenes Sports For viewing content that includes a lot of fast moving scenes Performances For viewing content such as a concert or stage performance to be enjoyed at leisure Overlay Text For viewing subtitled content with c...

Page 35: ...press OK and press or to select 3D Important Info 2 Press OK Adjusting 3D Depth You can adjust the level of 3D From the Menu 1 From the PREFERENCES menu press or to select 3D Setup and press OK 2 Press or to select 3D Depth and press or to select 1 2 3 4 or 5 The higher the number the stronger the 3D effect UsingtheTV sfeatures From the Quick Menu 1 Press QUICK Select 3D Settings and press OK 2 Pr...

Page 36: ...ing Location Quick Setup Germany Antenna Software Licences Manual Tuning Colour System English Home System Information SETUP Auto 2 Press or to select Colour System and then press or to select Auto PAL SECAM NTSC 4 43 or NTSC 3 58 3 Press OK to store your settings Note Confirm that Colour System is set to Auto If not select Auto with or Setting the external input skip This feature is designed to m...

Page 37: ...urrently support REGZA LINK REGZA LINK one touch play When a connected device is turn on REGZALINK will automatically detect the TV through the input selection If the TV is in standby it will be turn on automatically This feature is selected in the REGZA LINK Setup menu Note Even if the device is showing a menu the TV may automatically show the video input source on screen display REGZA LINK syste...

Page 38: ...A LINK to Off the all other items will be greyed out 3 Press or to select the REGZA LINK Setup item you want to use and press or to select On Off or the desired speakers mode TV Auto Power On Off Auto Standby On Off Amplifier Control On Off Speaker Preference TV Speakers Amplifier REGZA LINK input source selection When any devices using CEC technology has connected REGZA LINK icon shows on the inp...

Page 39: ...e the teletext over a normal broadcast picture Press again to return to normal TV mode You need to return to normal viewing if you wish to change channels When you first press TEXT to access the text service the first page you see will be the initial page In Auto mode this displays the main subjects available and their relevant page numbers In List mode you will see the page numbers currently stor...

Page 40: ...e teletext over a normal broadcast picture Press again to return to normal TV mode To display an index initial page In Auto mode Press to access the index page The one displayed is dependant on the broadcaster In List mode Press to return to the 100 page or initial page To reveal concealed text Some pages cover topics such as quizzes and jokes To discover the solutions press To hold a wanted page ...

Page 41: ...UDIO output terminal to the OPTICAL input of a receiver or processor Refer to the owner s manual of the connected equipment as well When you connect the TV to other equipment be sure to turn off the power and unplug all of the equipment from the wall outlet before making any connections The output sound of the TV has a wide dynamic range Be sure to adjust the audio amplifier s volume to a moderate...

Page 42: ...and uncompressed digital video from a DVI device This input is designed to accept HDCP programme material in digital from CEA 861 D compliant consumer electronic devices such as a set top box and DVD player with HDMI and DVI output The HDMI input is designed for best performance with 1080i 50 Hz 60 Hz and 1080p 24 50 60 Hz high definition video signals but will also accept and display 480i 480p 57...

Page 43: ...I cable HDMI cable transfers both video and audio Note Some HDMI devices may not be able to operate properly with the TV Connecting a DVI device One HDMI type A connector to DVI adapter cable and audio cables HDMI type A connector to DVI adapter cable For proper operation the length of an HDMI to DVI adapter cable should not exceed 3m The recommended length is 2m Standard analogue audio cables An ...

Page 44: ...This feature accepts the content type data from the connected HDMI device INSTAPORT mode This feature reduces the lag time when switching HDMI sources RGB Range mode This feature adjusts RGB full range signal automatically When Limited is selected RGB output signal is output in the range from 16 to 235 When Full is selected RGB output signal is output in the range from 0 to 255 Notes In a non HDMI...

Page 45: ...images may be hidden If connecting a certain PC model that signal is particular the PC signal may not be detected correctly ConnectingyourTV Signal names for mini D sub 15 pin connector Pin assignment for RGB PC terminal Pin No Signal name Pin No Signal name 1 R 9 NC 2 G 10 Ground 3 B 11 NC 4 NC not connected 12 NC 5 Ground 13 H sync 6 Ground 14 V sync 7 Ground 15 NC 8 Ground Using the PC Settings...

Page 46: ...al Position 0 Adjusting the Clock Phase of the picture If the Clock Phase which synchronize the PC signal and LCD display is not optimized the picture will blur This function enables you to adjust Clock Phase and display a clear picture 1 From the PC Settings menu press or to select Clock Phase 2 Press or to obtain a clear picture Clock Phase 0 Adjusting the Sampling Clock If the Sampling Clock do...

Page 47: ...hone jack directly to the TV s LAN port Using your home network This TV is a Media Player and Renderer This TV can play digital content stored on a Media Server on a home network with server function If you want to use this TV as a Media Player or Renderer on a home network you will have to configure the network on your TV If you want to use your home network you will have to configure the network...

Page 48: ...acter input To enter text using the software keyboard 1 Highlight the desired character on the on screen software keyboard 2 Press OK 3 Repeat steps 1 and 2 until you have entered all desired text 4 Press the BLUE button to close the software keyboard and return to the previous screen Note If RETURN is pressed changes are not saved and the software keyboard window is closed The text will remain as...

Page 49: ...t Yes and press OK 9 Press or to select the item you want to accept and press OK A check will appear in the box To remove the check press OK again 10 Press to select Done and press OK 11 The Maximum Volume Setup window appears Press or to adjust to the desired volume Then press OK Media Renderer 1 From the PREFERENCES menu select Media Renderer Setup and press OK 2 Press or to select Media Rendere...

Page 50: ...t can instruct the TV to display content Notes Do not insert remove USB device while in use MENU is not available during playback When you want to use your TV as a media renderer set Media Renderer to On page 49 Media Player Specifications Device USB device Interface version USB2 0 HS USB Mass Storage Class devices MSC Notes Connectivity is not guaranteed for all devices Incorrect behaviour may oc...

Page 51: ... a file or folder 2 Press OK to move to the next layer or press RETURN to return to the previous layer Closing the Media Player 1 Press EXIT Setting the Media Server Setup You only need to complete the Media Server Setup if you want to store a list of media servers to activate later from the TV 1 From the APPLICATIONS menu press or to select Media Player and press OK 2 Press or to select Setup and...

Page 52: ...e SingleView In this mode only files located in the selected directory will be displayed This view allows you to change the photo content manually When moving from Multi View to Single View the currently selected photo will be displayed 1 Press to view the next photo Press to view the previous photo 2 Press to rotate the image 90 clockwise Press to rotate the image 90 counterclockwise 3 Press to d...

Page 53: ...dia server pictures you can choose Quad FHD or Normal However when the resolution is 1920 x 1080 or above the Picture Size selection menu will be greyed out ConnectingyourTV Selecting the Playback Mode You can view 3D photos in 3D and you can also view 2D photos in 3D Select the playback mode from the Quick Menu or switch playback modes using the 3D button on the remote control The current Playbac...

Page 54: ...rding to different document sizes it may take sometime to start playing If playback finishes before v is pressed the screen will return to the available file list During playback Press to pause When the screen is paused press or to move to the location to be replayed only limited to media server PAUSE or operations during PAUSE may not be available depending on the content media controller or medi...

Page 55: ...ked to enter a registration code 1 From the APPLICATIONS menu press or to select Media Player and then press OK 2 Press or to select Setup and press OK 3 Press or to select DivX VOC and press OK DivX Video on demand DivX VOD Registration DivX VOD Deactivation 4 Press or to highlight DivX VOD Registration and press OK 5 The DivX VOD window will appear and you will see the registration code For deta...

Page 56: ...al playback press c play To play in fast reverse or fast forward directions press CC or cc during playback Each time you press CC or cc the playback speed will change To set the repeat mode 1 Press QUICK to open the Quick Menu 2 Press or to select Repeat 3 Press or to select Off All or 1 Mode Description Off Files in the same folder are played back once All Files in the same folder are repeatedly ...

Page 57: ...rer Setup Photo Frame Setup Auto Teletext Auto Teletext Language Panel Lock Off 4 PREFERENCES 2 Press OK The preview screen will appear Photo Frame Setup Photo Select Photo Edit Auto Power Off Off Start OK RETURN Back Enter 3 Press to select Start and press OK to open Photo Frame Open from Quick Menu 1 Press QUICK to open the Quick Menu 2 Press or to select Photo Frame and press OK to open Photo F...

Page 58: ...cording to the date and time when the picture was taken New From new to old according to the date and time when the picture was taken Old From old to new according to the date and time when the picture was taken ConnectingyourTV Auto Power Off 1 From the Photo Frame Setup menu and press OK 2 Press or to select Auto Power Off Press or to select Off 00 30 01 00 02 00 04 00 06 00 or 12 00 If Photo Fr...

Page 59: ... and under wait until the warms up Multiple images The station may have broadcast difficulties Try another channel Aerial reception may be poor Use a high directional outdoor aerial Check if the direction of the aerial has changed Poor colour or no colour The station may have broadcast difficulties Try another channel Adjust the Tint and or Colour in the PICTURE menu The remote control does not op...

Page 60: ...olby Digital AC3 WMA Std divx div xvid avi DivX 2 DivX Xvid MP3 Dolby Digital AC3 mp4 m4v MP4 MPEG4 part2 MPEG4 AVC H 264 AAC asf wmv ASF VC1 WMV9 WMA Std 2 Profile DivX HD 1080p External subtitle file srt is supported Maximum resolution 1920 1080 Maximum file size Unlimited Maximum number of files 1000 folder Notes The TV may not play display certain media format or files The External subtitle ma...

Page 61: ...6 9 59 940 60 000 Hz 33 716 33 750 kHz 74 176 74 250 MHz Side by Side Half Top and Bottom 50 000 Hz 28 125 kHz 74 250 MHz Side by Side Half Top and Bottom 1920 1080p 16 9 24 000 Hz 54 000 kHz 148 500 MHz Frame Packing 27 000 kHz 74 250 MHz Side by Side Half Top and Bottom 30 000 Hz 67 433 67 500 kHz 148 352 148 500 MHz Frame Packing 33 716 33 750 kHz 74 176 74 250 MHz Side by Side Half Top and Bot...

Page 62: ...9 25 C53 727 25 C54 735 25 C55 743 25 C56 751 25 C57 759 25 C58 767 25 C59 775 25 C60 783 25 C61 791 25 C62 799 25 C63 807 25 C64 815 25 C65 823 25 C66 831 25 C67 839 25 C68 847 25 C69 855 25 S mode OSD RF Frequency MHz S1 105 25 S2 112 25 S3 119 25 S4 126 25 S5 133 25 S6 140 25 S7 147 25 S8 154 25 S9 161 25 OSD RF Frequency MHz S10 168 25 S11 231 25 S13 238 25 S14 245 25 S15 252 25 S16 259 25 S17...

Page 63: ...ack NTSC recorded video tapes through PAL TV equipment Specifications LEDTV Model 55RZ1 Series Power source 110V 240V AC 50 60Hz Power consumption 285 W 0 3 W standby Dimensions 1253 mm W 832 mm H 357 mm D Mass Weight 30 5 kg TV system Aerial input Channel coverage PAL B G CCIR VHF 2 12 UHF 21 69 CATV X Z 2 S1 S41 PAL I UK VHF UHF 21 69 CATV PAL D K CHINA VHF 1 12 UHF 13 56 CATV Z1 Z38 SECAM B G C...

Page 64: ...s Storage File system FAT12 FAT16 and FAT32 LAN port RJ 45 Operating condition Temperature 0 C 35 C Humidity 20 80 No moisture condensation Supplied accessories Owner s manual 1 Remote control 1 Batteries 2 A V Adaptor cables 1 page 41 Component Adaptor cable 1 page 41 Clip 1 page 3 Pedestal stand 1 Screw set 1 Design and specifications are subject to change without notice Never service or remodel...

Page 65: ......

Reviews: