drill the holes for the fuel lines. Drill the holes with a
1/4” [6.4mm] drill (15/64” [6mm] drill for a better fit).
Coat the inside of the fuselage between the firewall
and former F2, including the back of the firewall, with
fuel proof paint, epoxy or finishing resin.
Note:
The
fuel tank is mounted sideways. In a model of this
type, this will not create a problem; just don’t do any
sustained knife edge flight.
❏
2. Place 1/4” [6.4mm] foam rubber on the tank
floor. Secure the tank to the tank floor with the
#32
rubber bands
included with this kit. Install the tank
and tank floor in the model and glue it into position
with medium CA. The photo at step 1 shows a Great
Planes 16 oz tank with former F1A in position.
Note:
Rubber bands deteriorate over time, so you should
replace them at least once a year.
❏
3. Install fuel and vent lines on the tank and route
them through the holes in the firewall to the location
of your fuel fill valve (see page 57, step 14) and the
muffler pressure fitting. Cut them a couple of inches
longer than needed.
Note:
In the future, when the
tank needs maintenance, cut the top part of F2 away
so the tank can be removed. You will also need to
remove the front canopy, which we mounted with
screws on our prototype.
❏
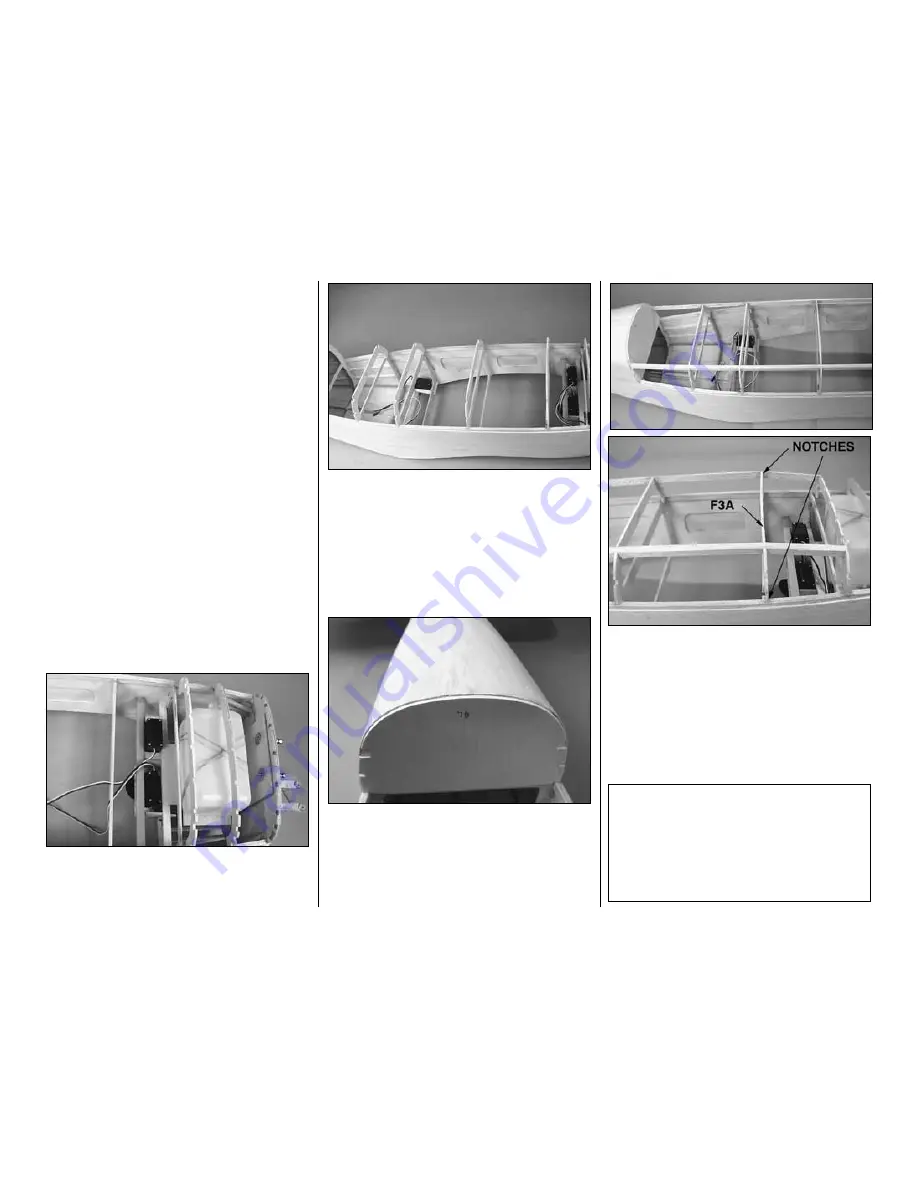
4. Glue the die-cut 1/8” [3.2mm] plywood formers
F1A
and
F2A
in place as shown on the plan. F1A is
positioned 2” [51mm] forward of F2. F2A is
positioned 3/16” [4.7mm] forward of F2.
❏
5. Glue the die-cut 1/8” [3.2mm] plywood formers
F3A
through
F6A
in place as shown on the plan. The
formers are glued to the front of its corresponding
former. If you previously cut slots for the servo wires
in F3, F4 and F5, then cut the needed slots in F3A,
F4A and F5A.
❏
6. If you have not already sanded the turtle deck
to shape then do so now. Remember, sand the 1/16”
[1.6mm] balsa carefully. Fit the die-cut 1/8” [3.2mm]
plywood former
F7D
to the front of F7A. Sand the
edges of F7D so that there is a lip the thickness of
the canopy. When you are satisfied with the fit, glue
F7D to F7A.
❏
7. Make the
canopy base
from two 1/4” x 3/8” x
36” [6.4 x 9.5 x 915mm] balsa sticks. Cut them to fit
between F2A to F7D. The sticks angle down between
F2A and F3A so you will need to cut a notch in the
stick at F3A. Glue the sticks in place, making sure
they are firmly seated in the notches in the formers,
especially at F7D.
T-34B Fact:
One of the Navy’s Mentors
accumulated over 5,000 hours of flying time - a lot
of time for a military aircraft. This aircraft had done
nearly 16,500 landings, 18,000 stalls, 3,400 spins
and 4,600 loops. The Navy decided to test the
service life of the airframe and after 15,000 hours
of testing the Navy declared that the T-34B had no
airframe life limit.
-51-
Summary of Contents for T-34B MENTOR
Page 7: ...7 DIE CUT PATTERNS...


