(not a felt-tip pen) to trace the outline of the landing
gear onto the rails so you know where
not
to apply
glue when you glue on the bottom sheeting. Later,
the sheeting over this area will be removed to
accommodate the landing gear mounts.
❏
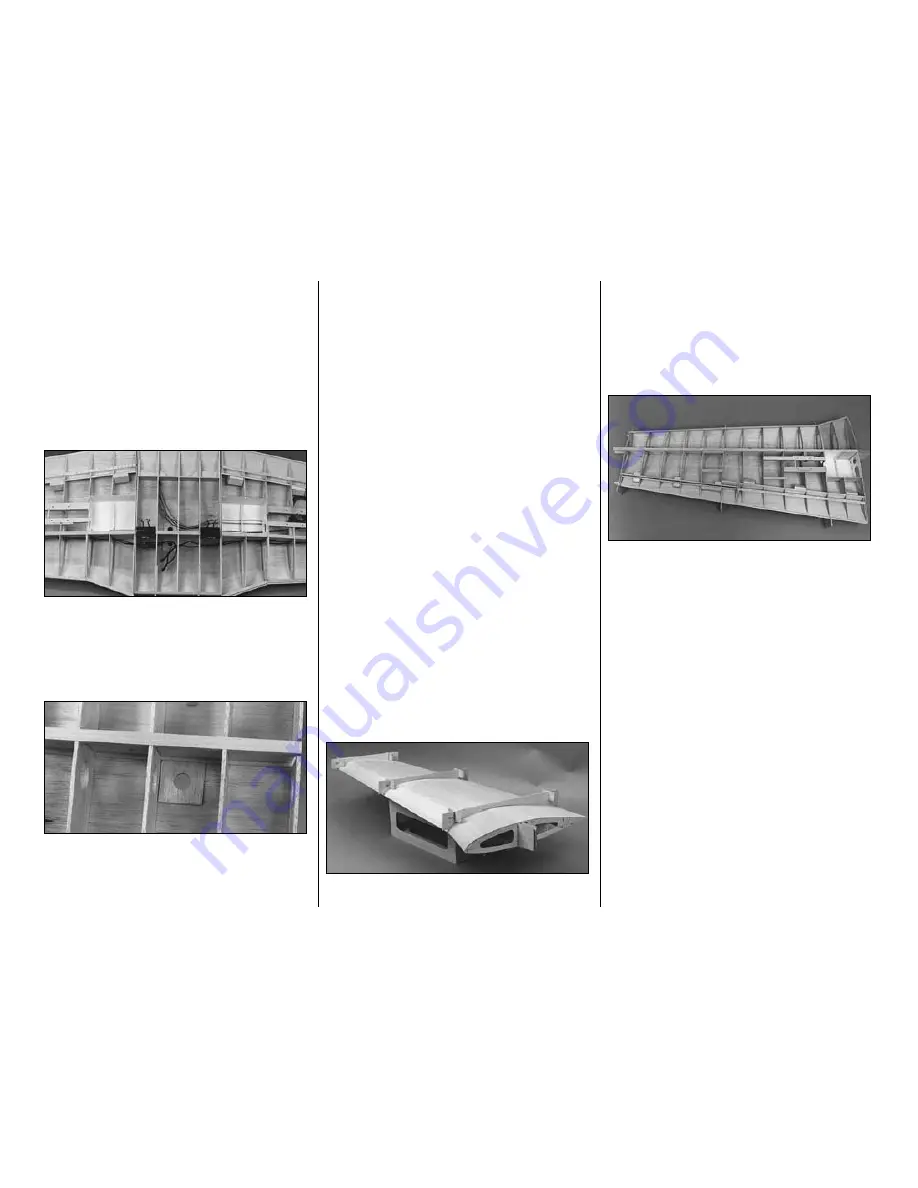
14. Cut holes and slots in the W1’s on the ends of
the center section to match the holes for the servo
leads and retract air lines in the W2’s of the outer
panels. Cut the holes slightly oversize just in case
they don’t align perfectly.
We’ve temporarily joined the wing panels and
installed the air lines and servo leads in the right
wing panel to mock-up the installation to give you an
idea of how to route them later. If you wish, you could
test your installation now to make sure your setup
will work.
❏
15. Glue a piece of leftover 3/32” [3.2mm] balsa to
the center section sheeting aft of the spar (note the
grain direction). Cut a 3/4” [19mm] hole through the
sheeting at this location for the servo cords and air
lines to exit the wing into the fuse.
❏
16. Separate the wing panels and remove the
servo cords and air lines but leave the tip light wires
in both outer wing panels.
❏
17. Sand the bottom of the outer wing panels with a
bar sander and 150-grit sandpaper so the spars, landing
gear and servo rails blend to the shape of the ribs.
SHEET THE WING PANEL BOTTOMS
❏
1. If you have not already done so, make the
forward and aft bottom wing skins the same way you
made the top wing skins on page 18.
❏ ❏
2. Use a ballpoint pen to mark the top sheeting
over ribs W14, W9 and W4 at the leading and trailing
edges. Check all glue joints and reinforce as needed.
❏ ❏
3. Test fit the die-cut 1/8” [3.2mm] balsa
wing
cradles W14C, W9C
and
W4C
on the top of the
wing, aligning them with the marks you made. Sand
away any slivers or slight die-cutting irregularities
until the cradles match the contour of the wing.
❏ ❏
4. Glue the die-cut 1/8” [3.2mm] balsa
feet
to the
cradles. Apply one drop of thick or medium CA near the
front and rear of each cradle and tack glue them to the
top wing sheeting in their proper locations. You only
need enough glue to hold the cradles to the wing so
they won’t fall off when you turn it upside down.
❏ ❏
5. Place the wing on your workbench so it is
resting on the cradles. Fit the bottom sheeting to the
wing. Trim the
stoppers on the cradles so the trailing
edge of the bottom sheeting aligns with the trailing
edge of the top sheeting. Trim the front edge of the
sheeting so it
ends at the center of the spar (the
same way as the top sheeting).
❏ ❏
6. Glue the aft bottom skin to the wing. Use T-pins
or weights to hold the skin in place until the glue dries.
Do Not
glue the skin to the servo hatch rails or where
the retracts will be mounted.
Caution:
Do not add too
much weight because this may bow the wing.
❏ ❏
7. Test fit, trim, then glue the
forward outer
skin
to the wing panel. Just the same as the top
forward outer skin, the wood grain should be parallel
to the
leading edge
of the wing panel.
-28-
Summary of Contents for T-34B MENTOR
Page 7: ...7 DIE CUT PATTERNS...


