❏ ❏
11. Cut a 1/4” x 36” [6.4 x 914mm] shaped
balsa
leading edge
to a length of 29-1/2” [749mm].
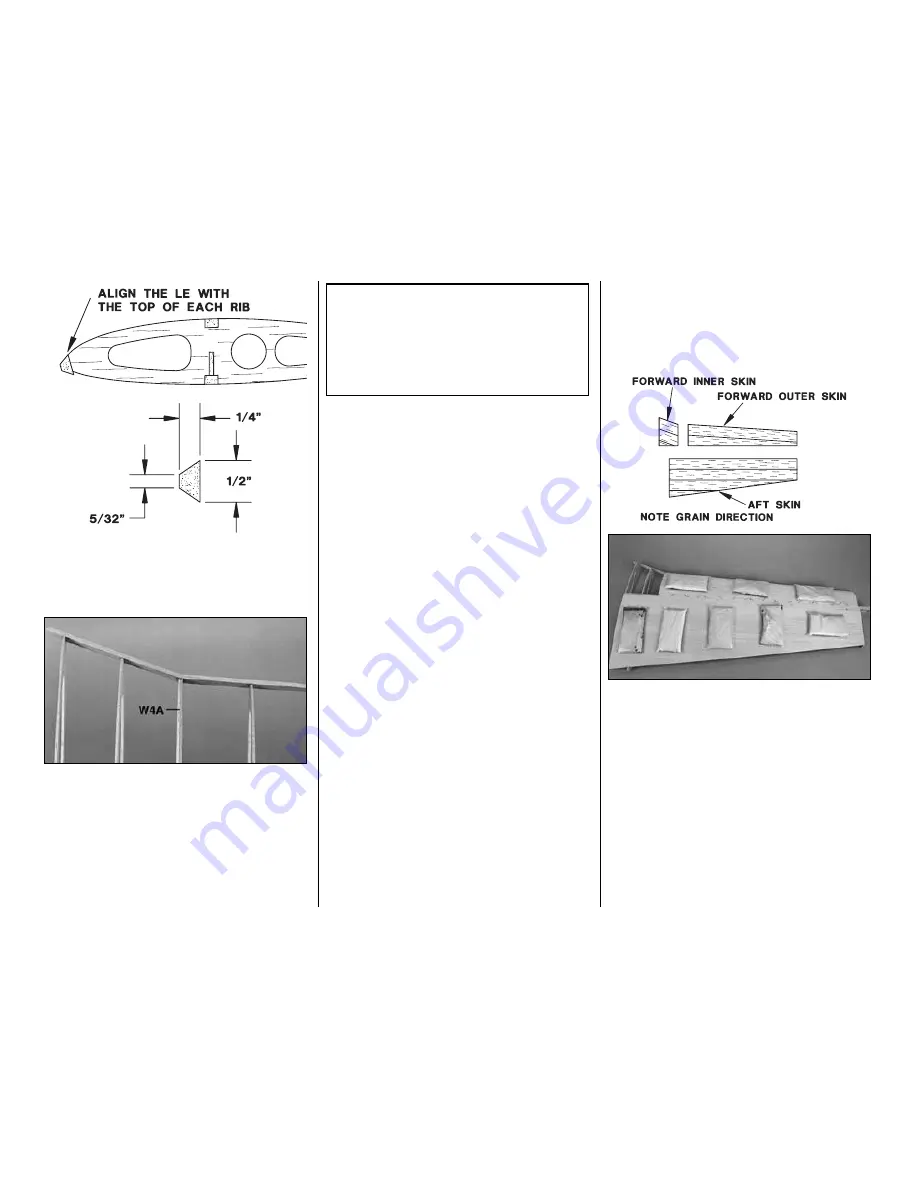
Glue the LE to ribs W4 through W14 so the top aligns
with the tops of the ribs (the same as on the stab).
❏ ❏
12. Bevel the end of the remaining piece of 6-1/2”
[165mm] leading edge so it matches the LE on the wing
when you position it on ribs W4, W3 and W2. Glue it in
position. Glue
rib W4A
to the side of rib W4.
Hint:
Glue
the LE to rib W2
last so you can use the dihedral gauge
to make sure W2 is at the correct angle.
Note:
Use a long straightedge along the length of
W2 to insure that it is flat along it’s length (from the
LE to the TE).
SHEET THE TOP OF THE WING PANELS
❏ ❏
1. Use a large sanding block or a bar sander
with 150-grit sandpaper to sand the tops of the top
spar, aft spars, LE and ribs so they all smoothly
blend together. Make sure the tops of the aft spars
match the tapering angle of the ribs but sand the ribs
lightly so you maintain the designed airfoil shape.
❏ ❏
2. Remove the T-pins from the bottom spar and
replace them so they are all sticking in from the front.
This way you will be able to remove them when the
aft top sheet is in position. Remove the T-pins from
the aft jig tabs and replace them in every other jig tab
so they all go into the building board at the same
angle (
you know the drill). Remove the weights from
the top of the wing (if you used them).
Note:
If you observe that the wing panel remains flat
and all the jig tabs are contacting your building board
when you remove the T-pins, you may leave the
T-pins out of the jig tabs. In this case the weights that
will be used to hold the sheeting to the ribs will be
enough to hold the wing flat to your building board.
Use this photo and the sketch for the next few
steps
. This photo shows a few weights on top of the
wing, but in actuality we used enough weights to fully
cover the skins. You can use magazines for weights
too. T-pins in the front ensure that the skins are
securely bonded to the top spar.
❏ ❏
3. Trim the aft wing skin so it fits the wing. The
TE
should be straight and true and contact the
stopper
portion of the jig tabs on ribs W14 and W3. The
front
of
the sheet should
end in the center of the top spar. The
ends should extend past W2 and W14 equally.
❏ ❏
4. Use your favorite method to glue the
aft
wing
skin to the wing. We recommend using aliphatic resin
because it gives you plenty of time to align the skin
and position your weights or T-pins. Hold the wing
skin in position with magazines or weights made
from plastic bags filled with lead shot or BBs. If you
choose to use T-pins to hold the skin to the wing,
lightly
mark lines on the top of the wing skin
indicating the location of the ribs underneath.
Do not
disturb the wing until the glue fully cures.
Beech Fact:
In 1952 the USAF ordered the YT-34
into production under the designation T-34A
Mentor. Beechcraft built a total of 353 T-34
Mentors for the USAF. [An additional 100 were
built for the USAF in Canada, as well as 25 for the
Canadian Air Force.] The T-34A was in production
from 1953 to 1956.
-21-
Summary of Contents for T-34B MENTOR
Page 7: ...7 DIE CUT PATTERNS...


