❏
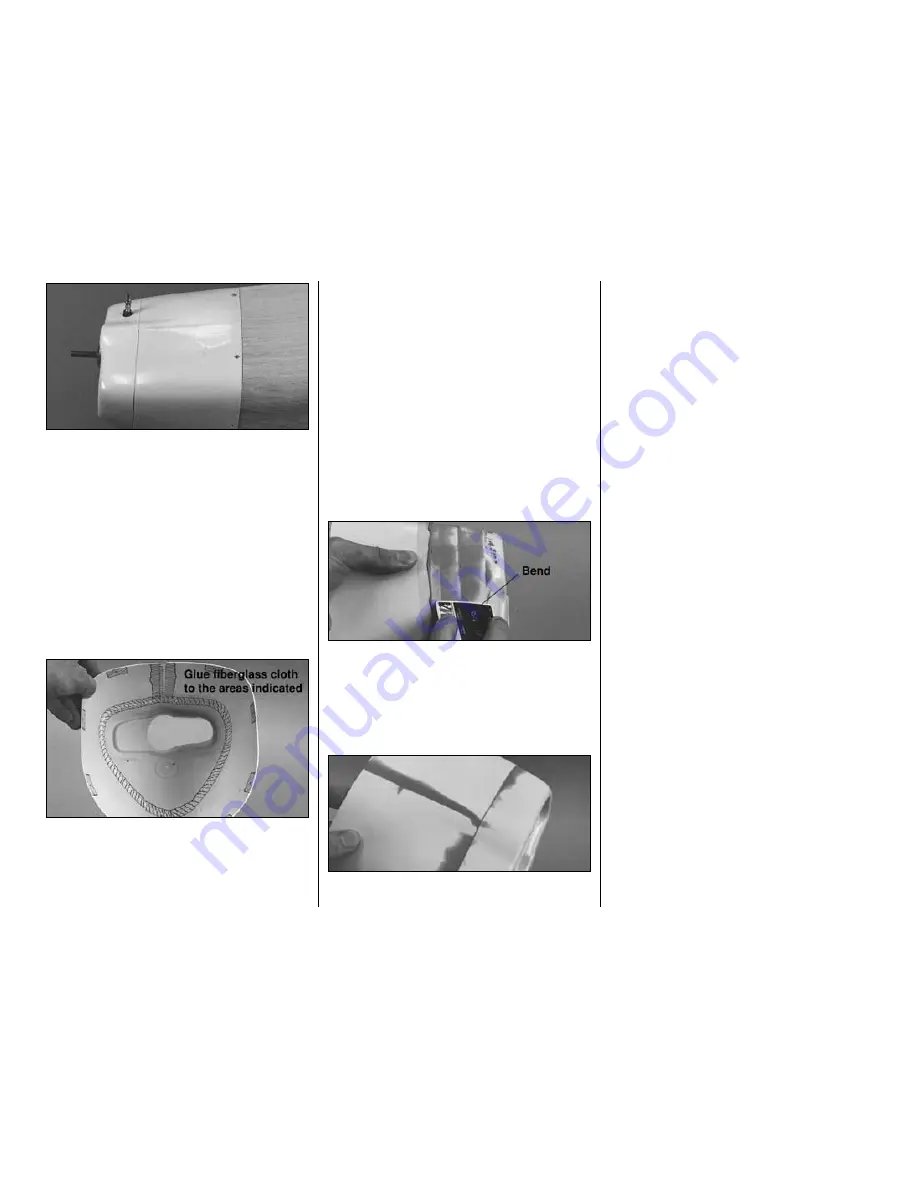
13. Remove the cowl and cut the hole for the
needle valve. Start with a small hole. Mount the cowl
to the fuselage and check your accuracy. Enlarge the
hole while you simultaneously change its position
if necessary.
❏
14. Use the same template method to make holes
for the glow plug, exhaust, fueling system and
engine head if necessary. The location for the fuel
filler valve and retract fill valve are up to you, but we
have provided die-cut 1/8” [3.2mm] plywood
mounting brackets
for these items. The head on the
SuperTigre .75
barely
contacted the cowl in one
area, so we just ground away that small portion of
the fins without any ill effect.
❏
15. Make sure you have thoroughly sanded the
inside seams of the cowl. Use 30-minute epoxy to glue
1” [25.4mm] wide
fiberglass cloth
over all the seams
inside the cowl. Add 1” [25.4mm] squares of glass cloth
inside of the cowl over the holes for the cowl mount
screws. Redrill the holes after the epoxy cures.
❏
16. Fill the seams in the cowl with Bondo filler.
There are other fillers that you can use, but we have
found that Bondo works the best. Squadron Green or
White putty also works well but it takes longer to dry
and shrinks. You could use Squadron putty for
smaller parts like the tail cone.
Here are some tips for applying the Bondo to your cowl:
❏
1.
Thoroughly
roughen all seams and other areas
with 150-grit sandpaper where you will apply Bondo.
❏
2. Mix the Bondo
thoroughly
but
rapidly
to allow
as much time as possible to apply it.
❏
3. Bondo cures within a few minutes, so mix only
enough to fill one seam at a time.
❏
4. Use an expired credit card or a piece of plastic
as a
spatula to apply Bondo. Bend your spatula to
build up a slight
mound
over the seam.
❏
5. Apply only enough Bondo to fill the seams and
uneven edges. It’s easier to apply a second coat than
it is to sand
gobs of it off.
❏
6. Wet-sanding is best. Start with 150-grit
sandpaper. Transition to finer grits as you proceed
and finish with 400-grit sandpaper. When you’re
done your cowl should look something like the one in
the photo–just enough Bondo left to fill in the low
spots near the seams.
Note:
If you are installing retracts, the cutout in the
bottom of the cowl for the nose wheel will be large
enough to allow an adequate air exit for cooling the
engine. If you are installing fixed gear you will have
to cut openings to allow adequate air exit.
❏
7. There is a recessed area in the front of the cowl
for the taxi light. Cut a
lens
from leftover clear plastic.
Glue it in place after the cowl has been painted.
You’ve come a long way. This is the end of the
construction portion of the model so there’s no more
woodwork. It’s all just details and other last minute stuff
before your T-34B will be ready to paint and cover!
FINISHING
FUELPROOFING
You may fuelproof your model before or after you
cover it. Fuelproof all areas that may be exposed to
fuel or engine exhaust such as the wheel wells, wing
bolt recesses in the wing, the firewall, fuel tank
compartment, the front of the belly pan and former
F2 in the fuse, etc. Use thinned 30-minute epoxy,
finishing resin or fuelproof model paint.
Note:
Fuelproof the wheel wells and flap wells
before
you cover the wing. Otherwise, the paint may soak
through the balsa and add blemishes to your covering.
-57-
Summary of Contents for T-34B MENTOR
Page 7: ...7 DIE CUT PATTERNS...


