


Chapter 8
Troubleshooting
135
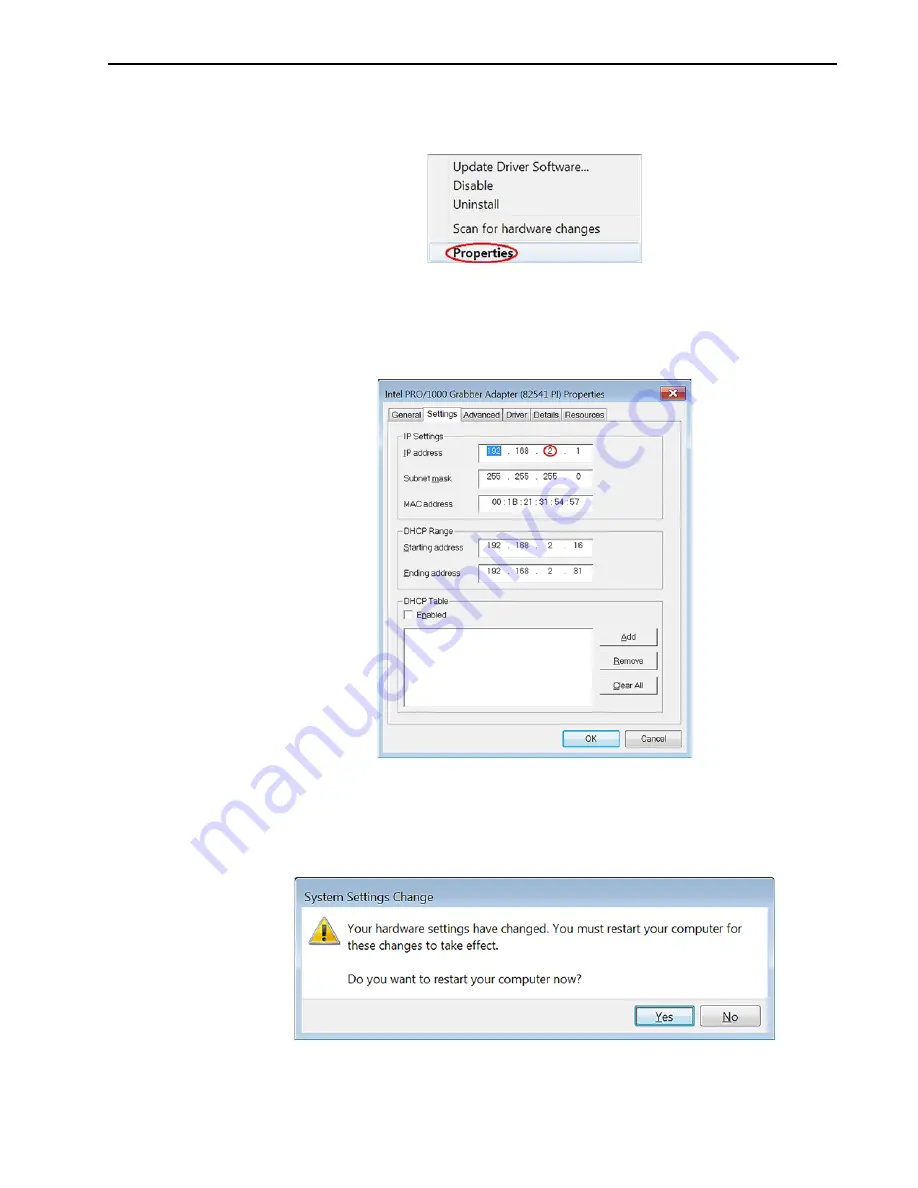
4. Click on that label to expand it and then right-click on one of the ports. On the
popup menu, click on Properties. See
Figure 8-13: Typical Device Pop-Up Menu
5. On the Settings tab, change the third number from the left in the IP Address. For
example, replace the 2 in the IP Address 192.168.
2
.1 with 4 so the IP Address
becomes 192.168.
4
.1. See
.
Figure 8-14: Typical Adapter Properties: Settings tab
6. Click on OK.
7. When the System Settings Change dialog appears, click Yes to restart your
computer now or click No to restart it later. See
Figure 8-15: Typical System Settings Change Dialog
The change will not take place until you restart the computer.
4
4
11-
012
6
_0
09
1
4
4
11-
012
6
_0
09
2
4
4
11
-01
26
_009
3
Summary of Contents for ProEM Series
Page 1: ...www princetoninstruments com ProEM System Manual 4411 0126 Issue 3 September 26 2019 ...
Page 10: ...10 ProEM System Manual Issue 3 This page is intentionally blank ...
Page 16: ...16 ProEM System Manual Issue 3 This page is intentionally blank ...
Page 30: ...30 ProEM System Manual Issue 3 This page is intentionally blank ...
Page 50: ...50 ProEM System Manual Issue 3 This page is intentionally blank ...
Page 88: ...88 ProEM System Manual Issue 3 This page is intentionally blank ...
Page 114: ...114 ProEM System Manual Issue 3 This page is intentionally blank ...
Page 122: ...122 ProEM System Manual Issue 3 Figure 7 8 LightField Settings 4411 0126_0078 ...
Page 136: ...136 ProEM System Manual Issue 3 This page is intentionally blank ...
Page 146: ...146 ProEM System Manual Issue 3 This page is intentionally blank ...
Page 152: ...152 ProEM System Manual Issue 3 This page is intentionally blank ...
Page 161: ...This page is intentionally blank ...


