5 Initial installation
Once you have read the safety notes, and have connected
the unit as described in Chapter 4, you may switch on the
unit as described in Chapter 7. When the unit is switched on
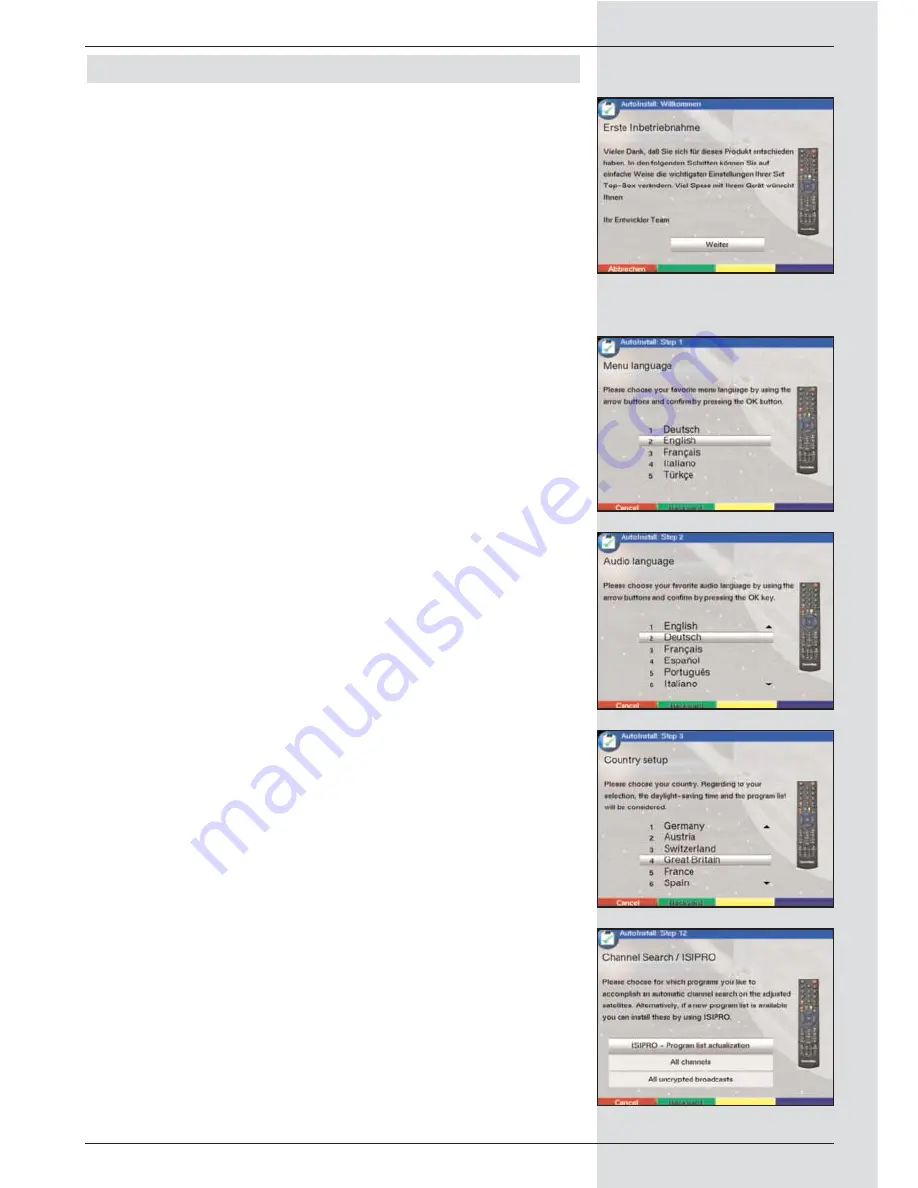
for the first time, the start window of the installation assistant
is displayed:
AutoInstall.
(Fig. 5-1) The installation assistant
will help you to make the most important settings on your
digital receivers quickly and simply.
You can exit from the initial installation procedure at any time
by pressing the red function key. Press the green function
key to return to the previous step of the installation. You can
thus correct any mistakes made at any time.
If the initial installation is not carried out, or is aborted before
completion, the unit will commence operation with a standard
pre-programmed configuration.
The initial installation described here serves only as an
example. The exact procedure of the intial installation will
depend on the settings you choose to make.
Please follow closely the instructions given on the screen.
Operating language
:
>
Press
OK
to move to the selection window for the
operating (menu) language (Fig. 5-2)
>
Use the
up/down arrow keys
to select the desired
operating language.
>
Confirm by pressing
OK
.
Audio language
>
Use the
up/down arrow keys
to select the preferred
audio language. (Fig. 5-3)
When the installation assistant has been completed,
the programmes in the Favourites list will be sorted
accordingly.
>
Confirm by pressing
OK
, to accept this selection into
memory.
Country setting
>
Use the
up/down arrow keys
to select the time zone
corresponding to your location. (Fig. 5-4)
The automatic clock setting will be made in accordan-
ce with your selection.
>
Confirm by pressing
OK
, to accept the setting into
memory, and to move on to the antenna configuration.
Scanning for programmes
Once you have checked on the software version, and possi-
bly downloaded an updated version, you can proceed to
searching for programmes.
>
Use the
up/down arrow keys
to mark the field
All
Channels
, if you wish to scan for both encrypted and
free-to-air programmes, or select All
Free-to-air
Channels if you wish to scan for only this type of pro-
gramme. (Fig. 5-5)
13
(Fig. 5-1)
(Fig. 5-2)
(Fig. 5-3)
(Fig. 5-4)
(Fig. 5-5)
Summary of Contents for DigiCorder T1
Page 57: ...57...
Page 61: ...61 DigiCorder T1...


