


TASCAM HS-4000
109
11 – Internal settings
IP SETUP
Use to switch between DHCP and STATIC.
When set to DHCP and there is a DHCP server on the LAN,
the IP Address, Subnet Mask and Default Gateway settings
should be acquired automatically.
When set to STATIC, you must set the IP Address, Subnet
Mask and Default Gateway manually.
Setting buttons: DHCP, STATIC (default)
LINK SPEED
Use these buttons to set the link speed.
Setting buttons:
AUTO (automatically adjusts speed according to connection)
100M (default, operates with fixed speed of 100 Mbps)
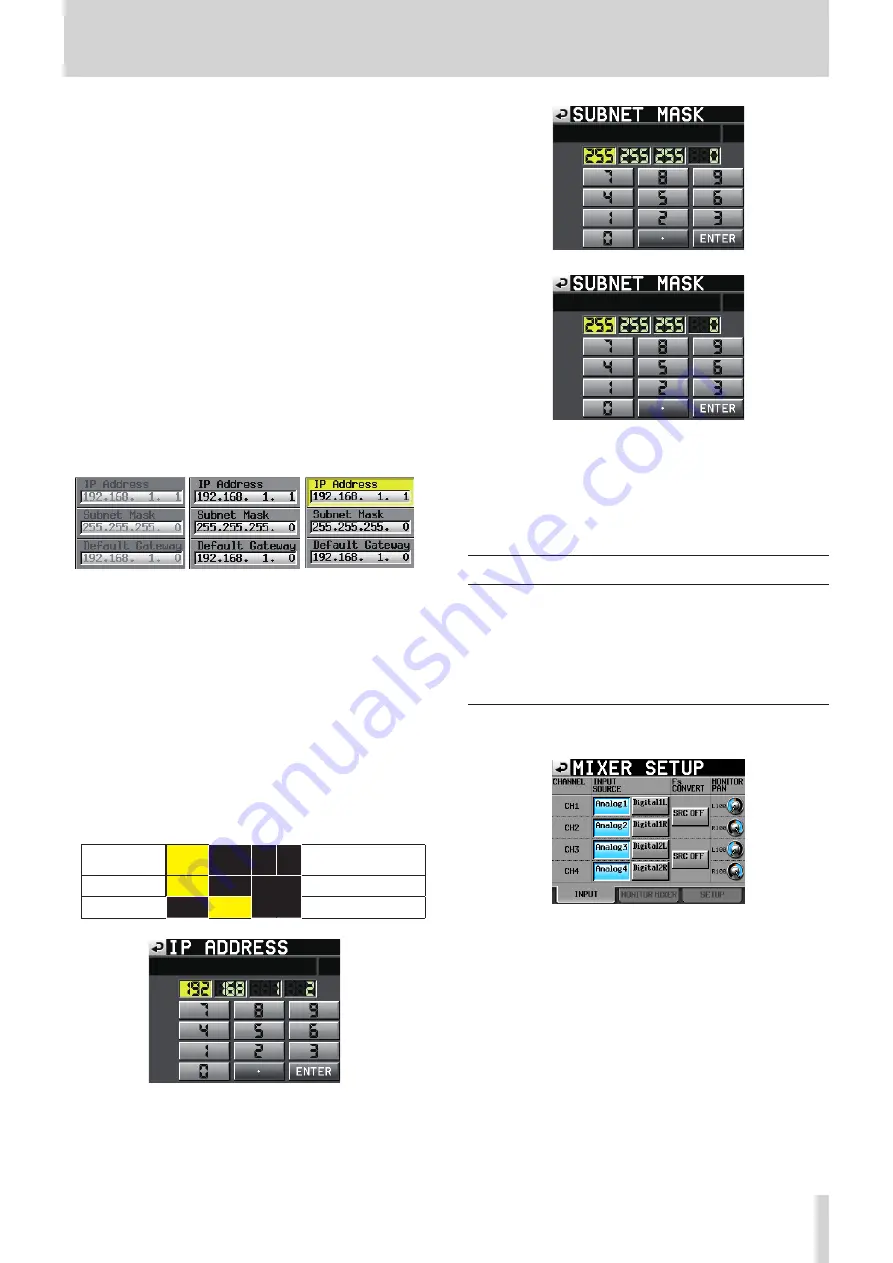
IP Address/Subnet Mask/Default Gateway
Use these fields to set the IP Address, Subnet Mask and
Default Gateway values when IP SETUP is set to STATIC.
These also show their setting values.
Defaults: 0. 0. 0. 0
Depending on the IP SETUP setting, this area appears differ-
ently as shown below.
タッチ中
STATIC設定時
DHCP設定時
DHCP
STATIC Field selected
8
Changing IP Address, Subnet Mask and Default
Gateway settings
Touch the corresponding area of the REMOTE SETUP screen
ETHERNET page to open its setting adjustment screen.
p
Each field has 3 digits. (You do not need to input "0" before
values of 1–2 digits.)
p
The first field (largest unit) is selected when a screen opens.
p
After selecting a field, touch a number button to enter it as
the first digit. Input further digits to the end of the same field
in the same way as when using a calculator.
p
Touch the period (point) button to move to the next field.
Example:
When screen
opened
192.
168.
1. 1
"1234" input 234.
168.
1. 1
First "1" is discarded
“ . ” input
192.
168.
1. 1
8
Changing the password
Touch the Change button in the Password section of the
REMOTE SETUP screen ETHERNET page to open the CHANGE
PASSWORD screen where you can set the password.
You can input up to 9 characters (default: "HS-4000").
Mixer settings (MIXER SETUP)
Make mixer settings.
The MIXER SETUP screen has 3 pages: INPUT, MONITOR MIXER
and SETUP.
Touch the tabs at the bottom of the screen to open the corre-
sponding page.
INPUT page
Make input settings on this page.
INPUT SOURCE
Set the input source for each channel.
Select an analog (AnalogX) or digital (DigitalX) input. ("X" is
the channel.)
Analog and digital cannot both be selected for a channel at
the same time.
p
Analog 1-4 buttons (default): ANALOG IN 1-4
p
Digital1L/1R/2L/2R buttons: Left and right channels for digital
inputs 1 and 2
Fs CONVERT
Turn the sampling rate converter ON or OFF for each pair
of inputs. Channels 1–2 and 3–4 are set in pairs, so different
settings cannot be used for individual channels in each pair
(default for both pairs: SRC OFF).


