background image

104

Appendix D, The Status Monitor

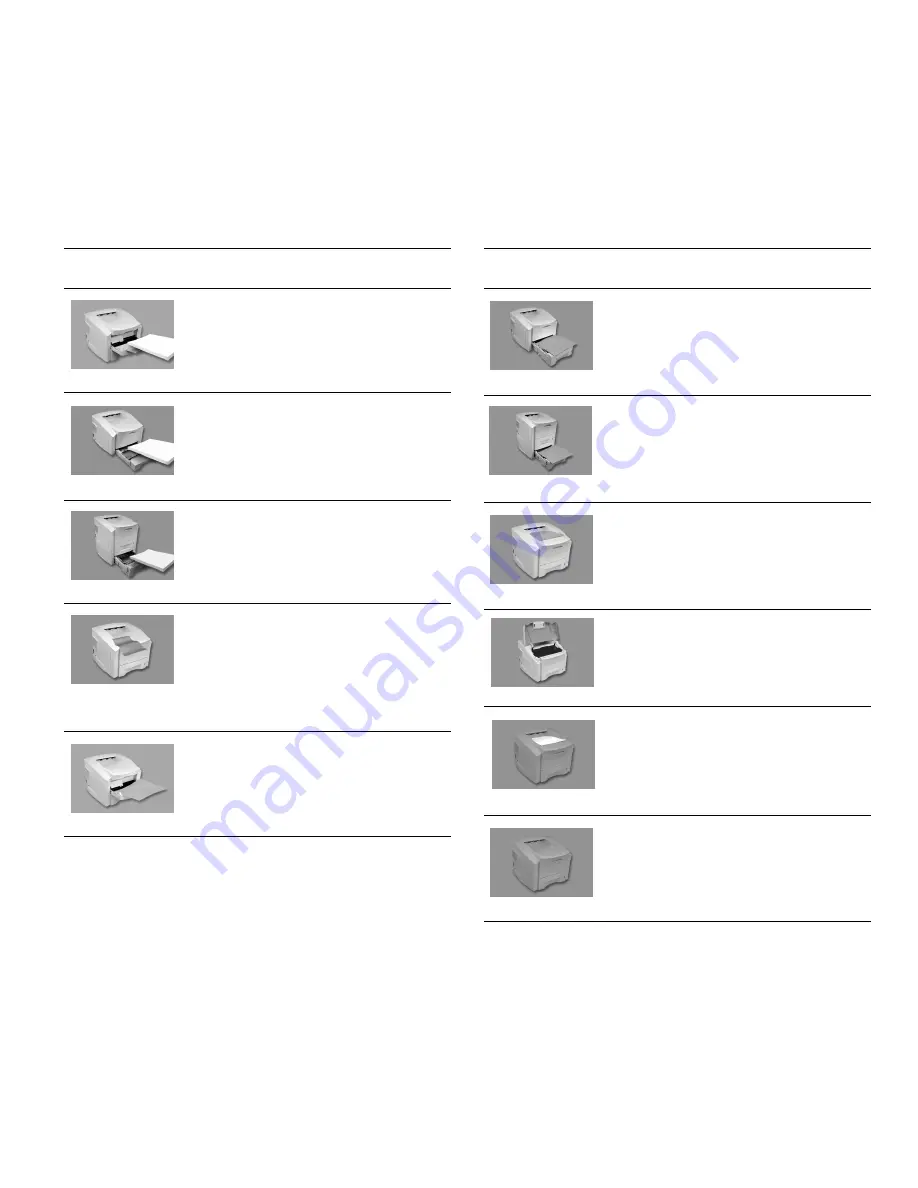
Paper Needed in 
Tray 1 

Fill Tray 1 (Multipurpose 
Tray) with paper.

Paper Needed in 
Tray 2 

Fill Tray 2 (standard 550-
sheet Cassette) with paper.

Paper Needed in
Tray 3

Fill Tray 3 (550-sheet 2nd 
Cassette).

Paper Jam - Clear the 
Paper Path

Open the input tray and 
remove any jammed paper. 
If necessary, open the Top 
Cover and clear any 
jammed paper. After 
clearing the jam, open and 
close the Top Cover to 
remove the error message.

Paper Size Error in 
Tray 1 

(may not appear 

on some models)

Feed the specified paper 
size into Tray 1 (Manual 
Feed Tray).

Displayed 
Image

Status 
Message

Corrective 
Action

Paper Size Error in 
Tray 2 

(may not appear 

on some models)


Refill Tray 2 (550-sheet 
Cassette) with the 
specified paper.

Paper Size Error in 
Tray 3 

(may not appear 

on some models)

Refill Tray 3 (550-sheet 
2nd Cassette) with the 
specified paper.

Page Too Complex

Simplify your document or 
lower the resolution of the 
document.

Cover Open
or No Toner Cartridge

Make sure the Top Cover 
is completely closed and 
that the Toner Cartridge is 
properly installed. 

Printing Error
(printer is shaded red)

Visually inspect the printer 
for anything unusual and/
or re-send the print job.

Hardware Error
(printer is shaded red)

There is a problem with 
the printer’s electronics. 
Have a qualified technician 
inspect the printer.

Displayed 
Image

Status 
Message

Corrective 
Action

Summary of Contents for XPRESS T9412i

Page 1: ...X P R E S S T 9 4 1 2 i X P R E S S T 9 4 1 2 n USER S GUIDE December 2000 084081...

Page 2: ...roduct may vary the suitability of specific product configurations and applications must be determined by the customer and is not warranted by Tally To allow for design and specification improvements...

Page 3: ...oftware Contents 19 Installing the Software 19 For Windows 95 98 Me NT 2000 19 Choosing a Printer Driver 21 For Windows 98 USB Connection 21 For Windows 2000 USB Connection 21 Using Add Printer 21 Sel...

Page 4: ...62 Accessing the Controller Board 65 Printer Memory Upgrade 66 PostScript Compatibility Upgrade 67 Replacing the Side Cover 68 Chapter 9 Troubleshooting 69 Overview 69 General Printing Problems 69 Err...

Page 5: ...3 Guidelines 93 Appendix B The Remote Control Panel 97 Information Tab 97 Paper Tab 97 Print Quality Tab 98 Configuration Tab 99 PCL Tab 100 Advanced Tab 100 Shifting the Printable Area 100 Appendix C...

Page 6: ...vi Xpress T9412i User s Guide...

Page 7: ...or T9412n s capabilities Xpress T9412i Highlights Prints up to 12 pages per minute PCL6 printer language standard Prints envelopes transparencies or label sheets automatically from the Multipurpose T...

Page 8: ...e of the following cables in order to connect your computer to this printer For a direct connection an IEEE 1284 compliant parallel cable For a USB connection a certified USB cable For an Ethernet con...

Page 9: ...intosh PCL driver Scale Printing This feature allows you to scale your print job to any supported paper size regardless of the digital document size This can be useful when you want to check the detai...

Page 10: ...Protection Agency s ENERGY STAR Computers program for printers The purpose of this program is to promote the manufacturing and marketing of energy efficient office automation equipment thereby potent...

Page 11: ...the Tally Xpress Solutions CD handy for future referencing The fuser area under the Top and Back Covers is very hot Let the printer cool before touching these areas WARNING This printer is intended t...

Page 12: ...th sides of the printer 3 Make sure all items are included in the box see the list on the next page 4 Remove any packing tape from the printer 5 Pull out the 550 sheet Tray from the printer and remove...

Page 13: ...84 compliant bidirectional parallel cable To connect your printer you need to provide the proper cable note Save the box and packing material in case you need to ship printer Power Cord Toner Cartridg...

Page 14: ...d various amounts of paper envelopes labels or transparencies Referred to as Tray 1 or Tray 1 Manual in the printer software Back View Interface Panel contains the Controller Board ports and any added...

Page 15: ...utputTray Back Cover Connector BACK INTERNAL VIEW BACK VIEW FRONT VIEW with the Optional 550 sheet 2nd Cassette 550 sheet Cassette FRONT VIEWT9412i n Model Important Printer Parts Power Switch Hand Gr...

Page 16: ...event damage from light keep the Toner Cartridge covered until you are ready to install it 3 Hold the cartridge horizontally and shake as shown about 10 times D 4 Rock the Toner Cartridge forward and...

Page 17: ...the green shiny material inside theToner Cartridge will flip up on the front of the Cartridge Guide exposing the green shiny material to the inside of the printer 8 Grasp the handle and gently guide t...

Page 18: ...out of the printer A 2 Push down the metal plate in the bottom of the tray until it clicks B 3 Fan the paper C 4 Load paper print side down D If tray needs adjusting to fit your paper stack see page 1...

Page 19: ...djusting the paper tray size are in the following section Changing Paper Sizes 8 The Paper Level Indicator will show how much paper is in the tray G E G F Paper Level Indicator Paper Limit Line Do not...

Page 20: ...til it lightly touches the media C 4 If necessary pinch and adjust the Back Corner Guide as shown D 5 When you first change paper sizes from Letter a mismatched paper error warning may show on the Ope...

Page 21: ...OFF and disconnected from the power 2 Plug the appropriate end of the parallel cable into the connector on the back of the printer Fasten the clips at the end of the connector into the notches on the...

Page 22: ...other end of the Power Cord into a properly grounded outlet C note Do not turn on your computer until you have successfully printed out a Configuration Sheet from the printer alone Follow the directio...

Page 23: ...o contains information about your printer s settings 1 With your computer turned OFF turn the printer power ON A All the Operator Panel lights will come on 2 When only the Ready light remains on press...

Page 24: ...18 Chapter 2 Getting Started...

Page 25: ...the Xpress T9412i Network Guide Tally Printer Manager Tally Network Printer Port Adobe Acrobat Reader 4 If you have the XpressT9412i model and want to use the PostScript printer driver you must order...

Page 26: ...e back to the main menu from the Reference screen select the back button and then the main button 7 Choose to install either from the CD or from the Web Select Install 8 Next you will be asked to choo...

Page 27: ...lder For Windows 98 USB Connection Windows 98 supports USB printing but you must load the driver from the Xpress T9412 Series Solutions CD when prompted by Windows Plug N Play The USB driver is locate...

Page 28: ...a PostScript SIMM Then use the appropriate cable to connect the NIC to your network Options for the Macintosh To receive print jobs from a Macintosh computer the printer must be upgraded so that it c...

Page 29: ...er window 8 The Tally Xpress printer name will appear in right pane 9 Close the Chooser window 10 A Tally Xpress printer icon will be placed on your desktop OVER USB WITH POSTSCRIPT 1 Follow the previ...

Page 30: ...m and printer model 4 The Start Up Screen and Tally License Agreement will appear Select Accept to continue 5 From the Installer dialog box choose Easy Network to install the Xpress printer driver the...

Page 31: ...explains single button functionality The table on the next page explains dual button functionality Error Manual Feed Ready Paper Cancel Go Continue Button Button Xpress T9412i T9412n Button Function C...

Page 32: ...the Factory Default Reset above press and hold the Go Continue and Cancel Job buttons simultaneously to reset the NIC network interface card to its default settings You must continue holding down the...

Page 33: ...tatus Legend Light off Light On Light blinking Processing Job Warming Up The Ready LED blinks fast when the printer is printing a page or is receiving data The Ready LED also blinks fast when the prin...

Page 34: ...he document is too complex and the printer does not have enough memory to print the job Cover Open NoToner Cartridge The Error LED is on steady Either the Top Cover is open or the Toner Cartridge is m...

Page 35: ...nes Desired result Choose paper that will be appropriate for the project you have in mind For example a matte ecru colored recycled paper works for natural subjects because it has a casual look and fe...

Page 36: ...lways print to the Face up Output Tray if it is open Media comes out of the printer face up with the last page on top Printing from Tray 1 Multipurpose Tray to the Face up Output Tray uses a straighte...

Page 37: ...ger paper B 3 The Back Cover now functions as the Face up Output tray C 4 The Face up Output tray will continue collecting printed media until you close the Back Cover D After that media will print to...

Page 38: ...mum size it supports is 8 5 inches by 14 inches Load only one size or type media in at a time You can load approximately 100 sheets of paper 10 envelopes 20 transparencies 10 cards or 20 labels sheets...

Page 39: ...f tray and adjust the Width Guide until it lightly touches the stack H Load paper print side up 6 After printing push the tray extender in I 7 Close the tray J I H Do not exceed the limit mark on the...

Page 40: ...inter driver C In Windows set up the paper source on the Paper tab of the printer Properties window On the Macintosh select your paper source from the General menu inside the Page Setup dialog box 4 S...

Page 41: ...up Output Tray in back of the printer B 3 Fan the envelope stack C 4 Load envelopes flap side down against the left tray edge D The stamp area is on the left side of the envelope and it enters Tray 1...

Page 42: ...g sheet 1 Avoid label sheets that have the backing sheet material exposed Do not use label sheets with some labels already removed A Do not over print label sheets B 2 Open and extend Tray 1 Multipurp...

Page 43: ...ave chosen Transparency in the printer driver rather than Auto Select Use letter or A4 size transparencies only Transparencies must be able to withstand temperatures of 392 F 200 C for at least 0 1 se...

Page 44: ...must both be dry Printing on Letterhead 1 Load letterhead stationary or other preprinted paper into Tray 1 printed side up A 2 Or load into Tray 2 or 3 printed side down B Adjust the Width Guide prop...

Page 45: ...can be set separately Follow these directions for offsetting printable area margins 1 First you must go to the RCP Remote Control Panel A 2 Then select the Advanced tab B note If you do not have the R...

Page 46: ...ot melt or vaporize when subjected to the printer s fusing temperature of 400 F for 0 1 seconds Inks used on preprinted media must be non flammable Paper and ink must both must be dry Follow these dir...

Page 47: ...sic document printing How to save toner Manual duplex printing N up printing Booklet printing First page printing Fit to page printing Poster printing How to use watermarks How to use page overlays 8...

Page 48: ...Name field A note If you do not see a Properties button click on the Setup Printer or Options button Then click Properties in the next screen 3 Click on the Properties button B 4 The Properties window...

Page 49: ...er note Change all print settings that are available in the software application first Then change any remaining settings in the printer driver accessed from the Printers folder WINDOWS PRINTER PROPER...

Page 50: ...the drop down menu under General You can also access these choices from the Print dialog box B 4 If you want to use the N up printing feature select Layout from the drop down menu Then select a numbe...

Page 51: ...nter Window 1 From the Windows Start button select Settings then Printers B 2 The Printer window opens Double click Xpress T9412 Series 3 From the Document menu select Cancel Printing C In Windows NT...

Page 52: ...binding orientation along the left edge of the paper as in a magazine B Choose Flip on Short Edge if you want the binding orientation along the top edge of the paper as in a calendar C 4 Select the Pr...

Page 53: ...last page will be on top of the stack Do not rearrange the pages The printer knows the stacking order and will print the corresponding side for each page 10 Click OK on the screen to start printing t...

Page 54: ...ages There will be a preview area on the tab to show the effect of the settings you select 1 Set up basic paper handling parameters such as paper orientation source and size from the Paper tab in the...

Page 55: ...the pages into the printer If specified the driver will print an instruction sheet to help you reinsert the pages correctly When you pick one of the booklet sizes in your Windows program the driver wi...

Page 56: ...aper in the input tray The printed pages will look similar to the drawing below D 9 Flip but do not rearrange the stack of printed pages Straighten the pages before loading them into the Multipurpose...

Page 57: ...s B 5 Setup other parameters of the job such as orientation and then click OK SCALE PRINTING This feature allows you to scale your print job to any selected paper size regardless of the digital docume...

Page 58: ...e Layout Options area 3 In the Poster Printing dialog box select your poster style and the desired overlap A 4 To determine the scaling factor B select 2X2 3X3 or 4X4 For example if you select 2X2 the...

Page 59: ...u The selected watermark will show in the preview window A 2 Click OK and print your document note To stop printing a watermark choose None in the drop down menu 3 To create new watermark text enter i...

Page 60: ...Select Print from the File menu Open the Properties window and click on the Overlays tab and click on Create Overlay 3 In the Create Overlay dialog box type a name of up to eight letters in the file...

Page 61: ...d is available for printing Select the overlay from the Overlay List box F 6 If necessary click the Query Page Overlay G If this box is checked a message box will appear each time you submit a documen...

Page 62: ...ly The default setting is 1200 dpi Fast Printing 3 In the Document Type area B you can further enhance your 1200 dpi printouts Select Photographic if your print job contains photo or bitmap images The...

Page 63: ...ed cleaners on the printer exterior They may damage the plastic case Do not expose the Toner Cartridge to direct sunlight or bright room light Do not spill any liquid inside the printer or in the powe...

Page 64: ...approximately 6 000 pages To order the high capacity Toner Cartridge contact your Tally printer dealer or call 800 338 3010 Follow these directions to replace the Toner Cartridge 1 Open the Top Cover...

Page 65: ...ently wipe the internal toner cartridge area Reach underneath and wipe off the Laser Lens as well especially if vertical streaks have been appearing on your printouts C 4 Re insert the Toner Cartridge...

Page 66: ...Unplug the Power Cord and any connecting cables from the printer B 3 If applicable remove the printer from the 550 sheet 2nd Cassette and place it on a sturdy surface or cart C Refer to page 62 and r...

Page 67: ...T9412i Network Guide For information about ordering Xpress printer options see page 88 PRECAUTIONS Disconnecting the Power Cord To avoid the possibility of electrical shock disconnect all cables when...

Page 68: ...work Remove the 550 sheet 2nd Cassette from its packaging and remove Tray 3 from the Feeder Unit B 3 Put the 550 sheet 2nd Cassette next to the printer and observe the location of the Feeder Unit s co...

Page 69: ...ected F note Macintosh user s see page 44 7 Push down the metal plate in the bottom of Tray 3 G 8 If loading paper make sure the Tension Lever on the left front of the cassette tray is released into t...

Page 70: ...ray 12 Load paper or envelopes into Tray 3 Do not exceed the paper limit mark on the inside of the tray M 13 Move Side Guide 2 to fit against the paper stack N 14 Reinsert the tray into the 550 sheet...

Page 71: ...grade To access the Controller Board 1 Turn off the printer and unplug all cables from the printer 2 Remove the two screws from the Side Cover as shown A 3 Slide the cover slightly 3 4 inch towards th...

Page 72: ...Board Cover and access the printer controller board as described on Page 65 2 Position the printer so you have access to the controller board 3 Figure A shows the Controller Board and the location of...

Page 73: ...oard 3 Figure A shows the Controller Board and the location of the expansion slot used for printer memory 4 Align the SIMM over the lower slot so that the notch is at the bottom and insert at a 45 deg...

Page 74: ...e bottom groove approximately 3 4 inch from the left side and slide into position Be sure the top part of the cover is secured by the tab A 2 Fasten the two screws on the back of the cover B 3 Plug in...

Page 75: ...inking Add paper to the Multipurpose Tray Wait for the Manual Feed LED to light before feeding each subsequent sheet The connection cable between the computer and the printer is not connected properly...

Page 76: ...ayout and remove any unnecessary graphics from the document if possible Install more memory See Page 66 The page orientation setting may be incorrect Change the page orientation in your application Th...

Page 77: ...artridge Remove the Toner Cartridge and pull out the sealing tape Reinstall the Toner Cartridge and check the printer by printing a Configuration Sheet The file may have specified blank pages Check th...

Page 78: ...mplex and the printer does not have enough memory to print the job Try to free some printer memory by removing any unnecessary fonts macros or any data currently in printer memory Add more printer mem...

Page 79: ...ntains photos select Photographic in the Document Type area of the Print Quality tab Use only high quality paper or transparencies Solving Print Quality Problems Problem Solution Solid White If the wh...

Page 80: ...out the contamination Problem Solution Smeared Image If the page is easily smeared Clean the inside of the printer Check the paper type and quality The toner may be unevenly distributed inside the To...

Page 81: ...in the tray Problem Solution Damaged Print If the page is torn Check the paper type and quality Make sure you are using only new undamaged paper Check for contamination along the paper path Make sure...

Page 82: ...oblem Solution Page Skew If the page prints at an unplanned angle Check the paper type and quality Make sure that the paper or other media is loaded correctly and the guides are not too tight or too l...

Page 83: ...he Multipurpose Tray Tray 1 Do not load wrinkled creased damp or highly curled paper Do not mix paper types in any of the paper tray Use only recommended print media See Appendix A Printer Specificati...

Page 84: ...of the printer Paper jams occur in the following three areas 1 The Input Area 2 The Engine Area 3 The Output Area note Frequent jams occurring in a specific area indicate that the area should be chec...

Page 85: ...at the rest of the paper is stacked neatly in the tray and slide the tray back into the printer C 4 Open the Top Cover and then close it again to resume printing D 5 If the Paper and the Error lights...

Page 86: ...small piece of paper gets lodged on the side turn the printer off and then on The rollers will turn slightly and this should release the paper 5 Reinstall the Toner Cartridge E note If theToner Cartri...

Page 87: ...le on the right end of the exit roller and then pull the roller in the direction of the arrow D 5 Remove the jammed paper E 6 Replace the exit roller F Make sure the right end of the roller clicks in...

Page 88: ...A 2 If you see the jammed paper gently remove it from the tray B 3 Slide Tray 2 partly back into the printer and pull Tray 3 out of the printer C 4 If you see the jammed paper in Tray 3 gently pull t...

Page 89: ...Delete all temp files from the Temp sub directory You can determine the name of the directory by editing the AUTOEXEC BAT file and looking for the statement Set Temp The name after this statement is...

Page 90: ...EPS file to the printer before printing Manually Selecting the PPD Problem Solution The PPD does not appear in the Chooser note If you manually select a PPD an icon might not appear next to the selec...

Page 91: ...stScript driver click on PostScript and click on Advanced button The pure binary data option is not supported Choose another The job prints in Courier instead of the typeface you used The typeface is...

Page 92: ...86 Chapter 9 Troubleshooting...

Page 93: ...your questions Monday through Friday 7 00 A M to 4 30 P M Pacific Standard Time Please have the following printer information ready when you contact Tally Model number Serial number found under the pr...

Page 94: ...order printing supplies contact your Xpress T9412 Series dealer You can also call 800 338 3010 to locate the Tally supplies dealer nearest you or purchase supplies directly from Tally The tables belo...

Page 95: ...hereinafter TALLY warrants this Product to be free from defects in material and workmanship and agrees to repair or replace any part of the enclosed unit which proves defective under these terms and...

Page 96: ...n contact Customer Service and Technical Support by dialing 866 359 2899 Warranty Limitations TALLY s sole liability for any defective product is limited to the repair or replacement of the product at...

Page 97: ...models T9412n Model PostScript Level 3 standard T9412i Model PostScript Level 3 optional Automatic Jam Recovery Automatically reprints jammed pages when enabled Interface Ports IEEE 1284 compliant par...

Page 98: ...0 pages at 5 coverage letter size Printable Area Paper Inside a 4 mm border around the edge of the paper Envelope Inside a 10 mm border around the edge of the envelope Noise Level Operating 48 dBA or...

Page 99: ...ter 5 and Chapter 8 for instructions Designate Card Stock in the printer driver when printing envelopes made from paper heavier than 24 lb Adhesive Labels Only use adhesive labels that are recommended...

Page 100: ...s of the paper Not all paper sizes listed are supported by all printer languages Table A 1 Multipurpose Tray Tray 1 Paper Type Size U S Letter 8 1 2 x 11 215 9 mm x 279 4 mm Executive 7 25 x 10 5 184...

Page 101: ...176 mm x 250 mm JIS B5 7 17 x 10 12 182 mm x 257 mm Table A 3 Optional 550 sheet 2nd Cassette Tray 3 Paper Type Size U S Letter 8 1 2 x 11 215 9 mm x 279 4 mm U S Legal 8 5 x 14 215 9 mm x 355 6 mm E...

Page 102: ...epends upon the thickness of the paper Table A 4 Envelopes to Use in the Multipurpose Tray Tray 1 and 550 sheet 2nd Cassette Tray 3 Only Envelope Weight Size COM 10 20 28 lb 4 1 8 x 9 1 2 104 8 mm x 2...

Page 103: ...List The user can print the PS Font List to see the available PostScript fonts The PS Font List button is grayed out if the PS SIMM is not installed in the printer Item Description Paper Size The Pape...

Page 104: ...the number of copies to be printed The maximum number of copies that can be printed is 999 The default number of copies is 1 Restore Defaults The Restore Defaults button replaces all selections in the...

Page 105: ...to continue printing after a paper mismatch or interface timeout error occurs The Auto Continue values available are On and Off The default value is On Jam Recovery The Jam Recovery parameter enables...

Page 106: ...nt is a monospaced fixed PCL font There is no selection possibility for bitmap fonts The values for Font Height range from 4 00 to 99 75 in units of 0 25 The default value is 12 00 Lines per Form The...

Page 107: ...s user s guide may result in hazardous radiation exposure Ozone Emission The corona assemblies found in laser printers and photocopiers generate ozone gas O3 as a by product of the electrophotographic...

Page 108: ...Consult the dealer or an experienced radio or TV technician for help Use a shielded and properly grounded I O cable to ensure compliance of this unit to the specified limits of the rules If your prin...

Page 109: ...icon does not reflect status B The Status Monitor first comes up in minimized view To maximize the view left click on the Status Monitor icon found on the Windows task bar For options right click on t...

Page 110: ...e Status Message Corrective Action Paper Size Error in Tray 2 may not appear on some models Refill Tray 2 550 sheet Cassette with the specified paper Paper Size Error in Tray 3 may not appear on some...

Page 111: ...ower There is miscommunication between the computer and the printer Possible causes Printer is not powered on Incorrect cabling Printer s parallel cable does not support bi directional communication D...

Page 112: ...106 Appendix D The Status Monitor...

Page 113: ...o continue button 17 25 34 graphic properties 56 H hardware requirements 2 heavy paper 40 93 humidity 91 I IEEE 1284 bidirectional parallel cable 15 installer 19 installing software for Macintosh 22 s...

Page 114: ...s 28 location 5 moving 60 operating specifications 91 paper limit 13 repair 89 safety 5 settings 17 software 42 software features 3 status 3 system requirements 2 unpacking 6 printer dimensions 91 pri...

Page 115: ...Windows 2000 21 Windows 98 21 USB port monitor 16 V video clips 19 W warranty 89 watermark 3 44 53 weight 6 91 Windows basic document printing 42 printer properties 43 system requirements 2 Windows 2...

Reviews: