NAS-Z200DiR/Z200iR.GB.4-151-738-
12
(1)
GB
4
Select [Record to USB].
A confirmation message appears and the USB
device stands by for recording.
Note
It may take a while for the USB device to be ready
for recording. Therefore, it is recommended that
you allow enough time not to miss any recording
opportunity, especially when recording from the
tuner.
5
Select [OK].
When recording from an external component
(Audio In), start playback the source before
selecting [OK].
Recording starts.
To stop recording
Press
.
To add track marks
You can add track marks during recording. Press
OPTIONS to enter the Options menu and select
[Record to USB] at the point you want to add a
track mark.
The unit pauses recording for a few seconds and
adds a track mark, showing a message “Creating
MP3 file. Recording is stopped.” No sound is
recorded during pause time.
Notes
The unit automatically adds track marks at 60-minute
intervals.
After adding a track mark, at least 4 seconds must pass
before the next track mark can be added.
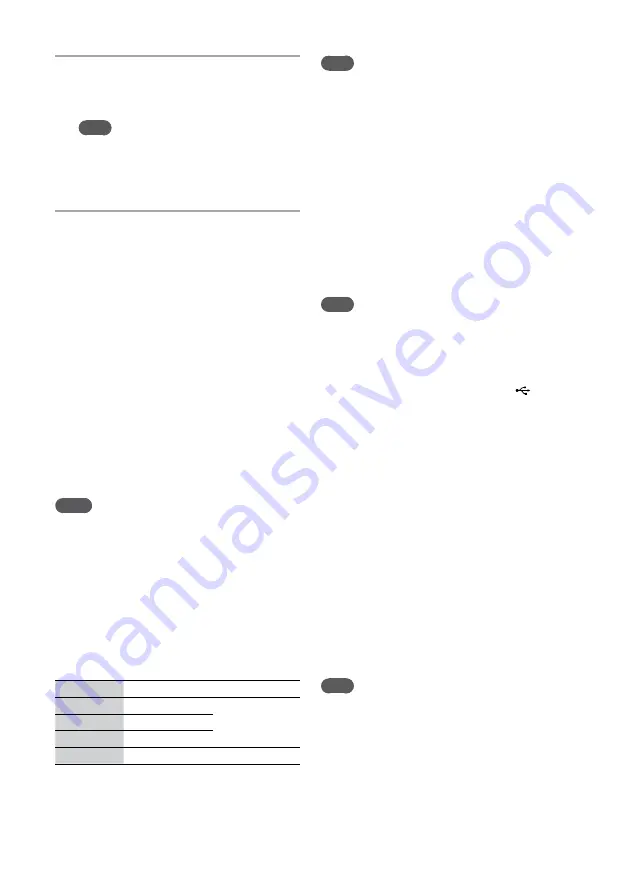
Folder and file generation rules
When first recording analog audio to a USB
device, a “MUSIC” folder is created directly below
the “ROOT” folder.
Folders and files are generated within this
“MUSIC” folder as follows.
Source
Folder name
File name
FM
“TUFM0001”*
1
“TRACK001”*
1
AM
“TUAM0001”*
1
DAB
“TUDB0001”*
1
Audio In
“EXAU0001”*
1
“TRACK001”*
1
*
1
Folder and file numbers are assigned serially thereafter.
Note
Recording stops automatically when:
you change the function.
you change the band.
you insert a disc in the disc slot.
you turn off the system.
the USB device runs out of space during recording.
the number of files or folders on the USB device
reaches the limit for the number that the unit can
recognize.
To erase audio files or folders on the
USB device
You can erase audio files or folders from the USB
device. Note that you cannot erase files or folders
when shuffle play has been set.
Note
Do not insert a disc during erase operation. If you do so,
the unit will automatically change to the CD function, and
audio files or folders are deleted up to the point when the
erase is stopped.
1
Connect the USB device to the (USB)
connector.
2
Select the USB function from the Home
menu.
3
While playback is stopped, press
/
/
/
to select the folder or file
that you want to erase.
4
Press OPTIONS to enter the Options
menu.
5
Select [Erase].
A confirmation message appears.
6
Select [OK].
The selected file or folder is erased.
To cancel the procedure
Select [Cancel] in step 6, or press HOME.
Note
Erase operation can be performed only when the playback
is stopped.


