


C H A P T E R 3
Using your interactive projector
31
smarttech.com/kb/170295
l
N O T E
The center of the image is offset 1.75" to the left from the center of the mounting bracket with a
tolerance of ± 2". See the
LightRaise 60wi interactive projector installation template
) for more information.
l
When you move the projector forward or backward on the boom to make the image larger or
smaller, you might need to tilt or turn the projector slightly to keep the image square. Loosen the
ball joint lever slightly to aid in this adjustment.
l
To fine-tune the image, you might need to repeat all steps described in the installation document
in smaller increments.
Using your interactive pen
The interactive projector includes two interactive pens that can be used to draw or write in digital ink
at the same time. You can also use one interactive pen while you’re using your finger to touch the
surface and interact with your computer. Each pen has a charging port and a status light to help you
understand its status.
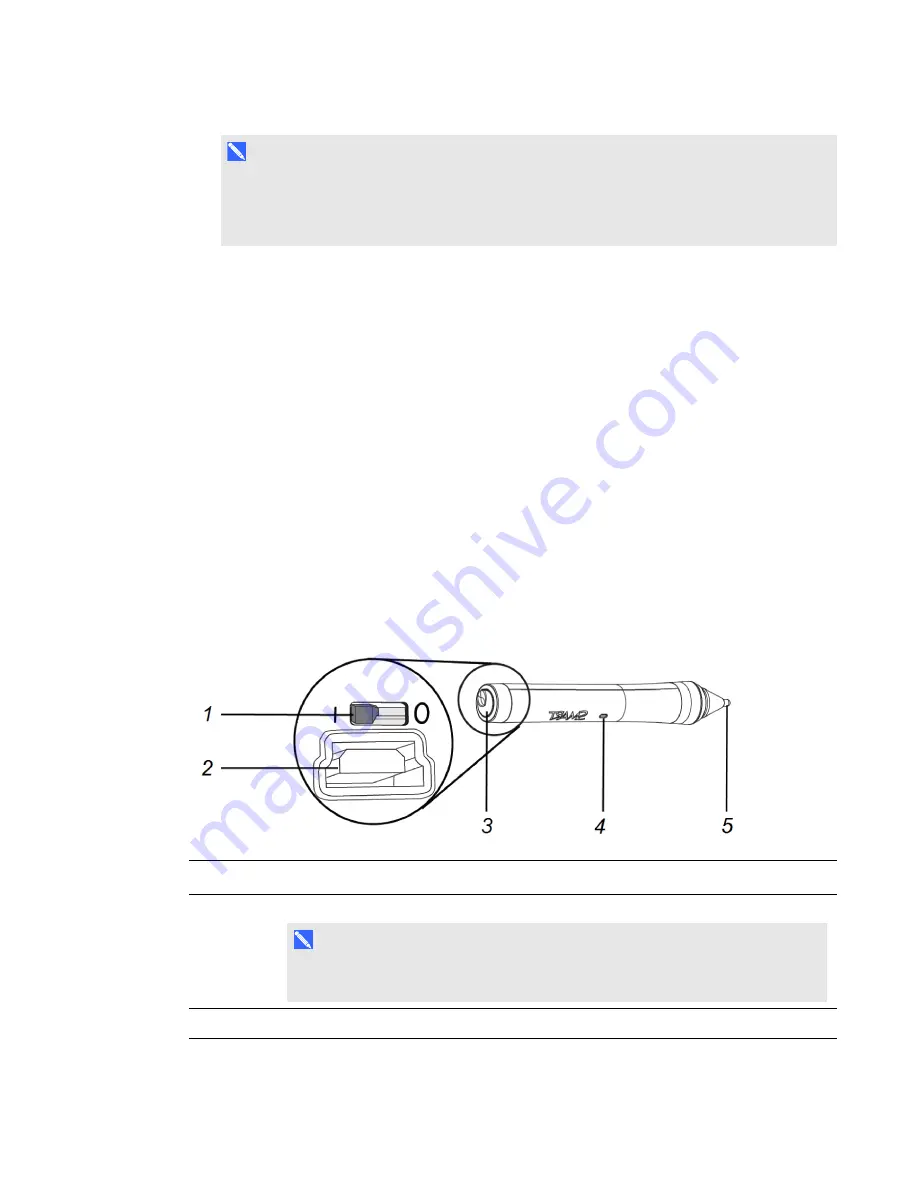
Interactive pen components
The following diagram and table describe the components of the interactive pens.
Component
Description
1
On/Off switch
N O T E
You can leave the switch
On
all the time, including when charging. The pen
automatically turns off when not in use to prolong battery life.
2
USB receptacle for charging
Summary of Contents for LightRaise 60wi
Page 7: ...C O N T E N T S v smarttech com kb 170295 More information 95 Index 97 ...
Page 8: ......
Page 14: ......
Page 42: ......
Page 48: ......
Page 62: ......
Page 80: ......
Page 102: ......
Page 104: ......
Page 107: ......
Page 108: ...SMART Technologies smarttech com support smarttech com contactsupport smarttech com kb 170295 ...


