2-11
CHAPTER
2
MAKING COPIES
Reduction/Enlargement/Zoom
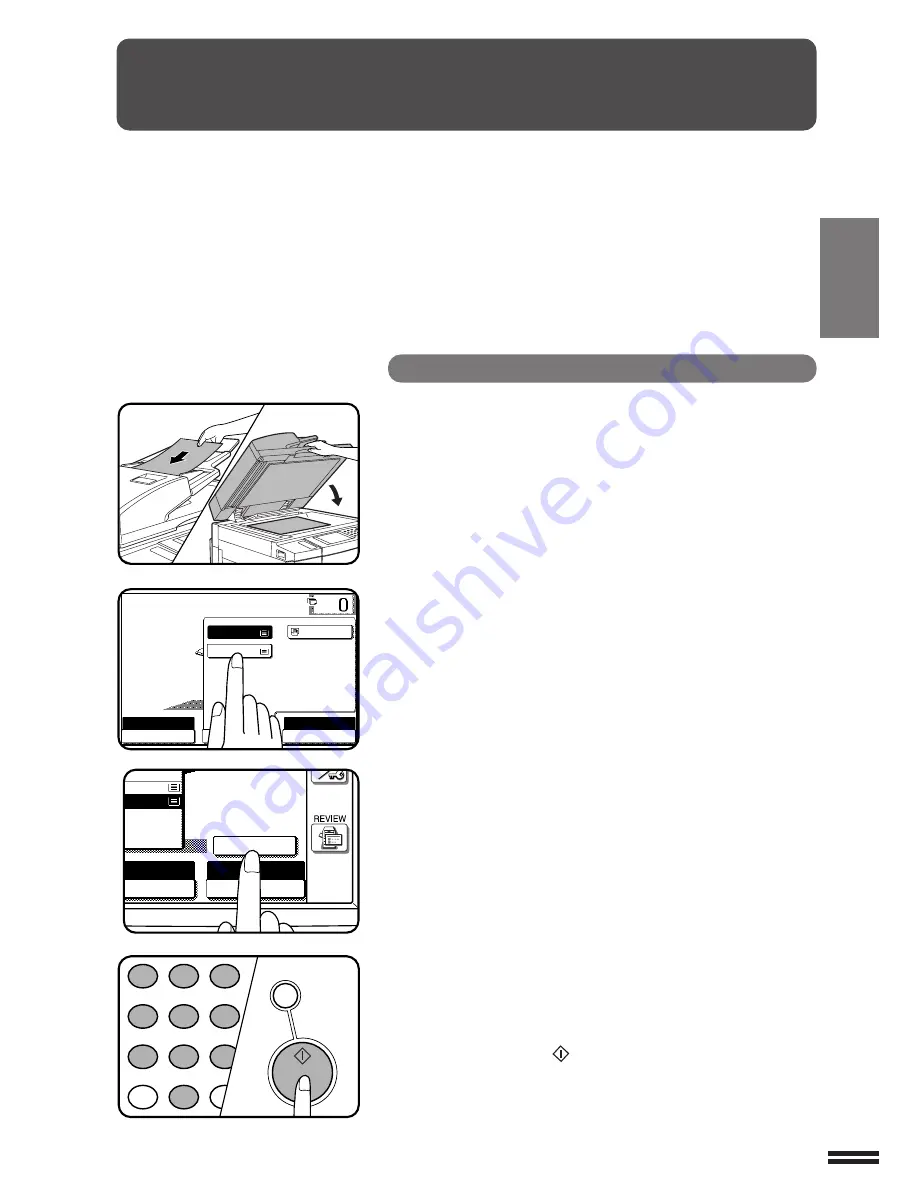
Automatic selection
1
Place the original in the document feeder tray or on the
document glass.
●
The original size will be detected and indicated on the touch
panel.
2
Press the “PAPER SELECT” key on the touch panel and
select the paper tray with the desired paper size.
3
Press the “AUTO IMAGE” key on the touch panel.
●
The best reduction or enlargement ratio for the selected paper
size will be automatically set and displayed on the touch panel.
●
If the originals and the selected copy paper are not facing the
same direction, the image will be automatically rotated to match
the copy paper. If enlargement copying onto a paper size larger
than A4 (8-1/2" x 11") is performed and in case of 100% copying
onto a paper size larger than B4 (8-1/2" x 14"), however, the
image will not be rotated.
NOTE:
This feature will not work when original or copy paper is of non-
standard size.
4
Enter the desired number of copies.
5
Press the START (
) key.
●
To cancel the automatic reduction/enlargement mode, press the
“AUTO IMAGE” key again.
REDUCTION/ENLARGEMENT/ZOOM
READY TO COPY.
AUTO
EXPOSURE
PAPER SELECT
100%
COPY RATIO
AUTO 8/ 11
1
2
1.
2.
A4
A3
AUTO IMAGE
PER SELECT
100%
COPY RATIO
.
.
A4
A3
AUTO A3
1
2
3
4
5
6
7
8
9
0
P
PROGRAM
AUDIT CLEAR
INT
CA
CLEAR ALL
START
Reduction and enlargement ratios can be selected either
automatically with the “AUTO IMAGE” key or manually with the
reduction, enlargement or “ZOOM” keys on the touch panel. The
zoom function enables precise copy ratio selection from 25% to
400% in 1% increments.
★
KEY OPERATOR
A total of four extra preset copy ratios, two each
for reduction and enlargement, can be added. See page 8-17.


